Do it yourself Mobula7 brushless whoop
Happymodel Mobula7 is one of the most popular brushless power whoops at the moment of writing this article. Almost all pilots, that have tried this whoop have given the positive feedback. This made me want to try one. As always, I like to build the quads by myself rather than buy pre-build ones. This time I’ve purchased the separate parts also to build my custom Mobula7.
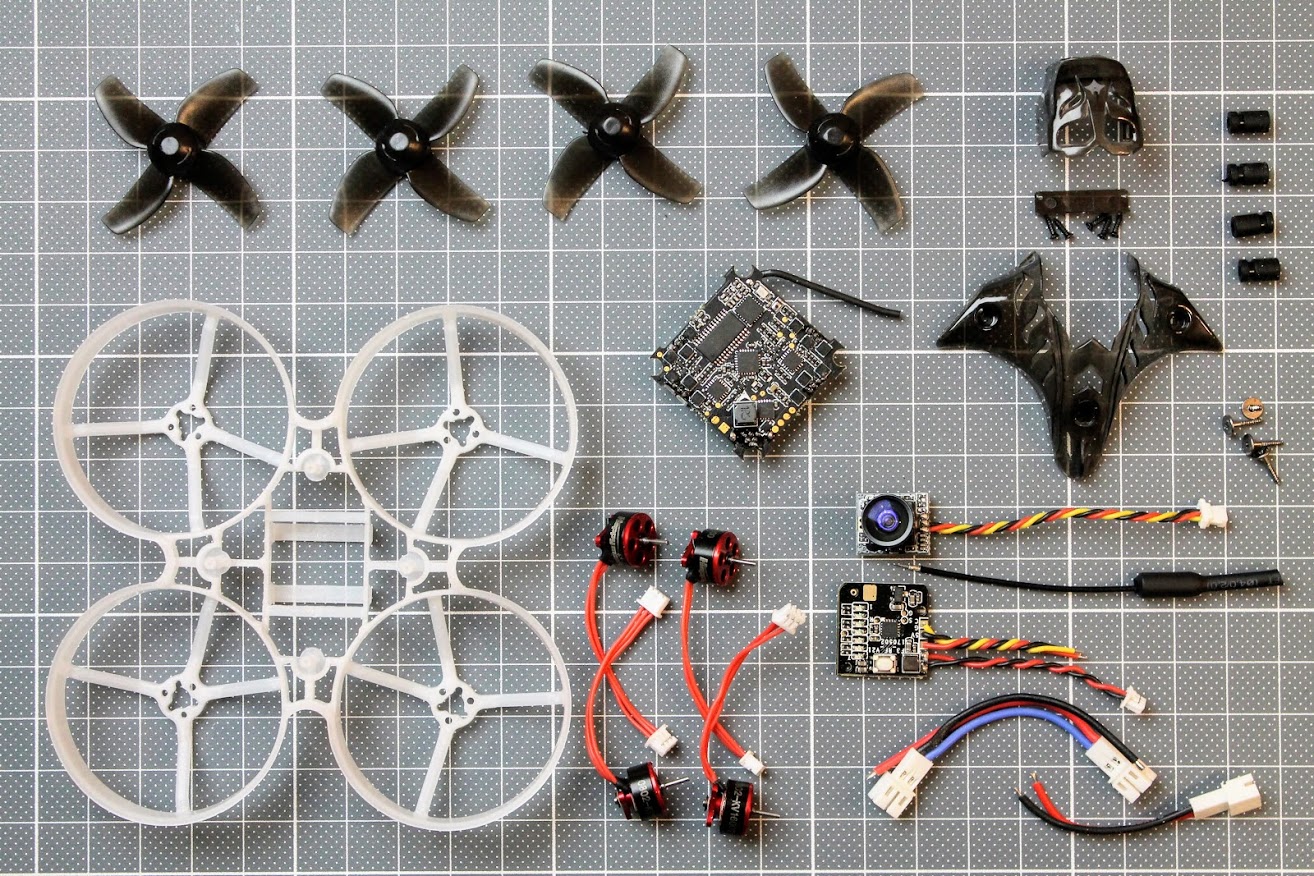
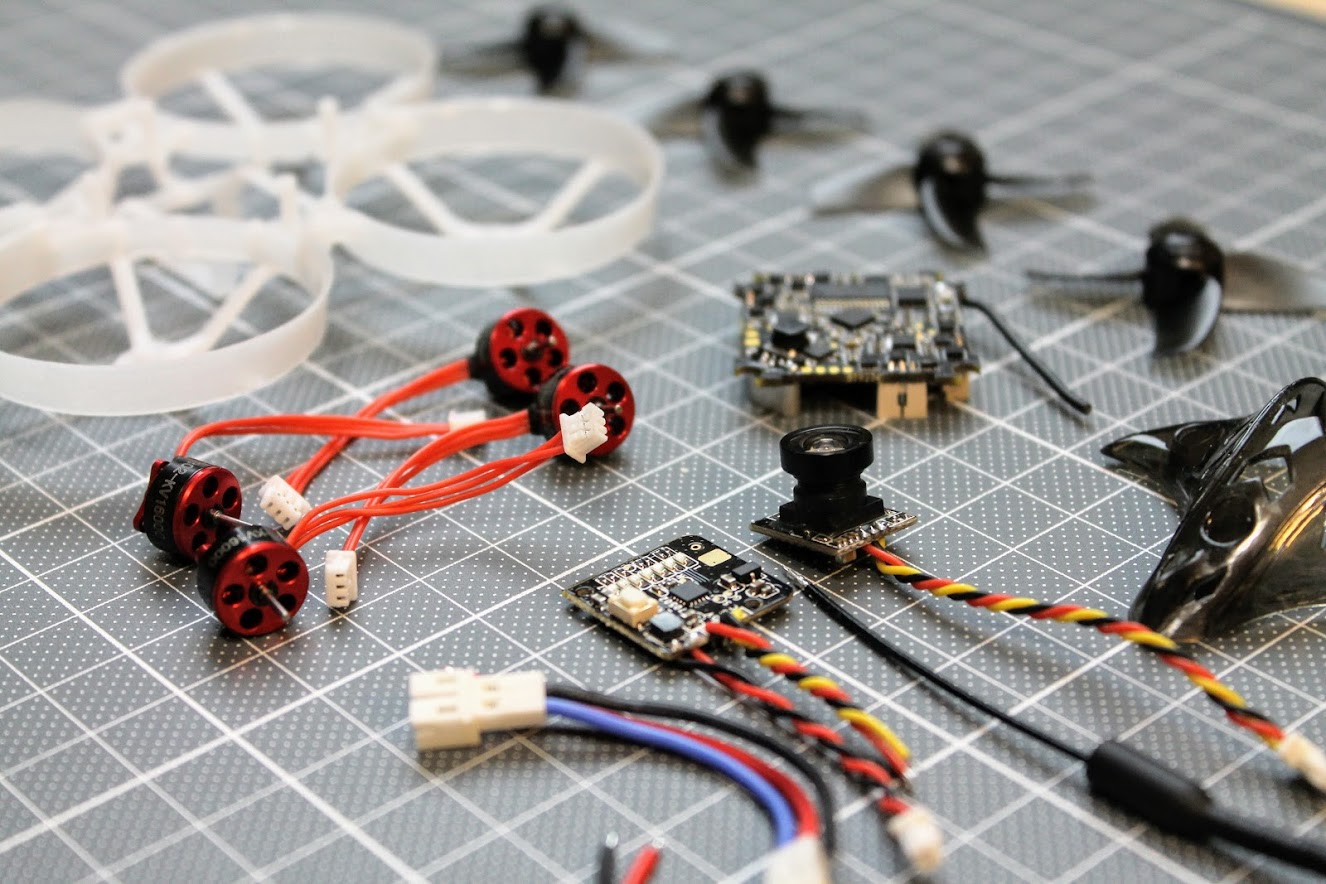
Here are all the parts, that were gathered for the build.
Parts List
This is the list of the components I will be using this build:
Banggood
Happymodel CrazyBee F3 Pro (with FrSky/Flysky/DSM RX) – $39.00
Happymodel SE0802 1-2S 16000KV 19000KV Brushless Motor – x $8.71
Happymodel Mobula7 Frame V1 – $2.99, Frame V2 – $3.59, Frame V3 – $4.59
Happymodel Canopy – $3.66
Happymodel Propellers – $2.55
Turbowing TWC25 1/4 CMOS 700TVL Camera – $11.21
Turbowing VTX 25mW – $10.36
Total cost: $101.62
Bind-N-Fly Mobula7 price is $89, so DIY version of the Mobula7 will be no cheaper, also taken into consideration that with the BNF version you’ll also get 4 batteries and the charger. If you already have a charger and some spare 1S batteries then you can look at this DIY Mobula7 kit from XT-Xinte. It is only $72 for FrSky receiver version. Other possible DIY build kits are listed on XT-XINTE.
I had the Mobula7 frame was purchased some time before this build and it is V1 frame. I have decided to build with this frame and replace it with the V2 frame once it will break to the point it could not be fixed.
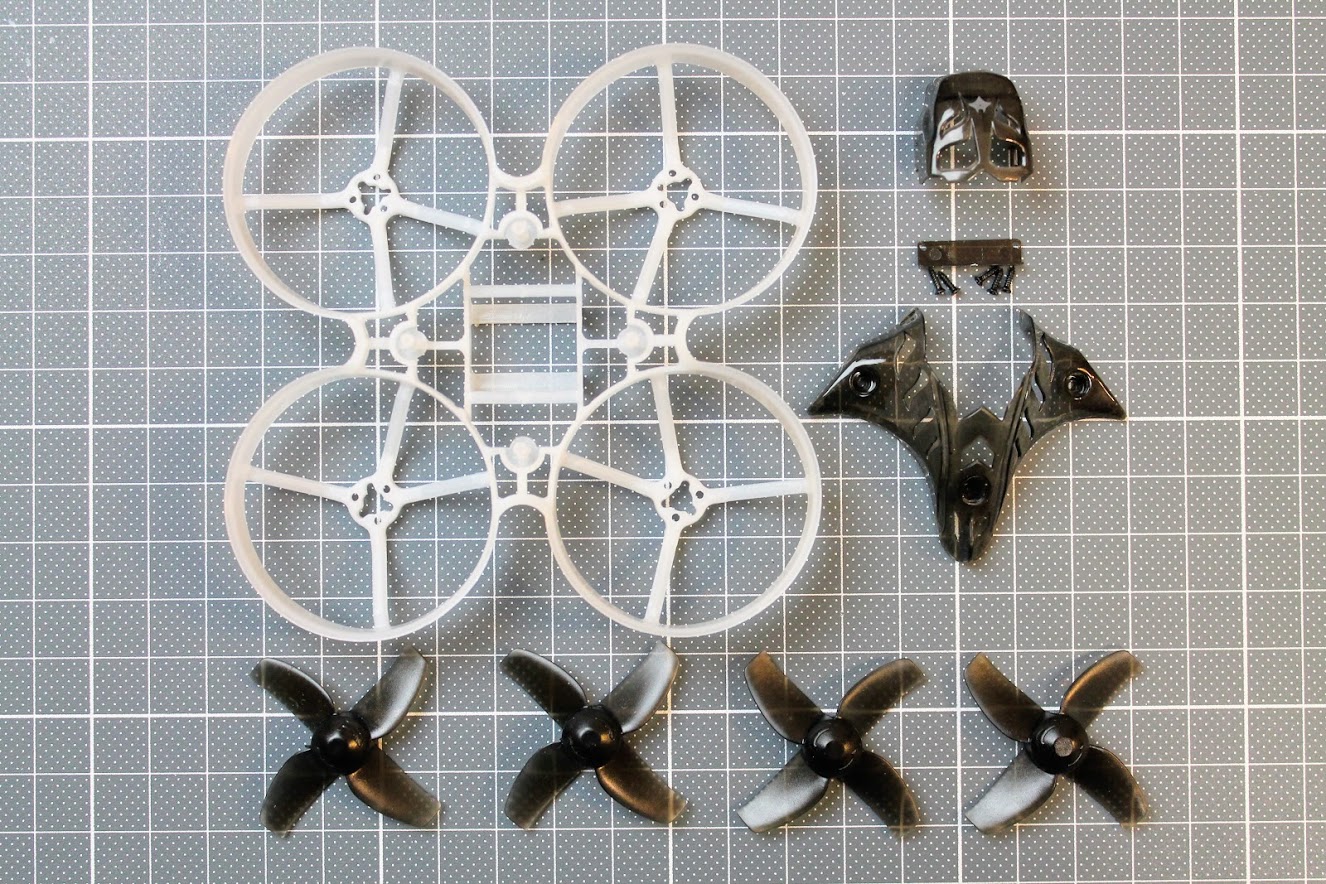
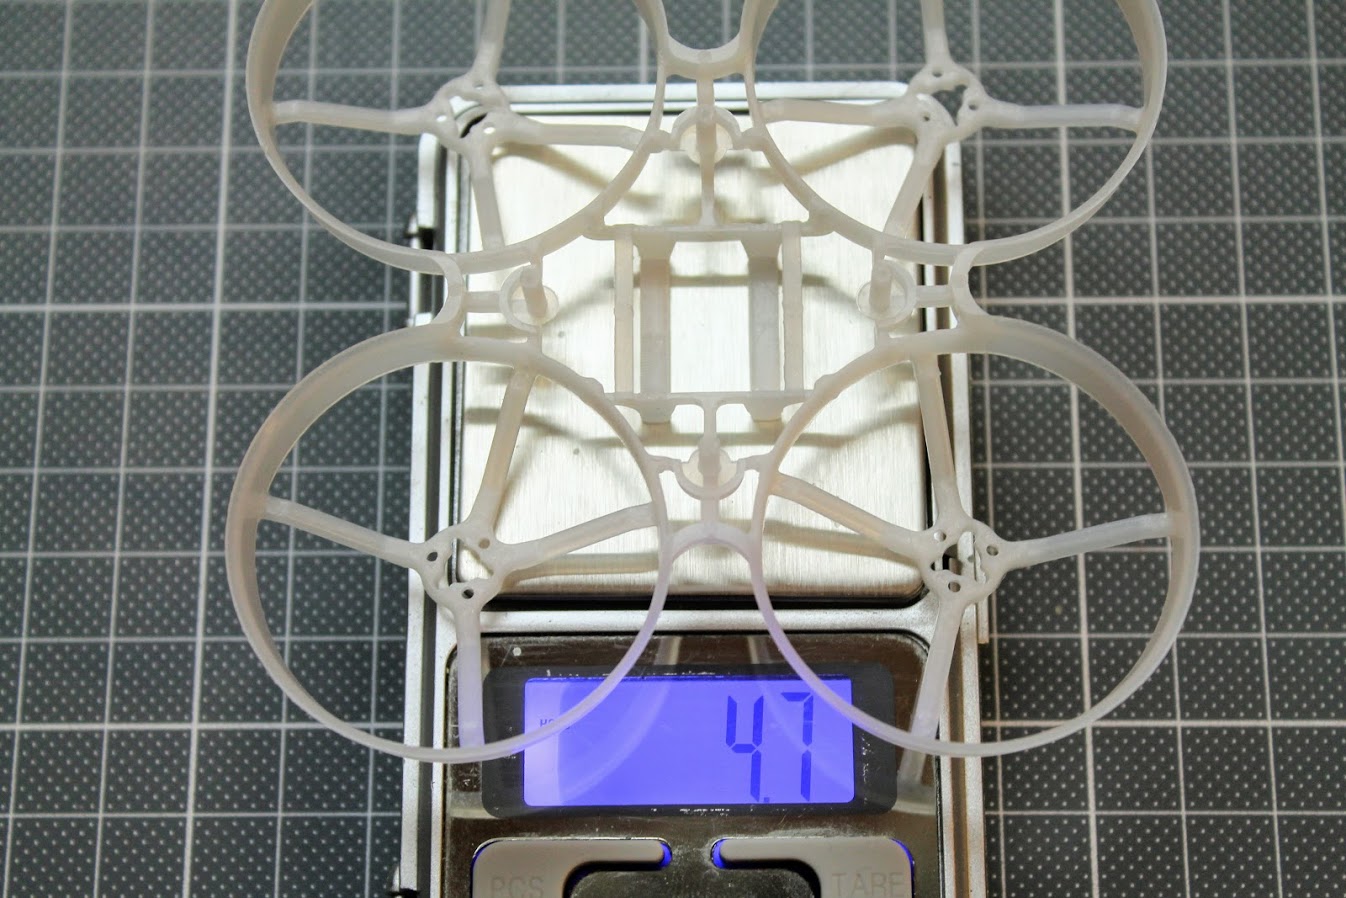
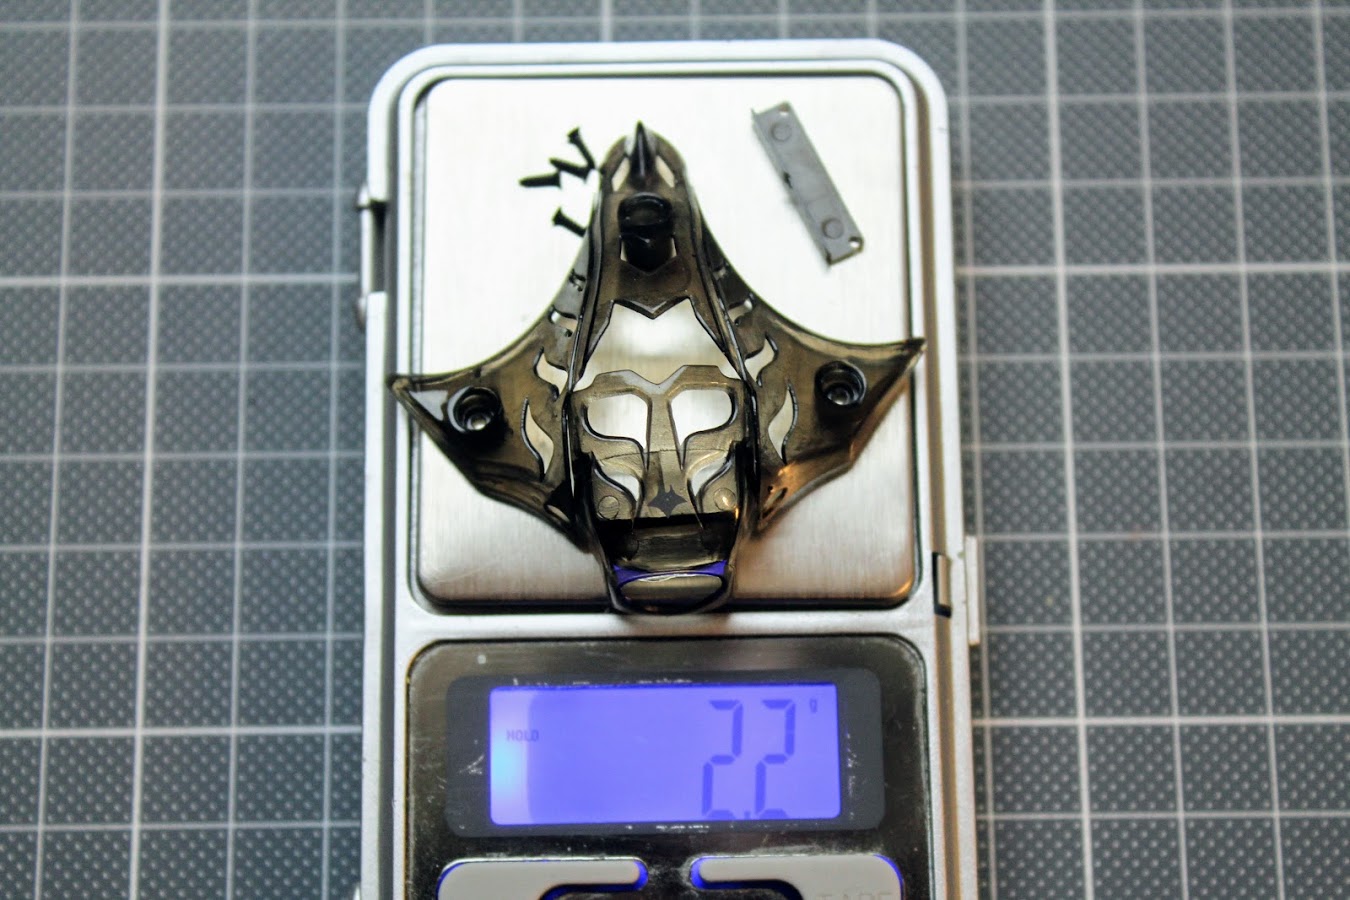
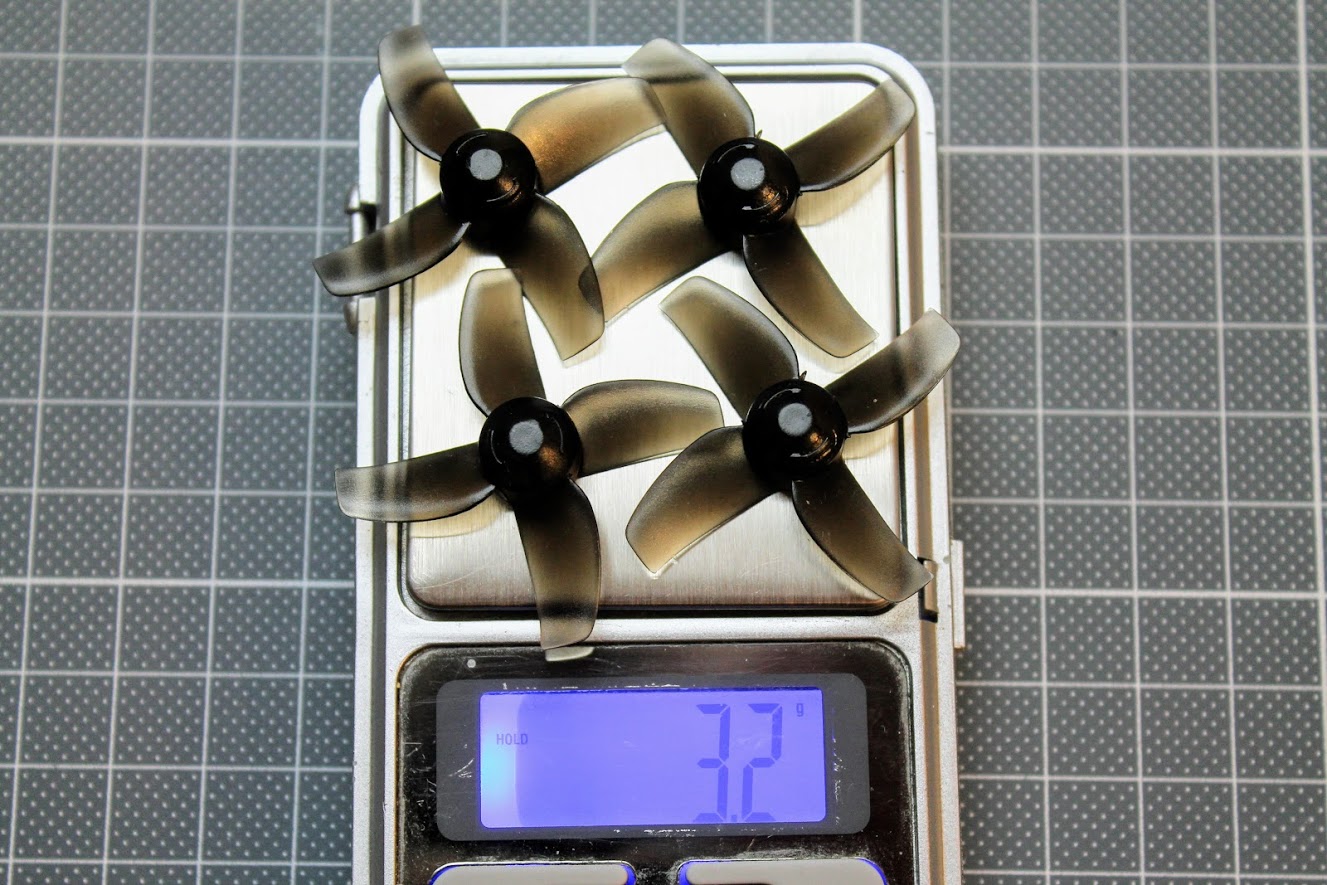
The weight of the frame is 4.7 grams, canopy – 2.2 grams, 40mm propellers – 3.2 grams.
For the filght controller I have purchased Happymodel CarzyBee F3 AIO FC
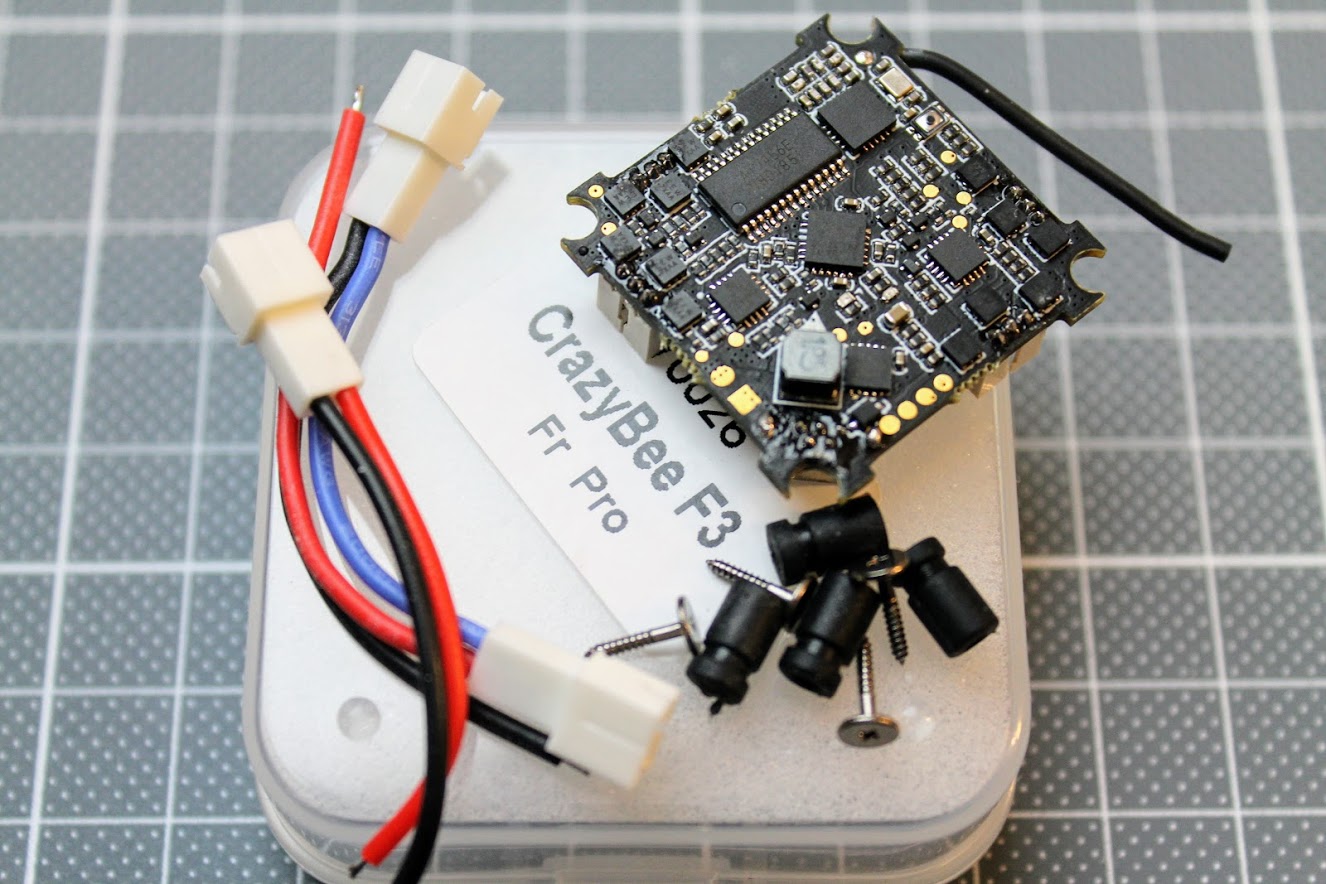
The weight of the Flight Controller, pigtail, rubber grommets and screws is 5.4 grams.

CrazyBee F3 flight controller package includes two battery pigtails. Double connector pigtail is for connecting two 1S batteries as 2S battery, and single connector is for 1S battery. If you will use double connector pigtail you’ll still be able to fly with 1S battery by shoritng on of the connectors with jumper plug.

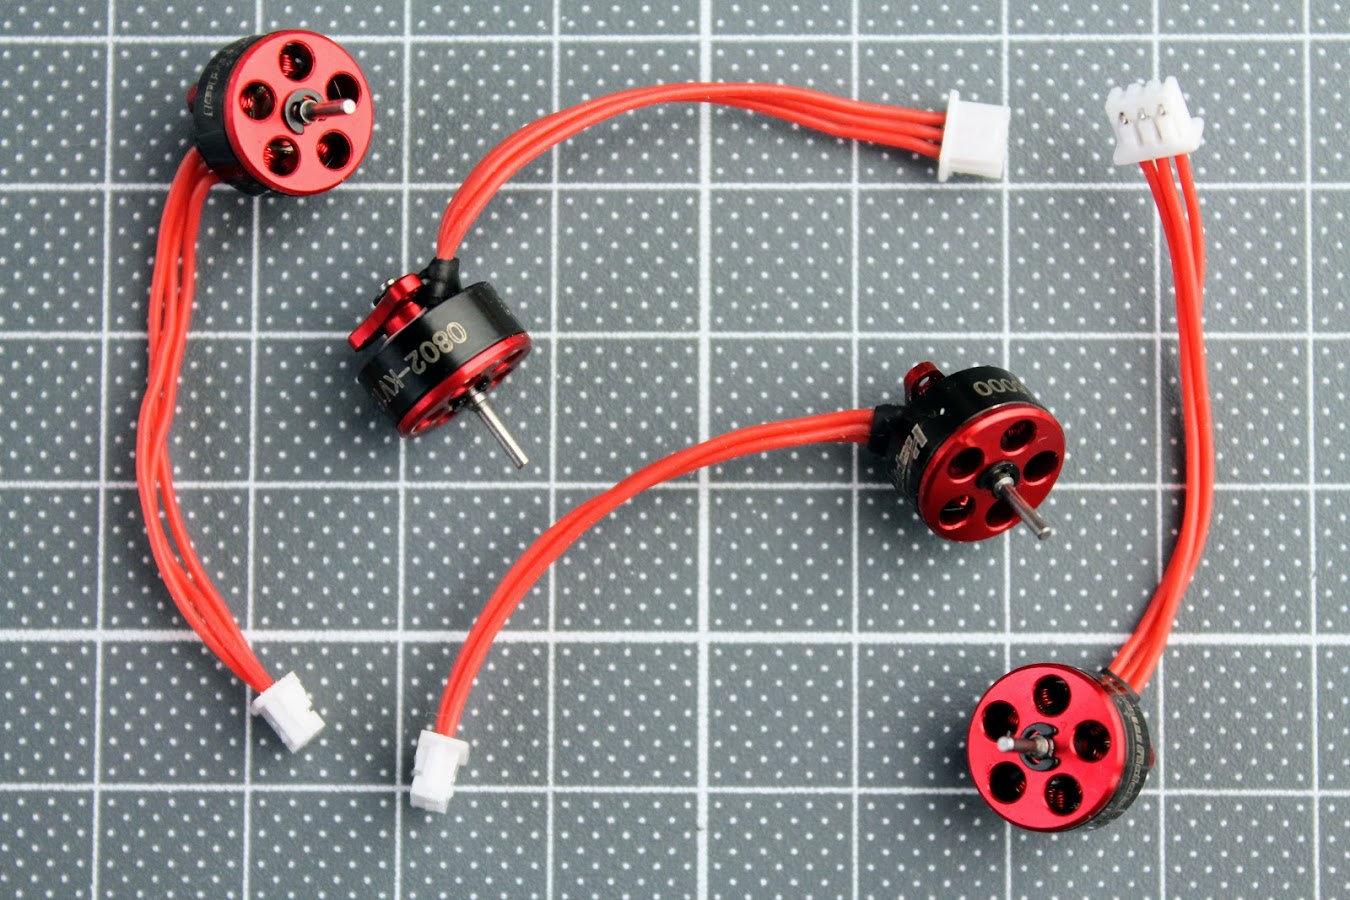
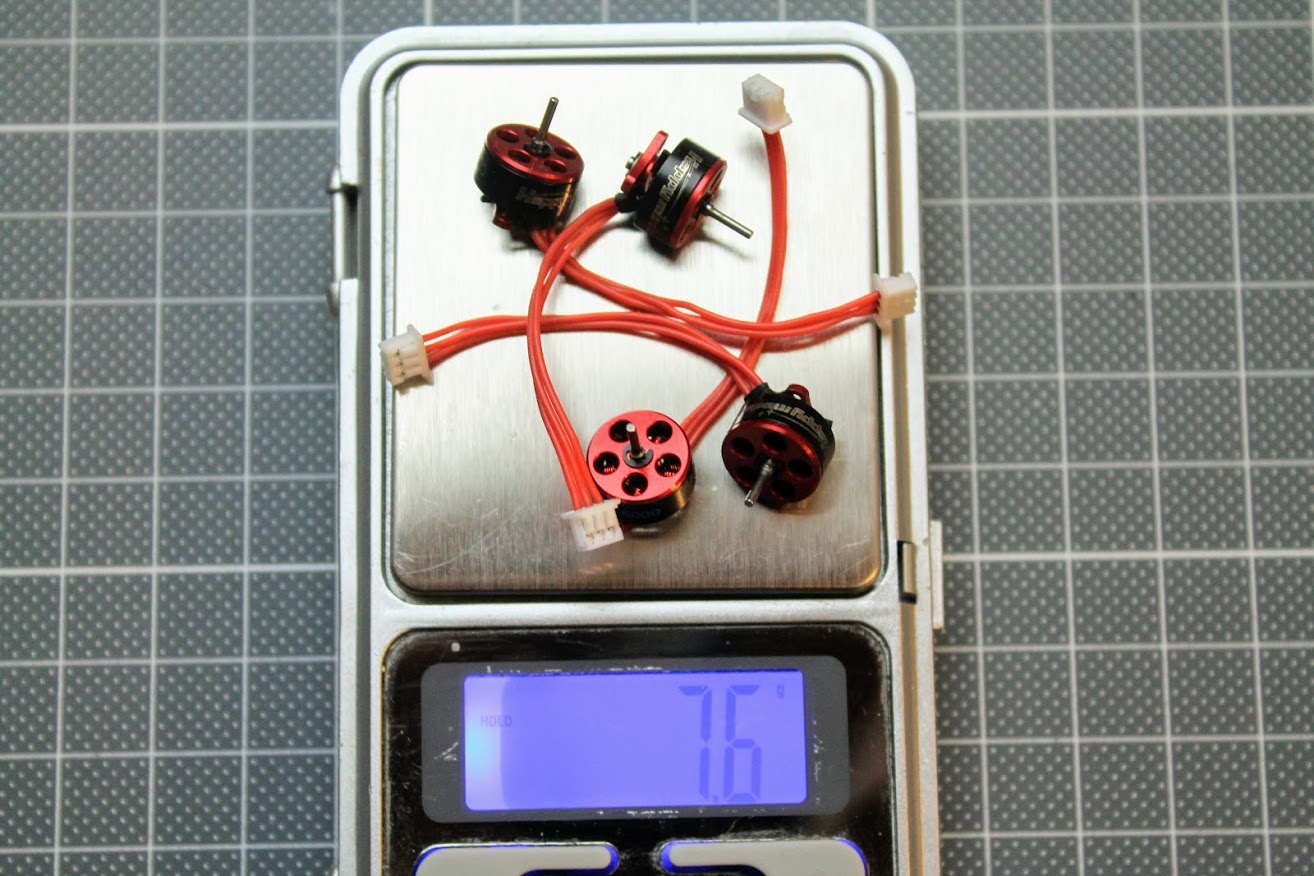
Motors are Happymodel 0802 16000KV brushless motors.
The weight of the motors is 7.6 grams (1.9g one motor)
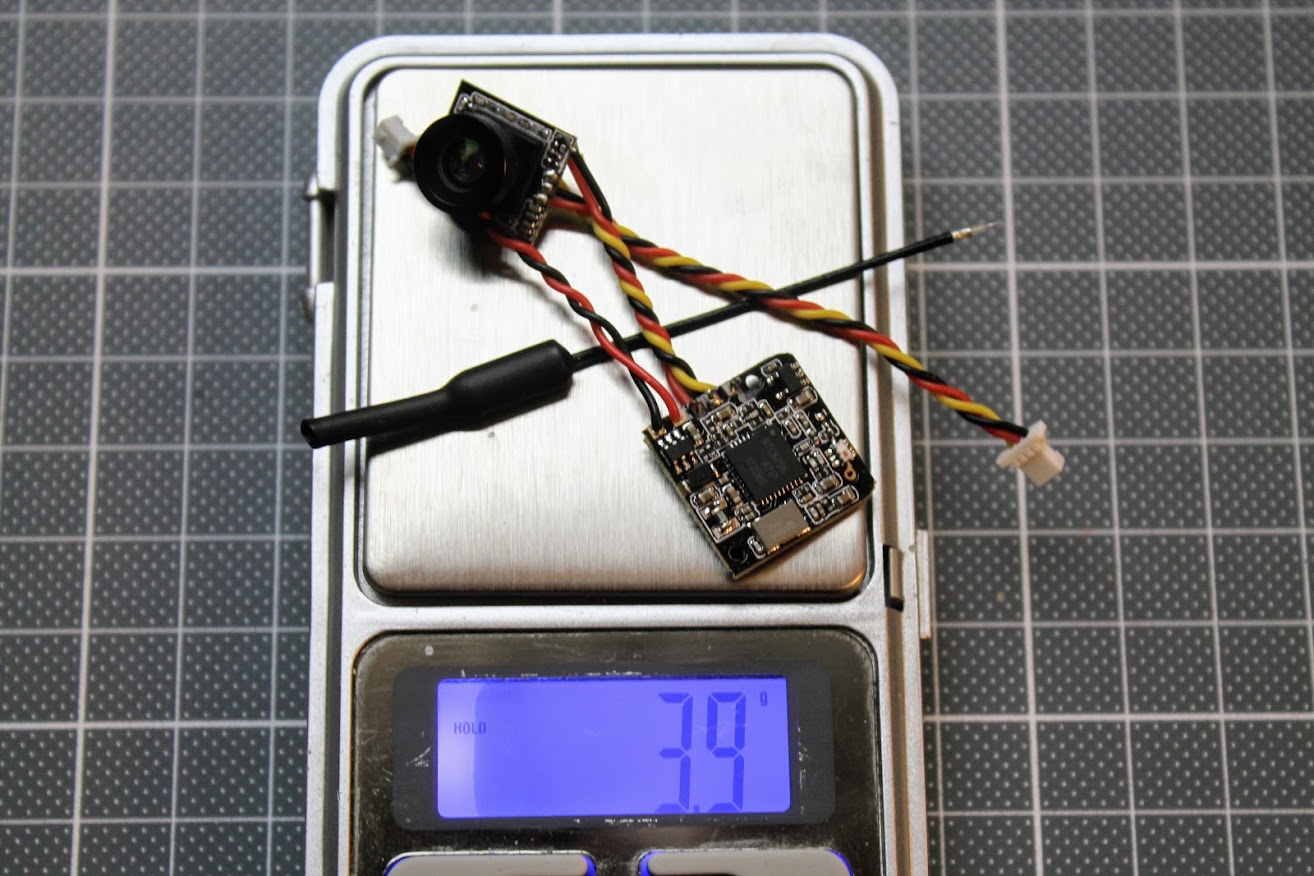
The camera is Turbowing 700TVL CMOS small size camera and VTX is Turbowing 25mW transmitter. It has no SmartAudio, so I will have to set the channel and band via push button.
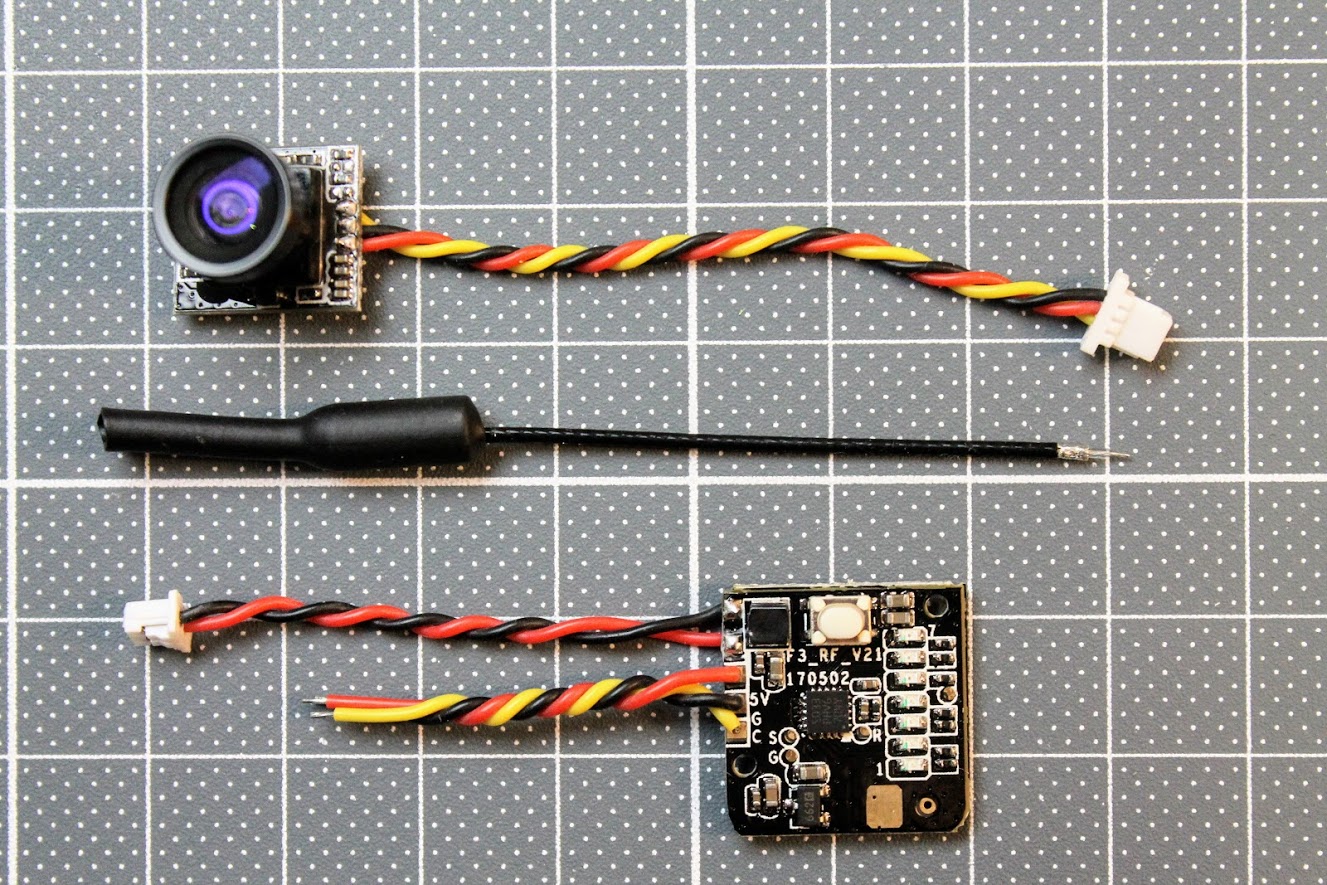
Weight of the FPV components is 3.9 grams, but we can strip the wires and change the antenna into simple wire to reduce the weight.
Now let’s assemble everything into Mobula7.
Build step-by-step
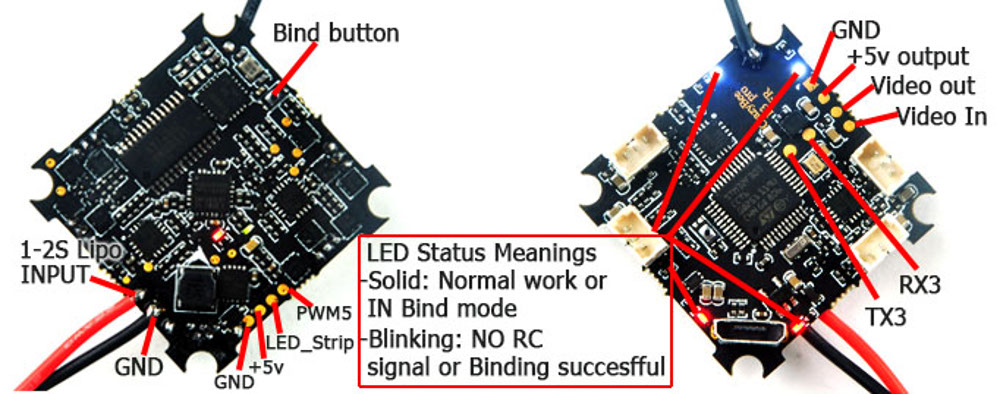
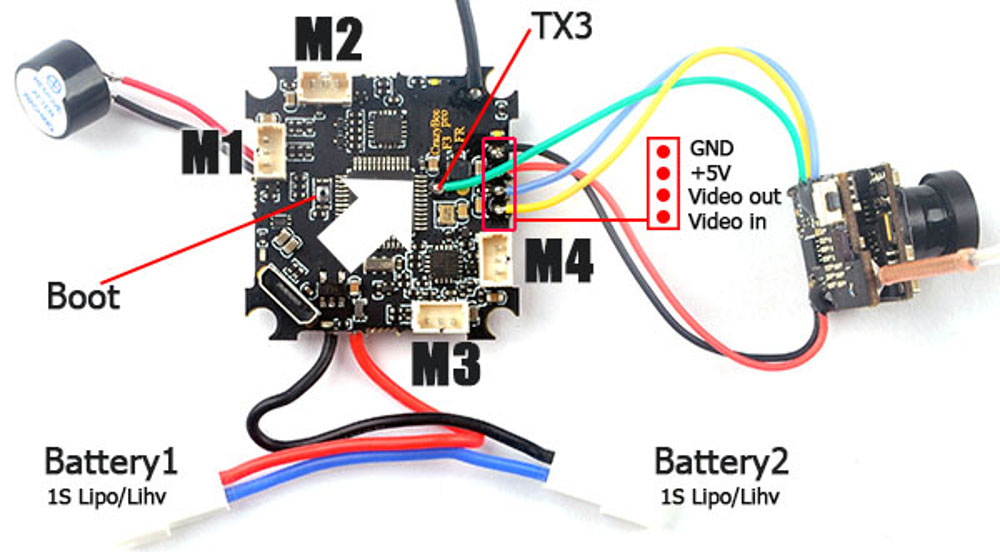
Please refer to the CrazyBee F3 PRO flight controller connection diagram before the soldering the wires.
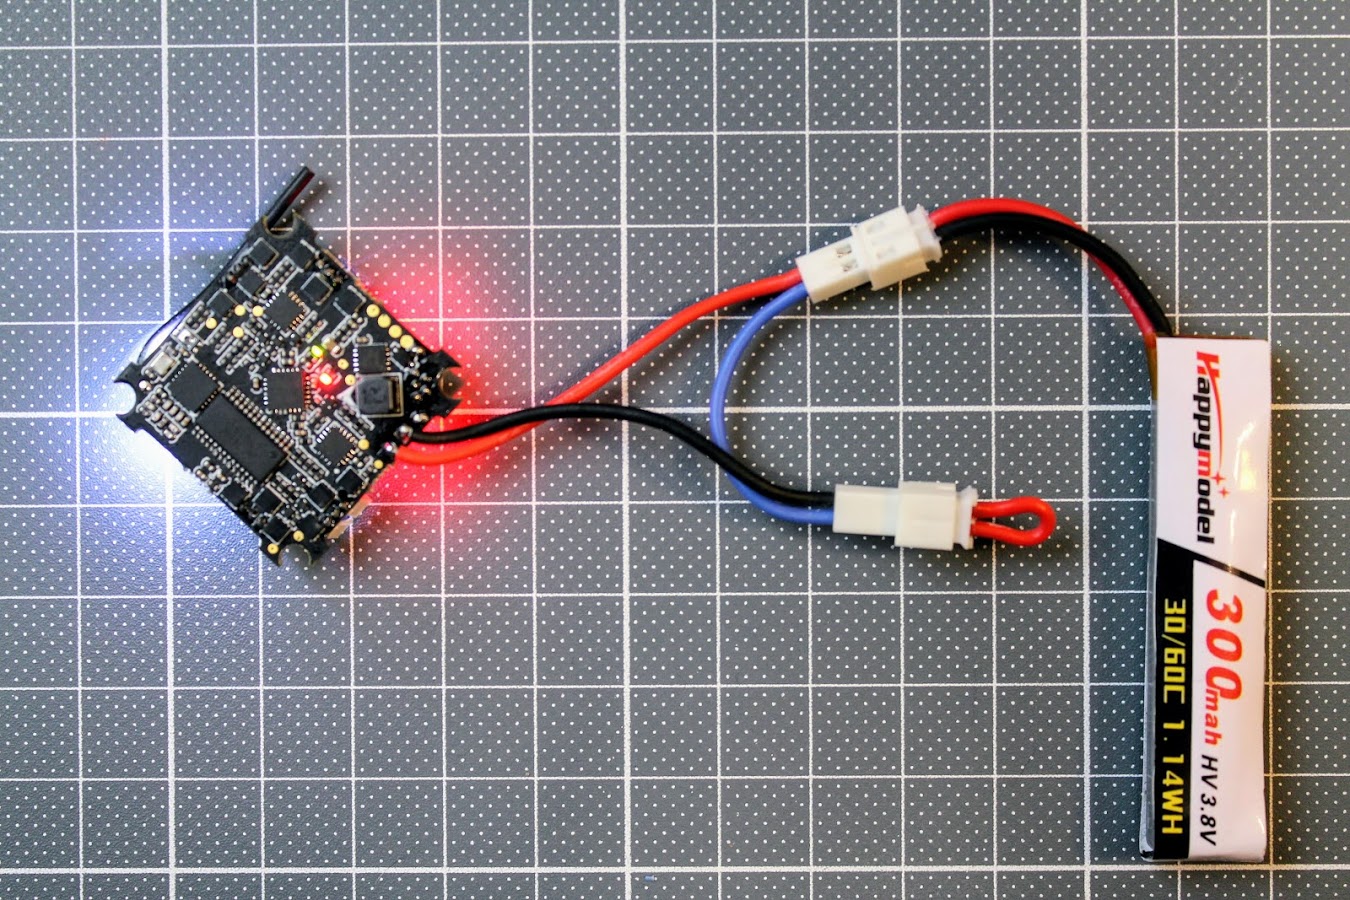
First step is soldering the power leads.
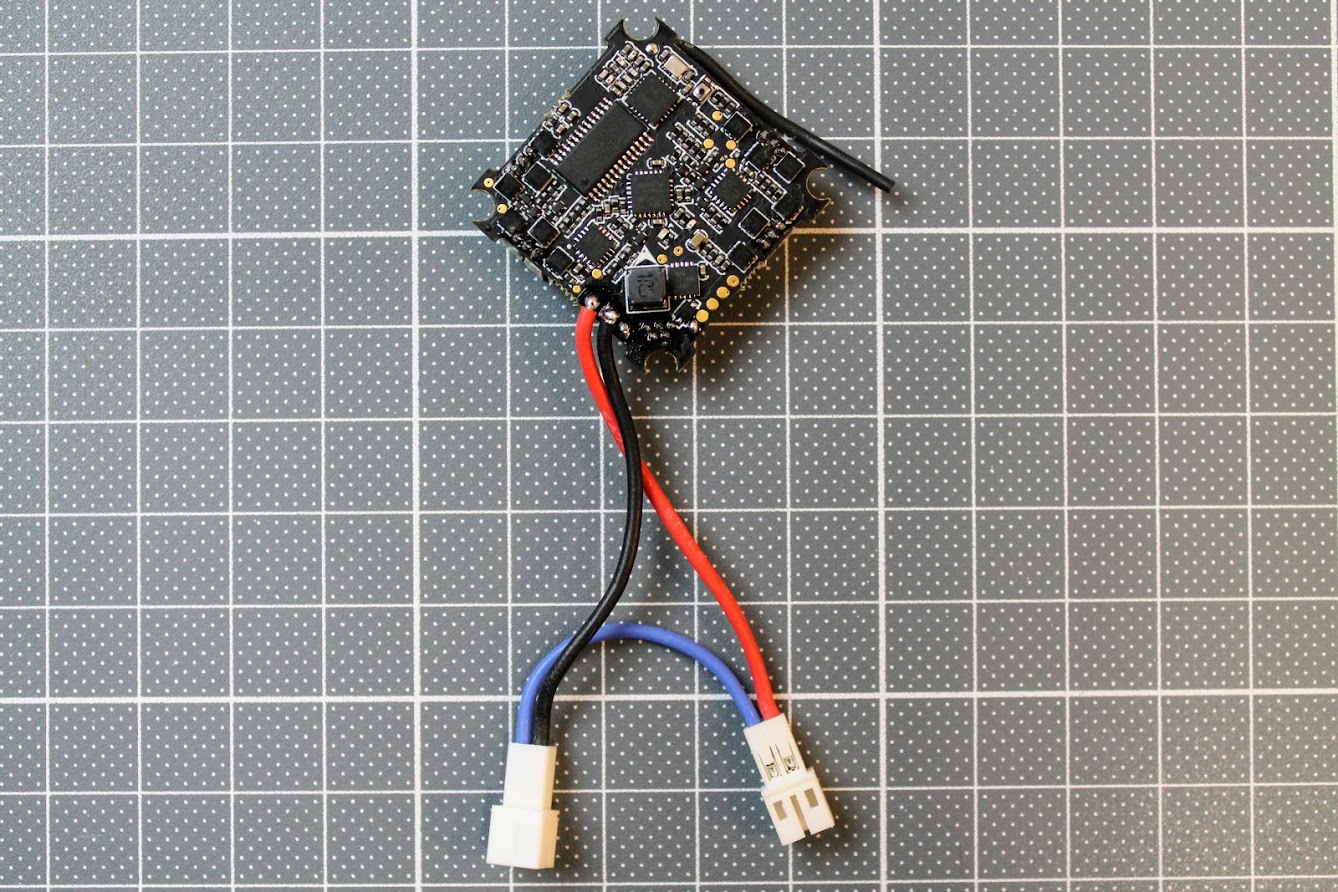
I have soldered the 2S power pigtail, but also have made a small power jumper plug to be able to power from the single cell battery. At least to try if the Mobula7 can actually fly with 1S battery.
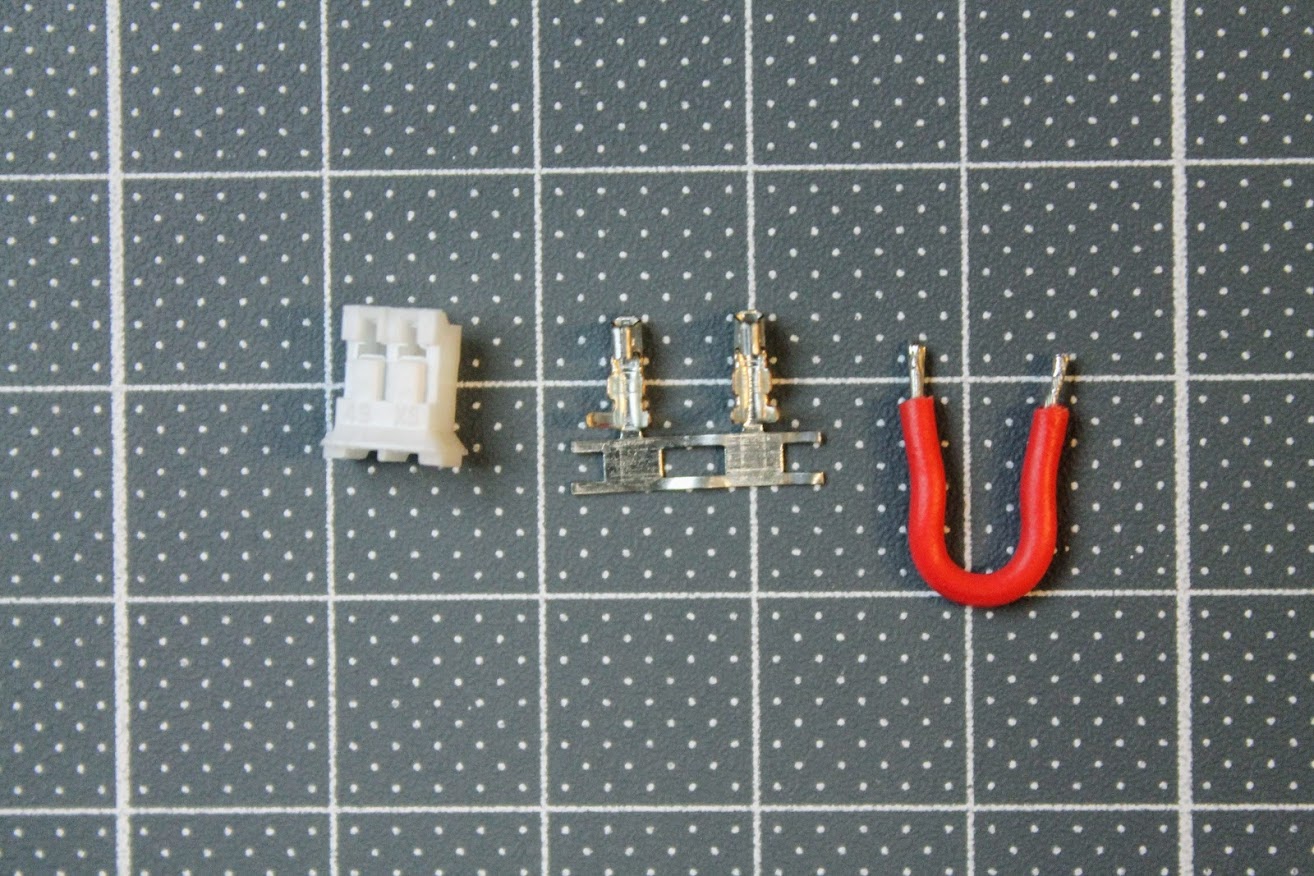
Diy battery jumper is made from spare 2pin 2mm JST PH-Style plug.
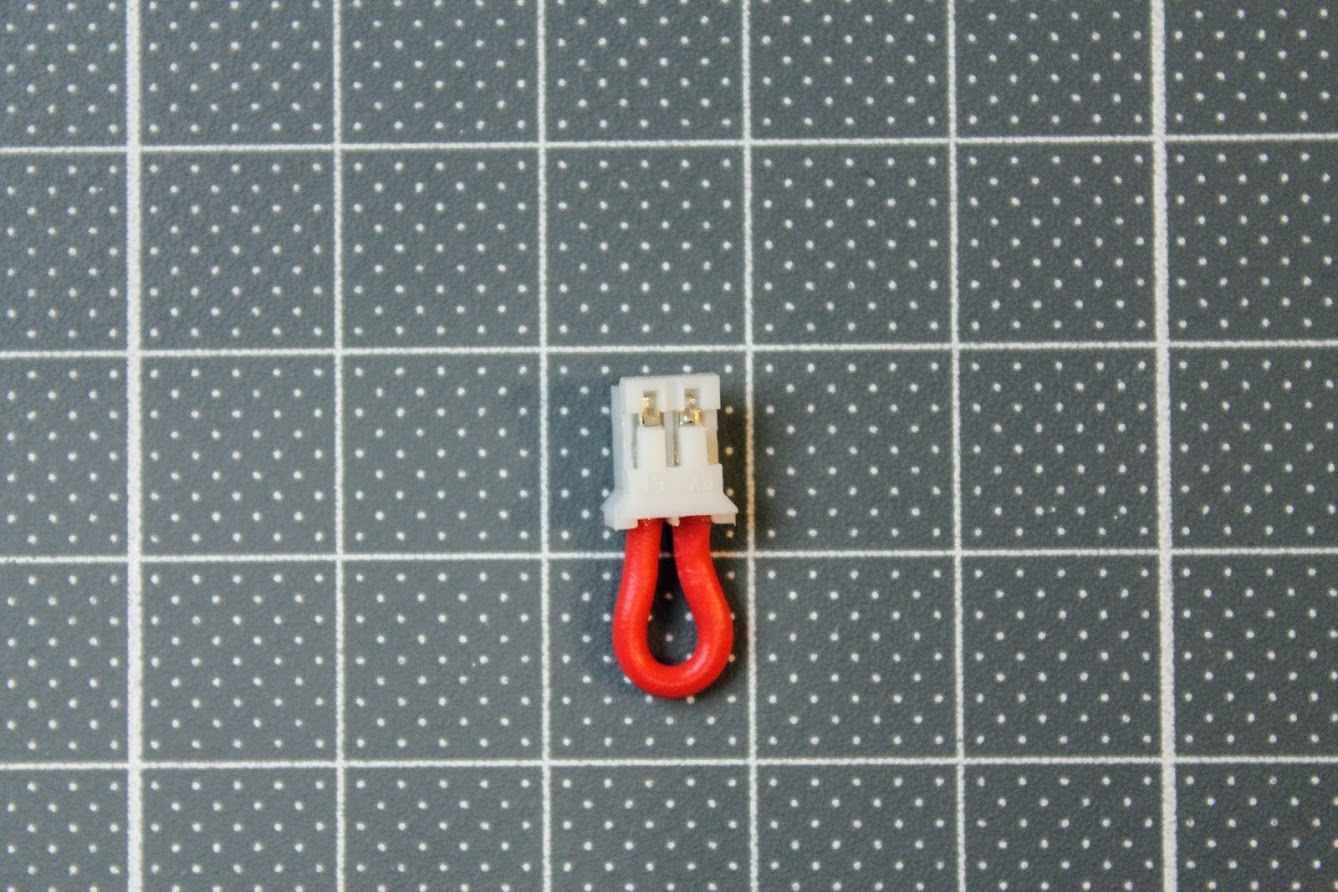
First test – power on single FC – passed.
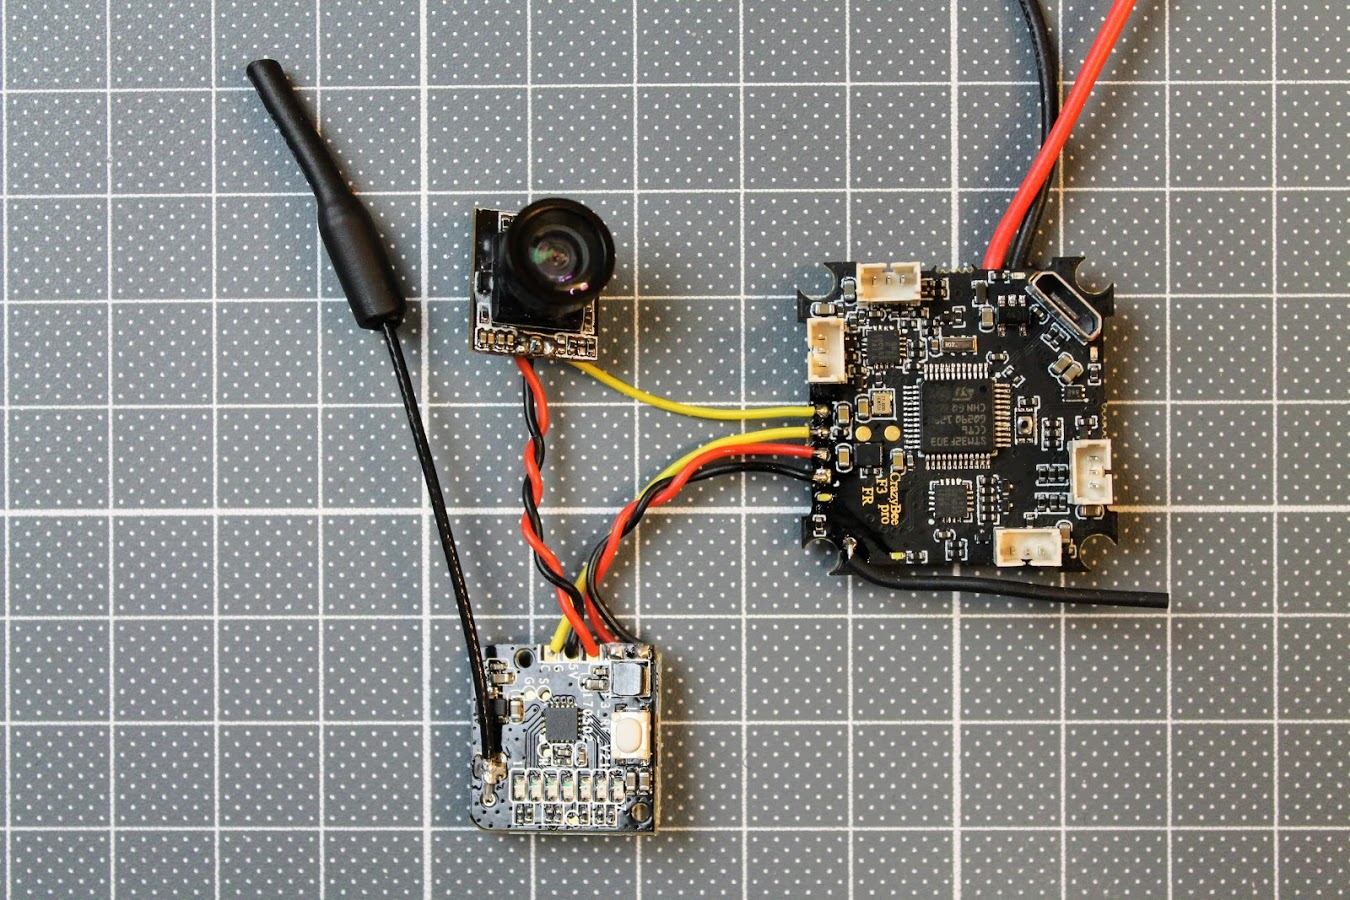
Second step is soldering the VTX +5, GND and VIDEOin to the FC, Camera +5, GND to the VTX and Camera VIDEOout cable to FC.
Now power this FPV + FC system by 1S battery – passed. 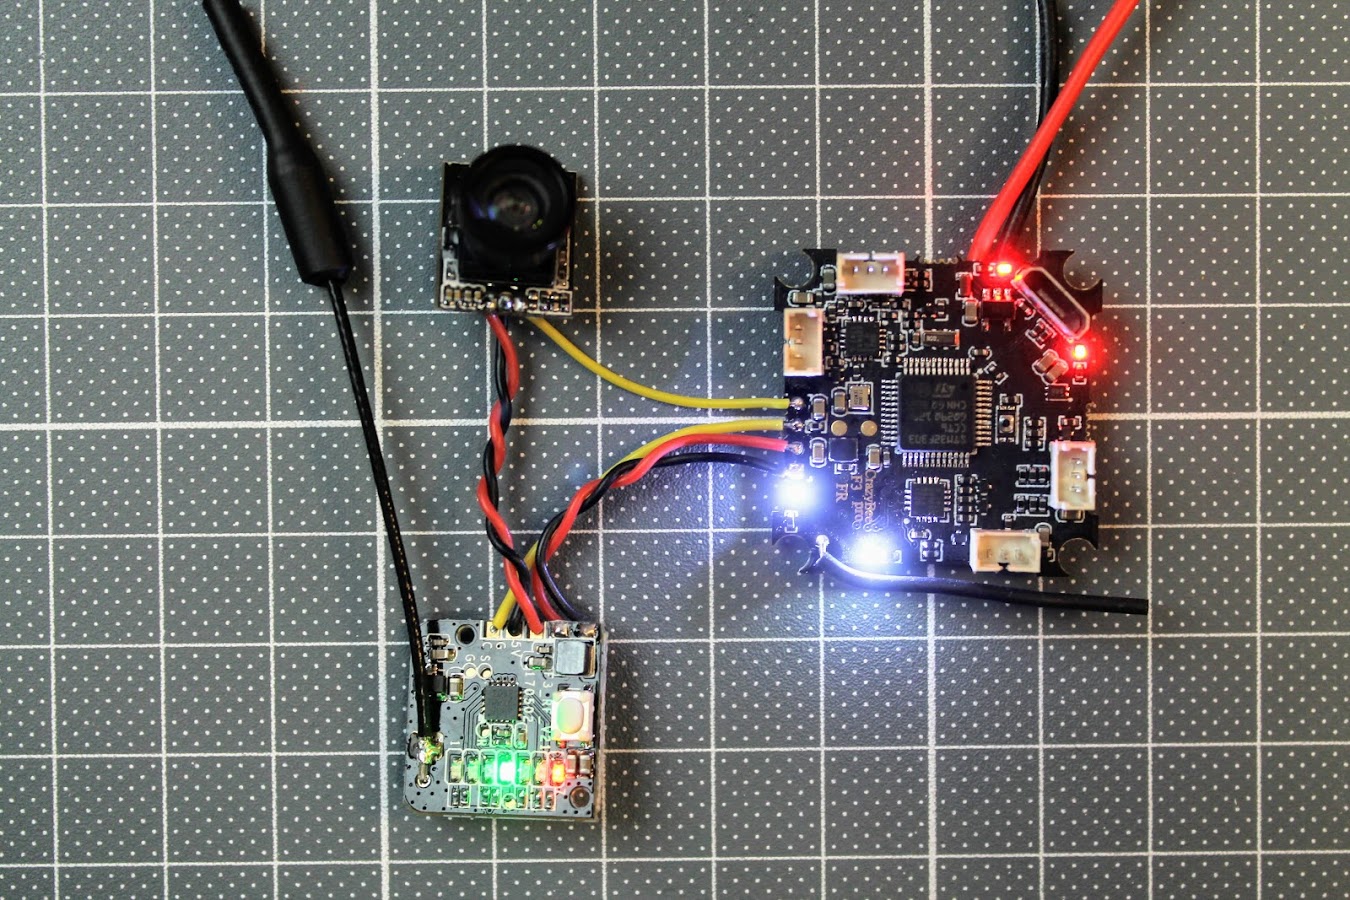
Video is clear, no interferences seen in the picture.
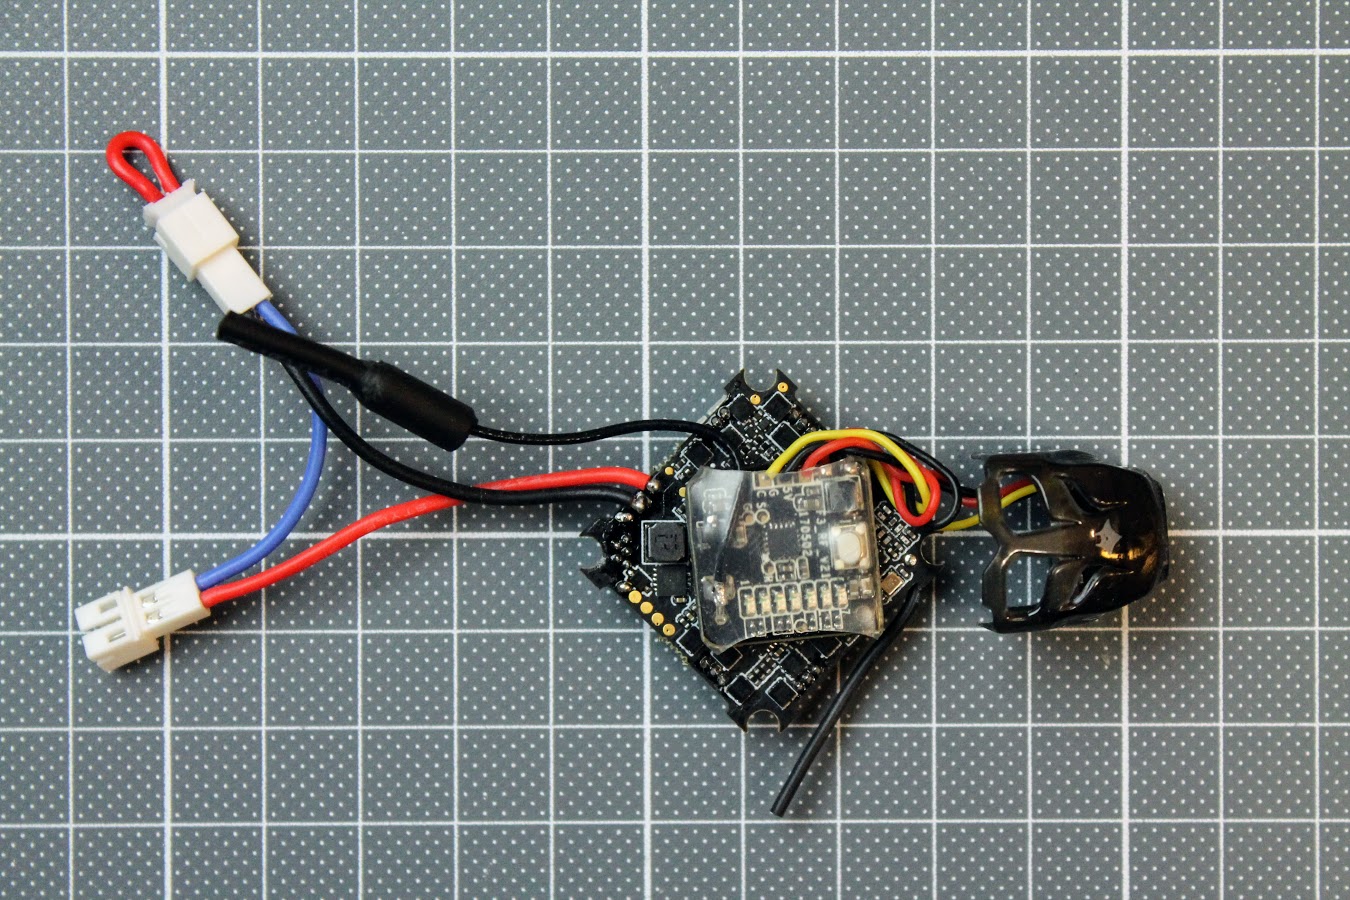
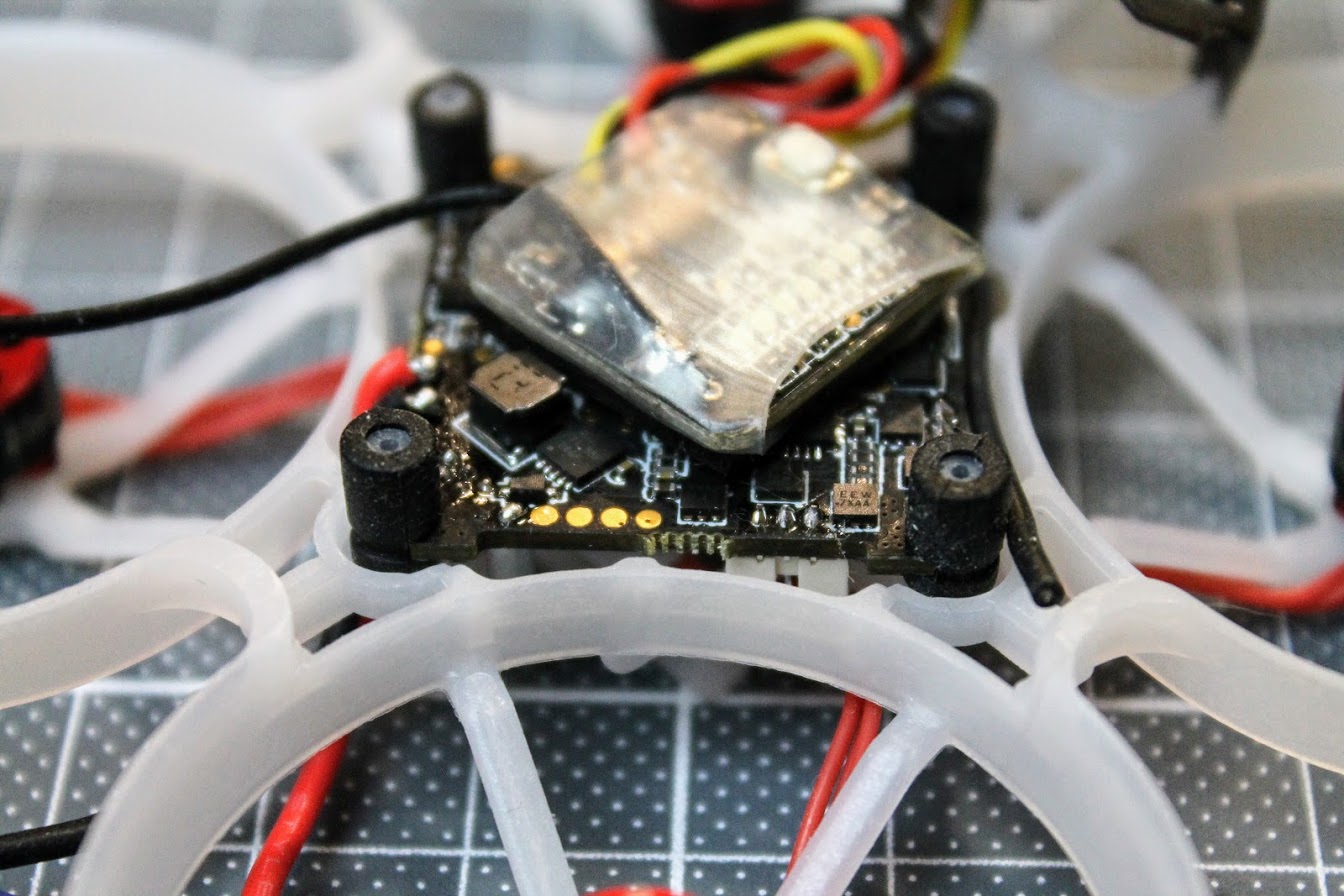
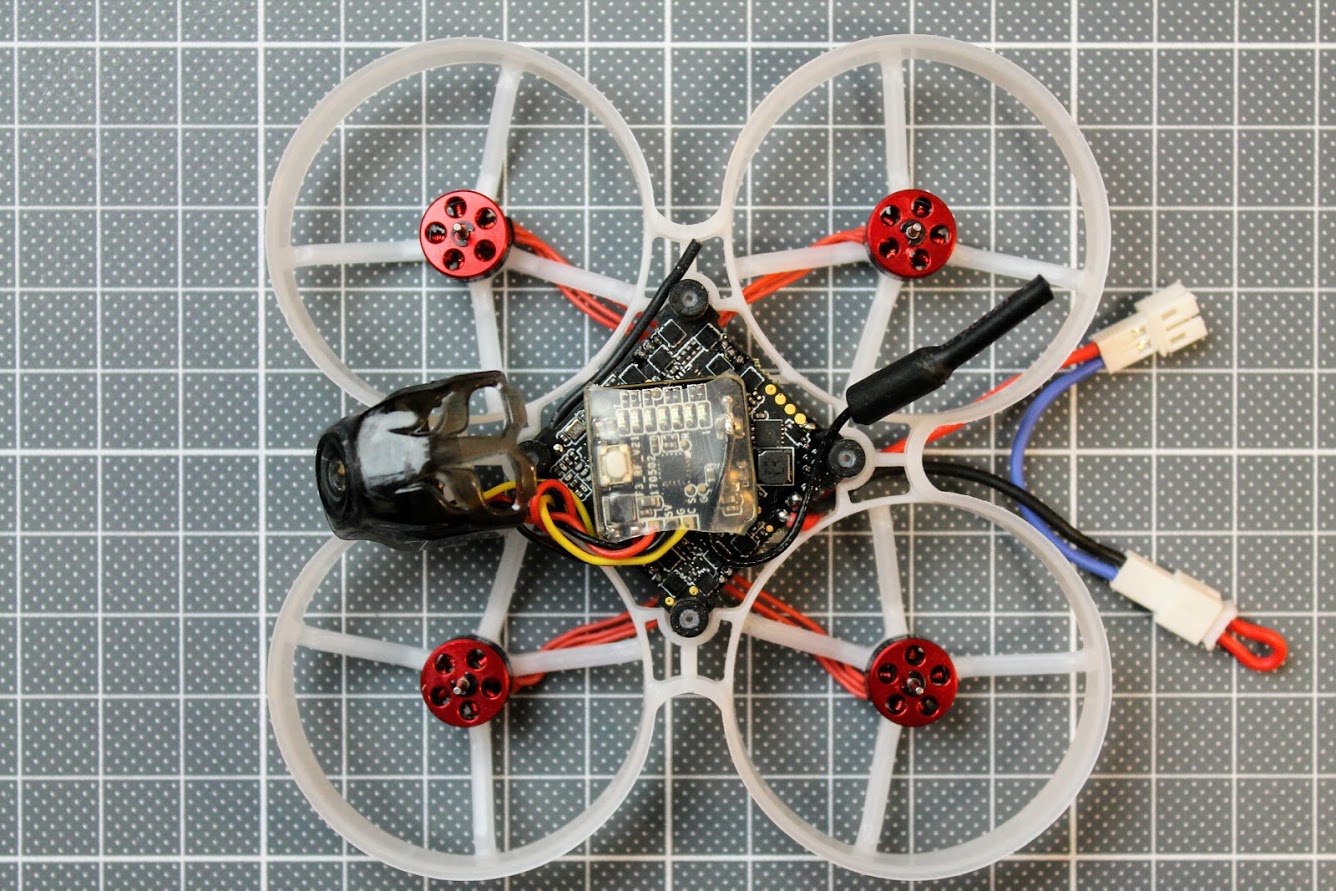
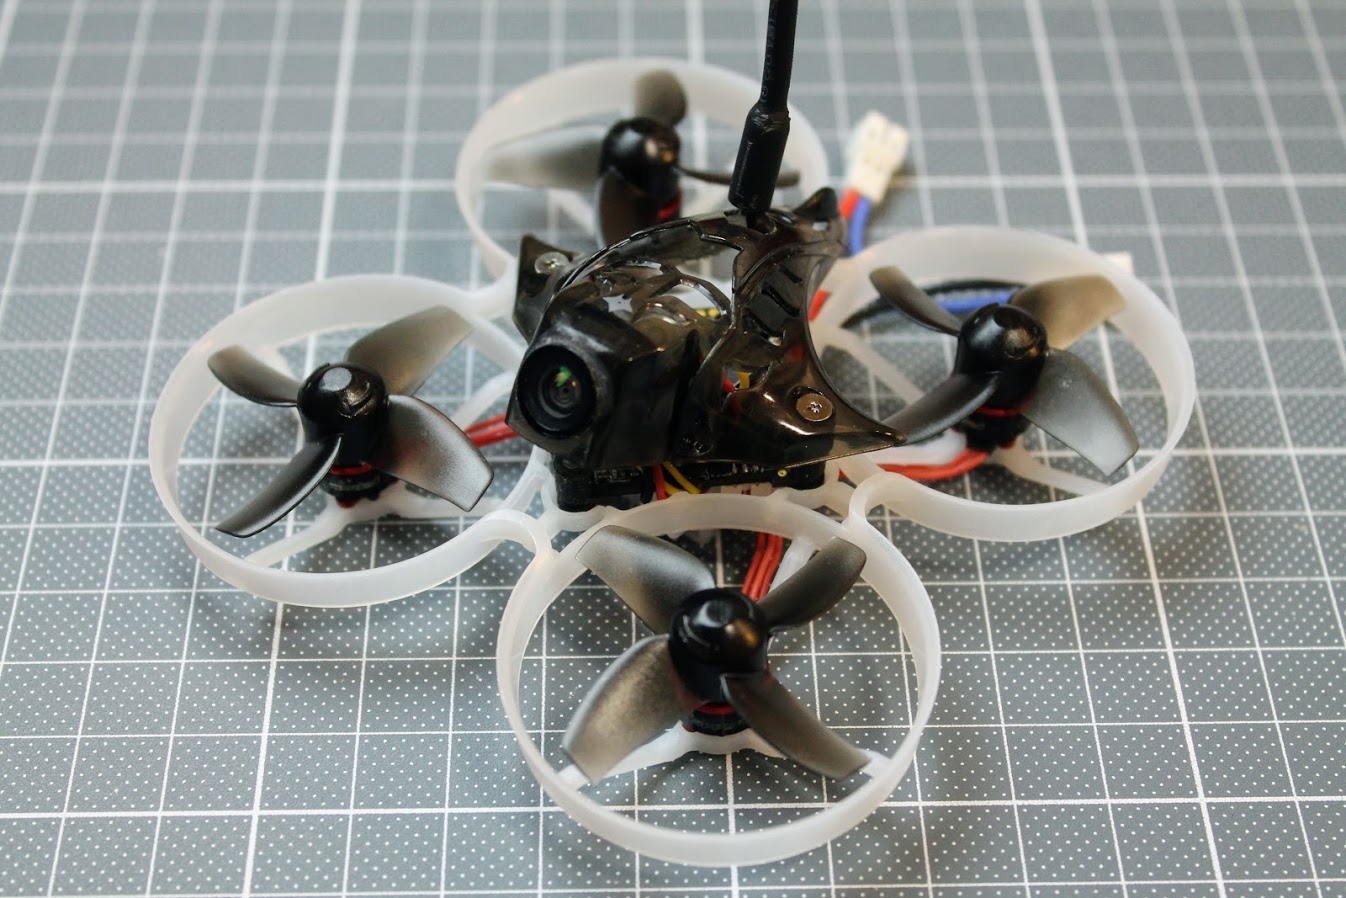
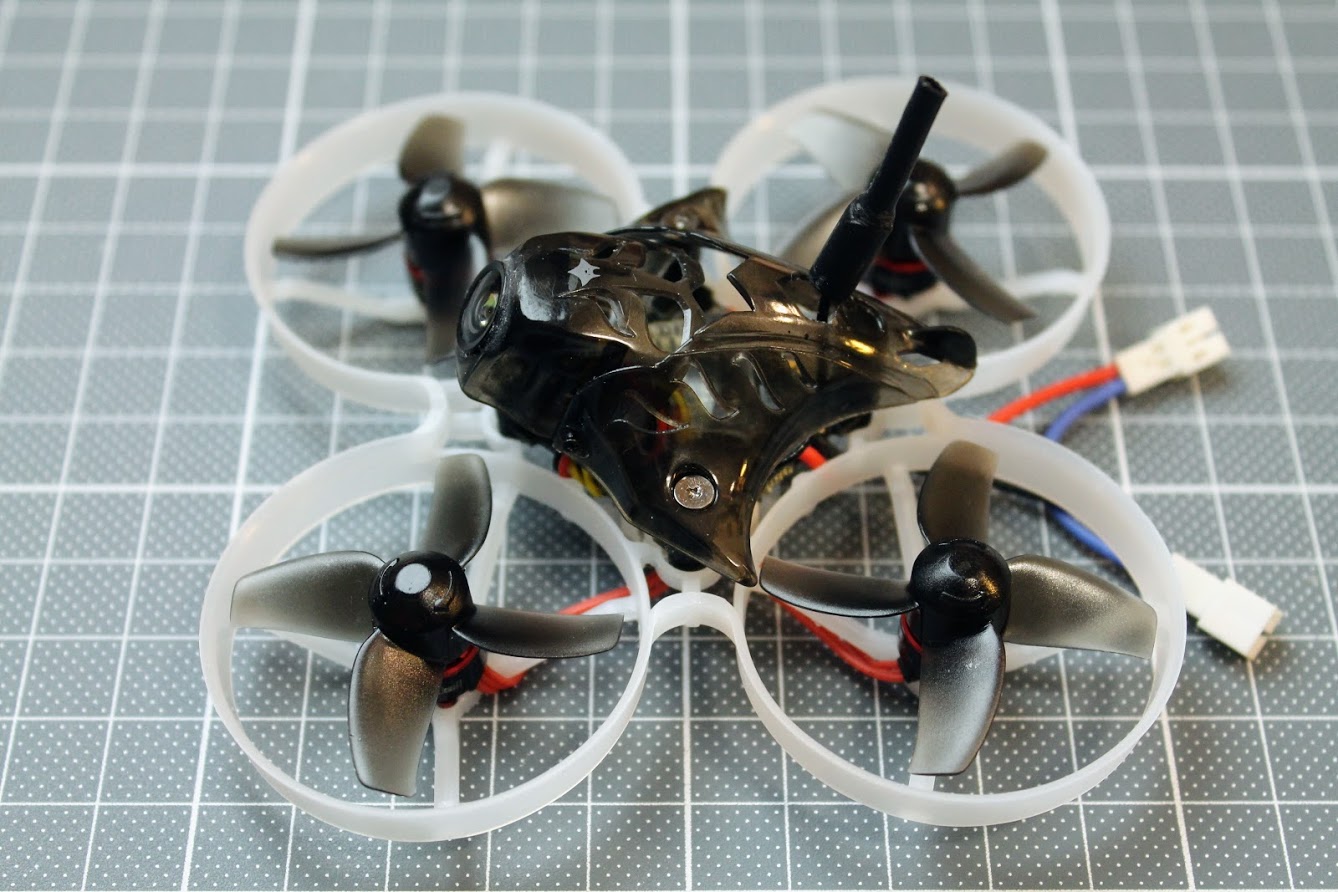
VTX was heat-shrinked and attached to the FC by double side adhesive tape. Camera was installed into adjustable front part of the canopy and secured with a dab of super glue.
Next step was attaching the motors to the frame by three screws. It is advised to add small amount of loctite on the screw thread to ensure they will not unscrew in the middle of the flight.
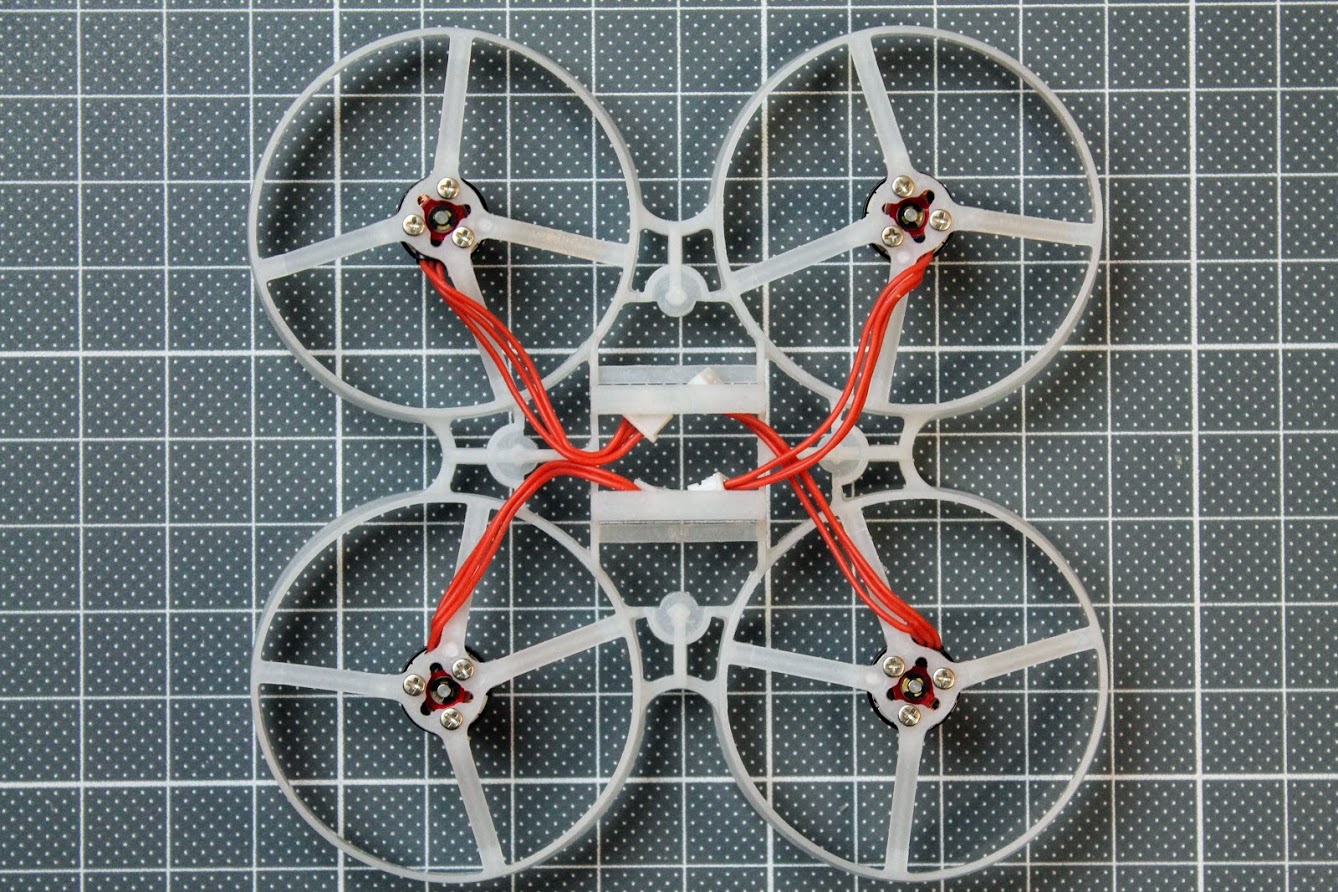
FC should be mounted on the rubber grommets by inserting the FC into grommet slots first and then pushing them down on the standofs.
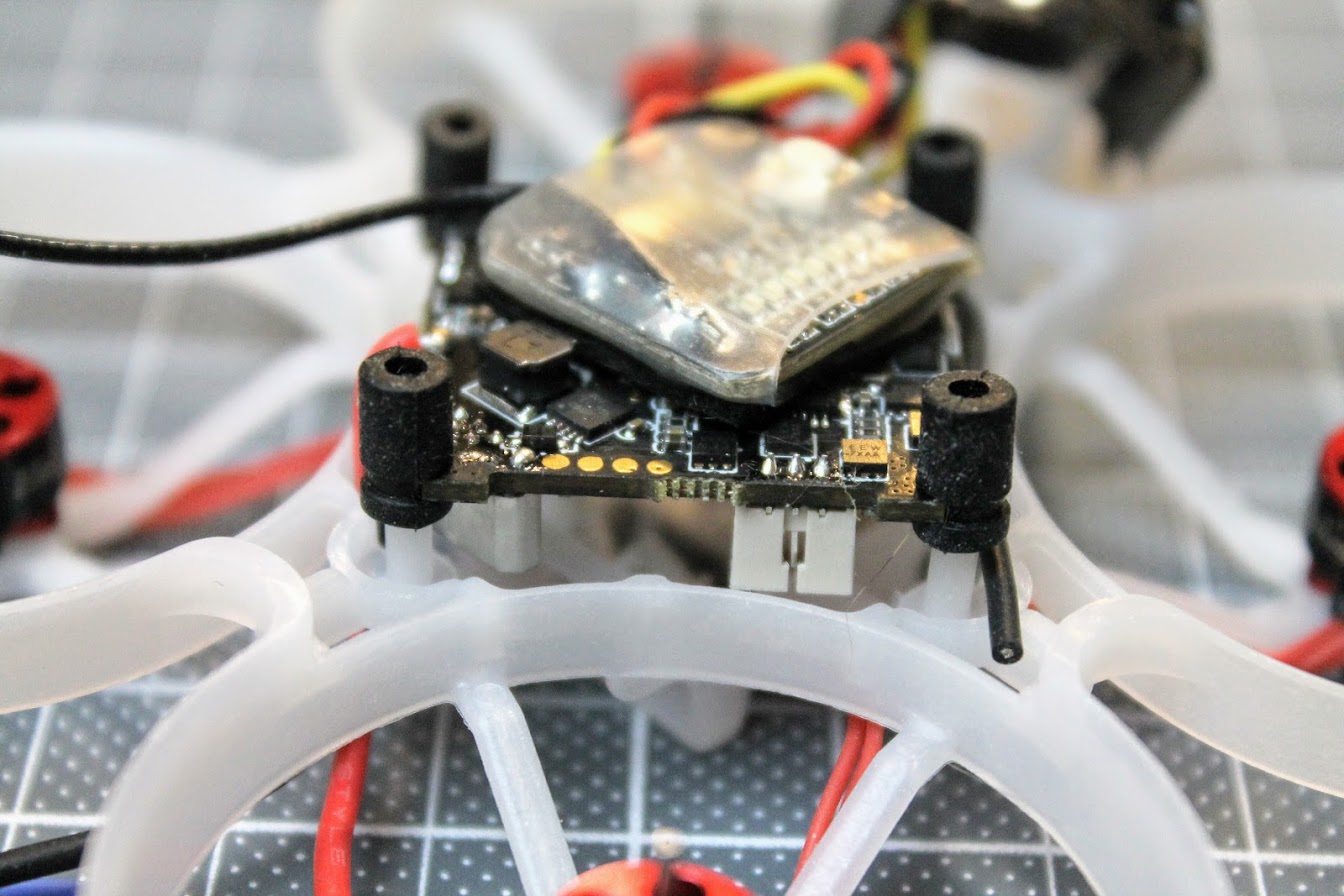
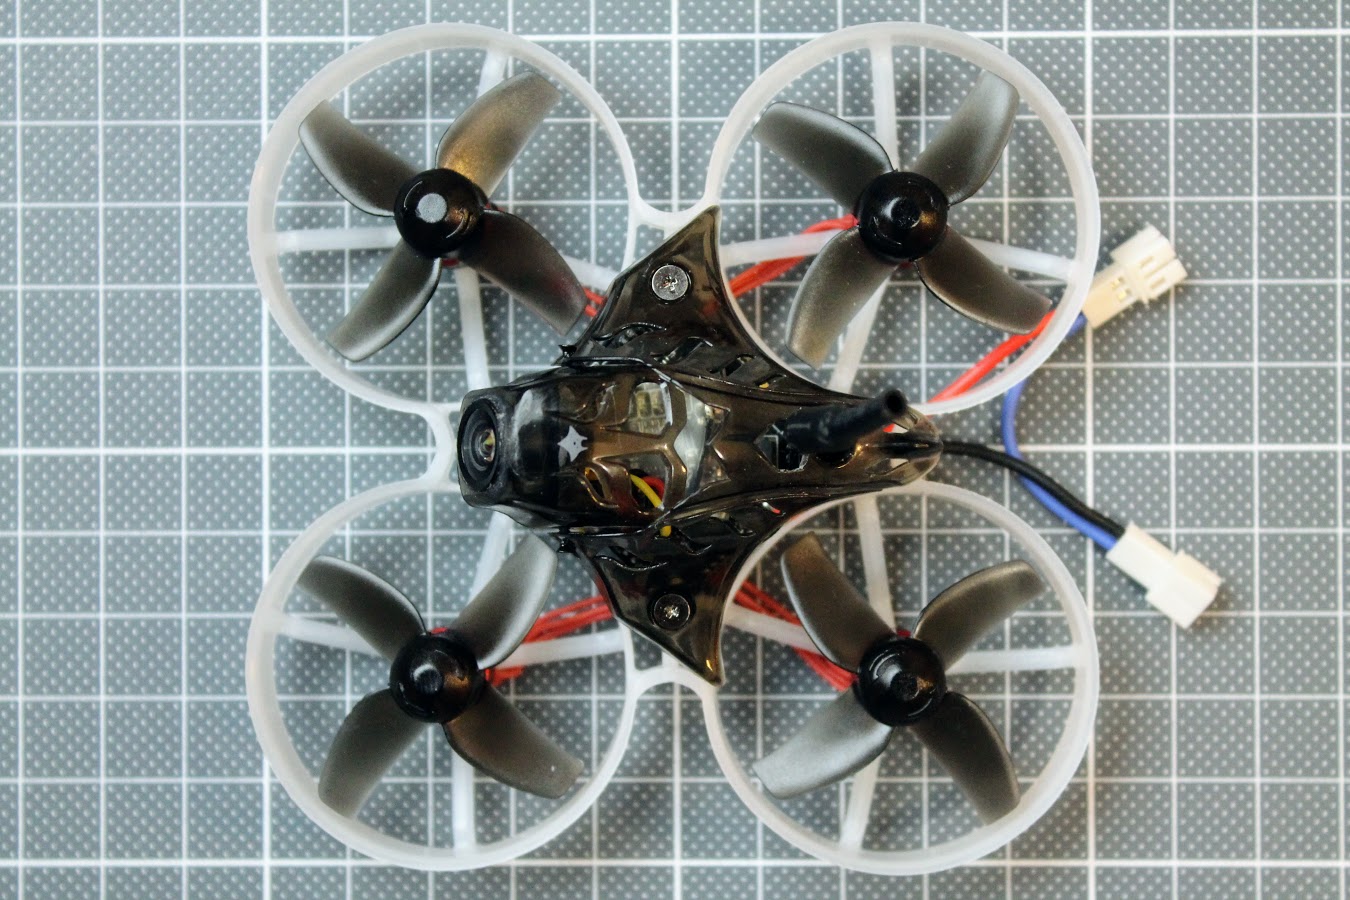
The motors and FC is installed in the place, now canopy should be installed next.
Canopy is attached to the frame by two screws on the sides. Somehow the third rear screw does not fit into the slot.
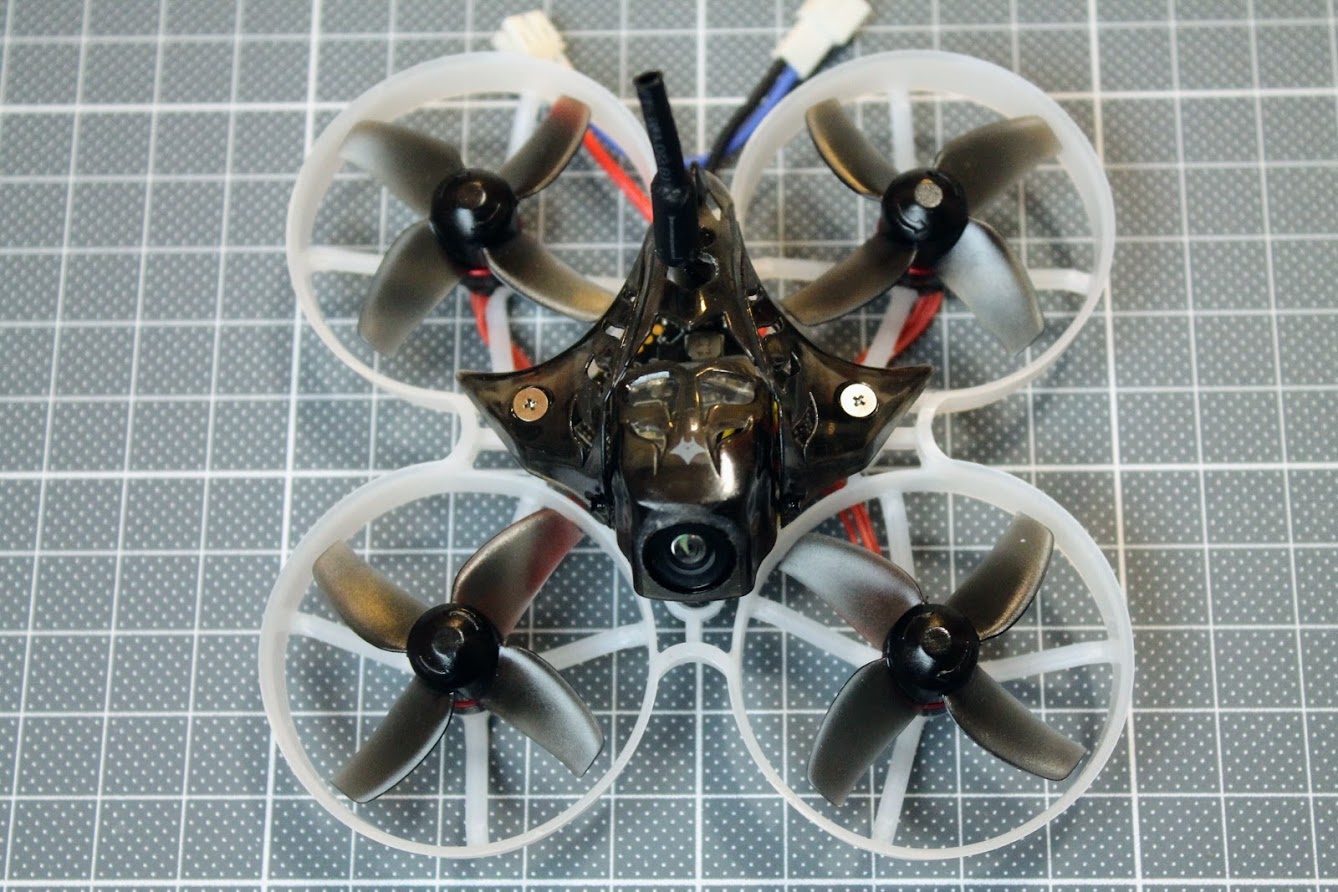
Total weight without the battery is 28.4 grams.
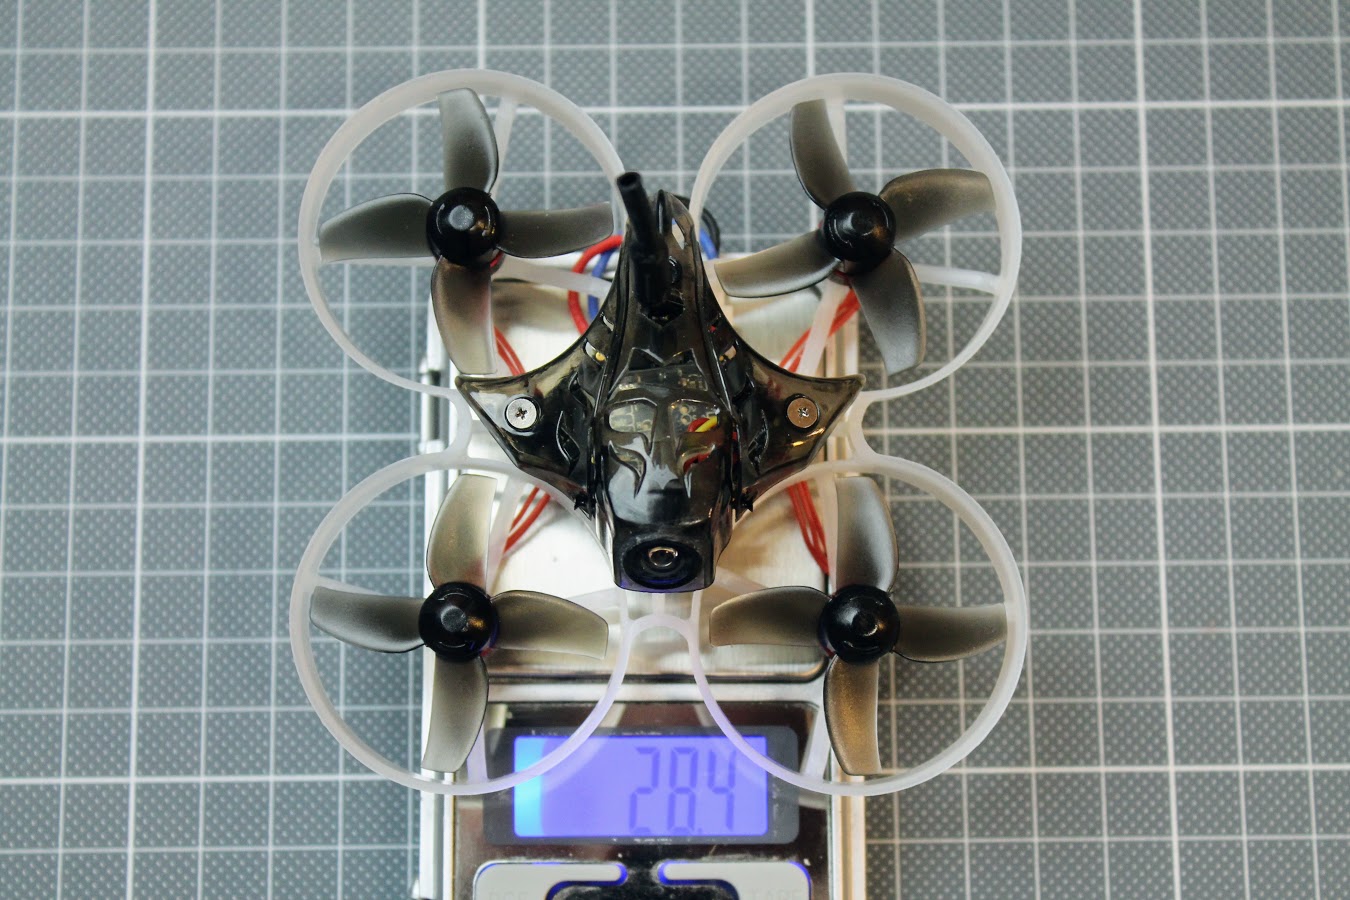
Final result.
Setting up the Mobula7
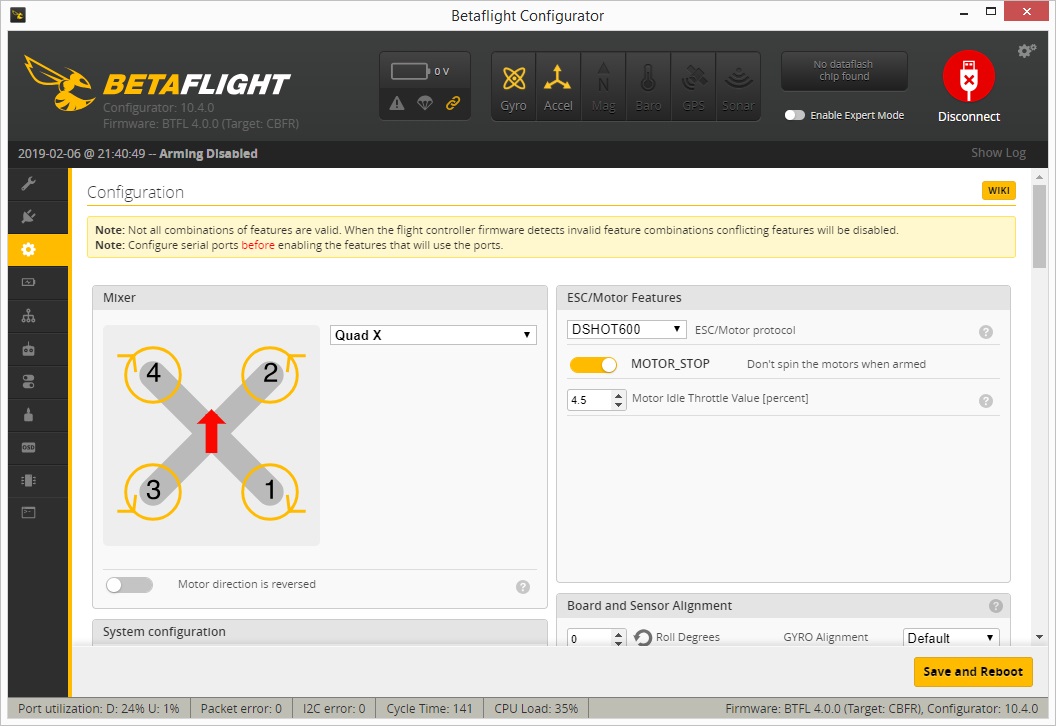
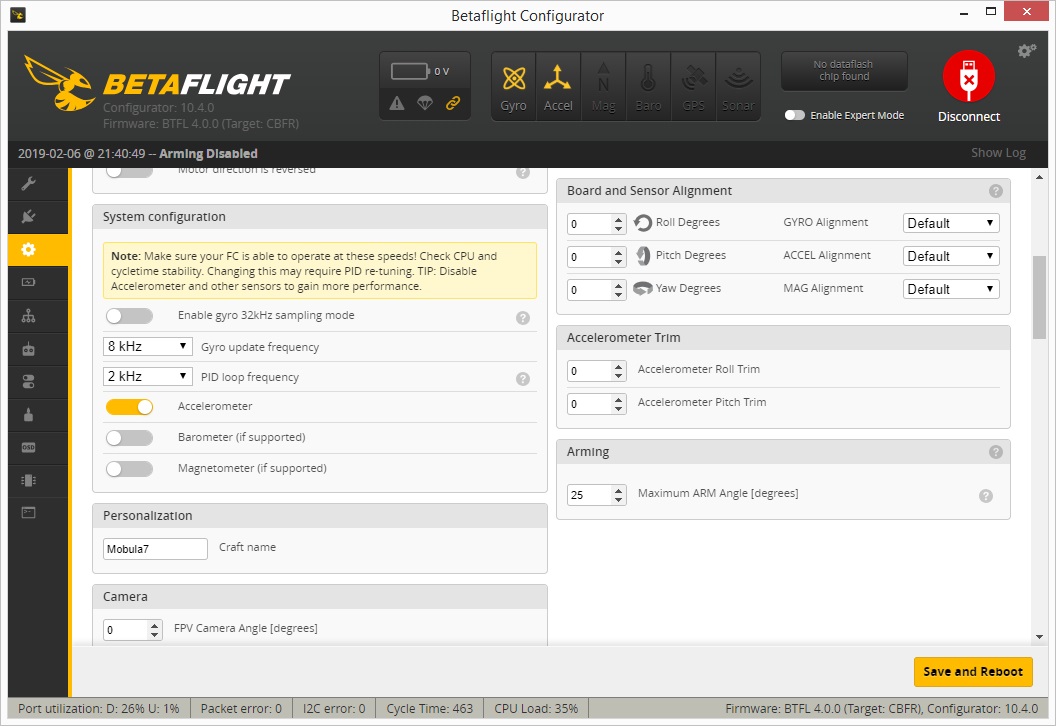
CrazyBee F3 PRO flight controller comes already preconfigured. Almost plug and play. It even has aircraft name set to Mobula7!
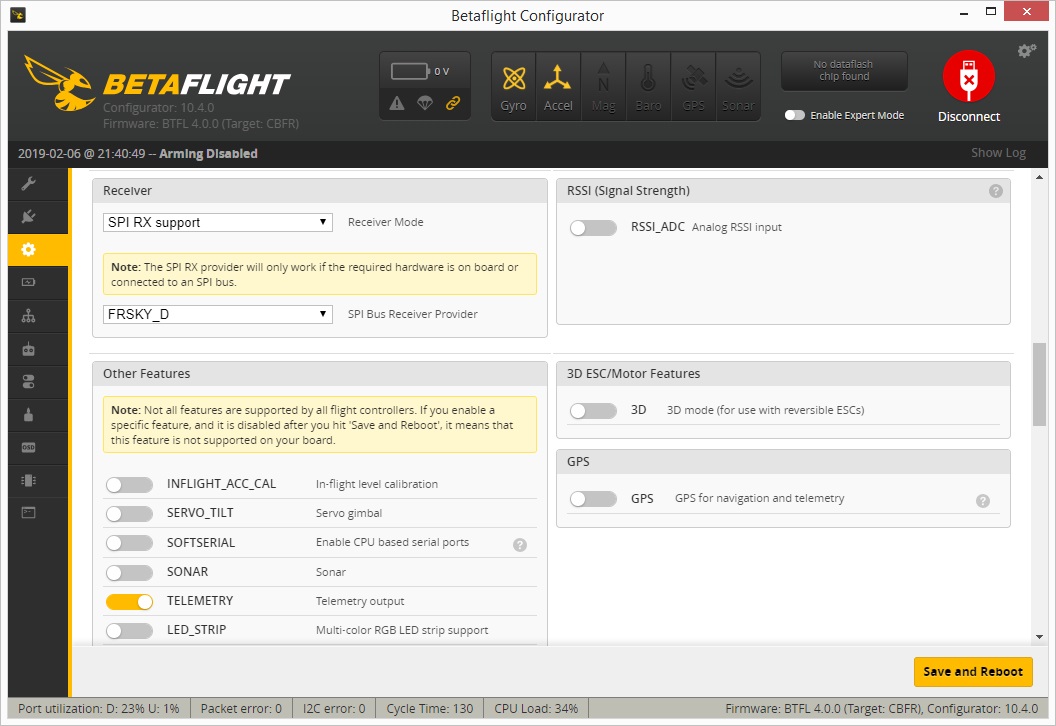
Special notes fo the receiver setup. CrazyBee F3 PRO has on board integrated FrSky receiver, connected via the SPI bus. There are optional variants with FlySky and DSM receivers, but the DSM receiveris not connected via SPI and should be configured as regular serial receiver. SPI RX configuration has many differnt protocols to select.
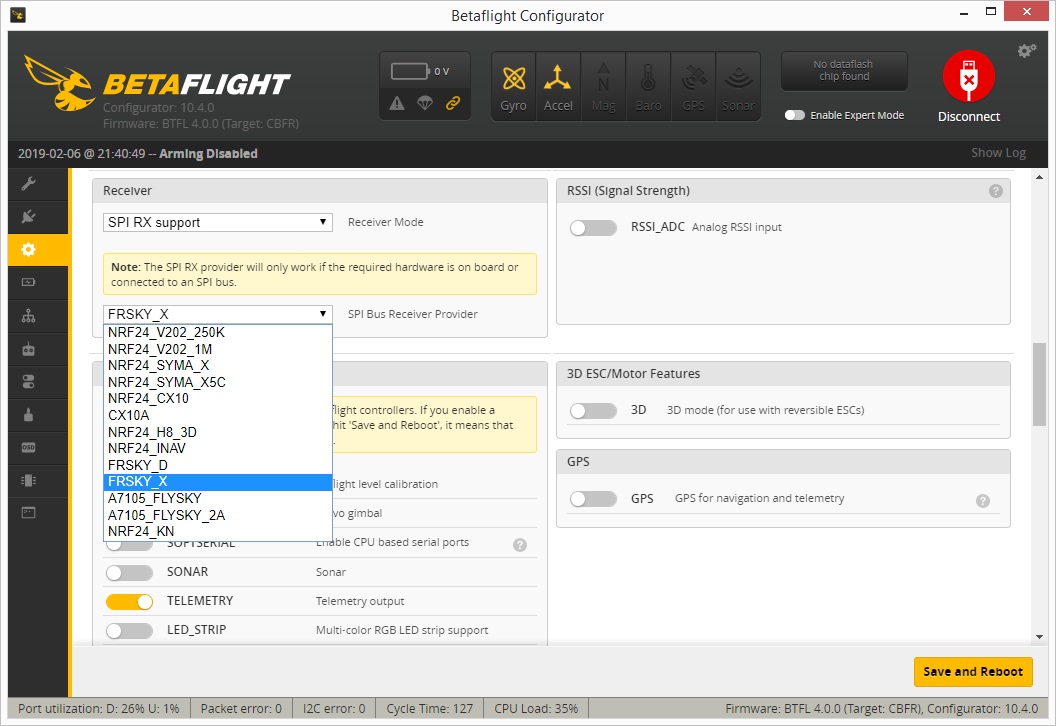
If you want to use FrSky D8 protocol, then choose FRSKY_D option.
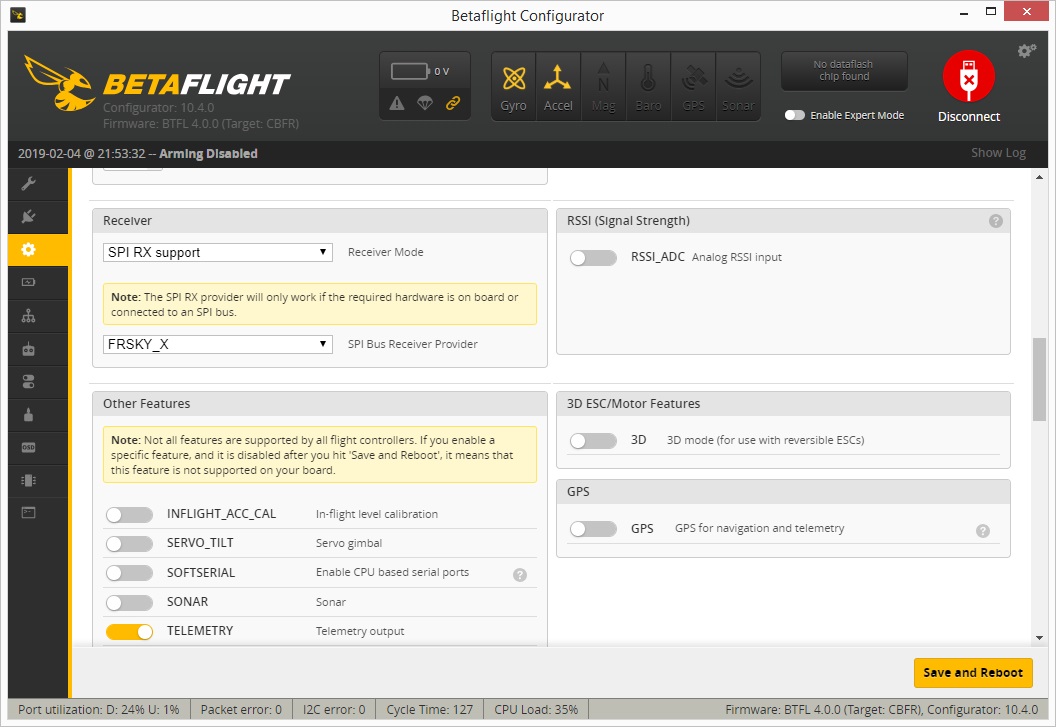
If you want to use FrSky D16 protocol, then choose FRSKY_X option.
You can bind the receiver by pushing the bind button for a few seconds and then selecting the bind function on the transmitter.
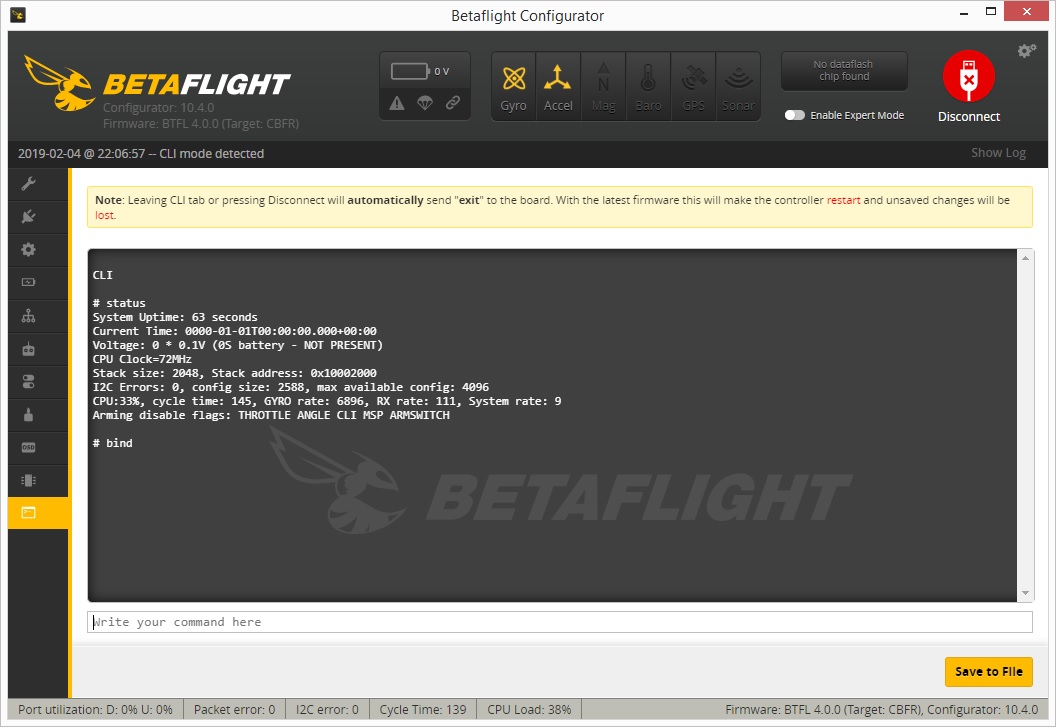
Alternatively you can enter the onboard SPI RX receiver into the bind mode via CLI command “bind” (works in betaflight 4.0). You will not get any response in the CLI command window, but the receiver does enter into Bind mode.
[To be continued]
-
 Guide: The ultimate list of FPV cameras – choose the best
This is the most complete FPV cameras list with brief description of the each
Guide: The ultimate list of FPV cameras – choose the best
This is the most complete FPV cameras list with brief description of the each -
 Review: Fullspeed Leader 3/3SE quadcopter
Fullspeed has released the Leader 3/3SE , the sucessor of the highly sucessfull Leader 120
Review: Fullspeed Leader 3/3SE quadcopter
Fullspeed has released the Leader 3/3SE , the sucessor of the highly sucessfull Leader 120
Montis, thanks for the post. I am literally just starting down this hobby. I want to DIY not do a kit. What control transmitter and what video receiver are best to start with? I am in the US so anything that you know works in our allowed frequency range is best. Thanks in advance.
This is good, but wide question. The best full size radio controllers are Radiomaster TX16s, Jumper T18 or Eachine TX16S. The smaller one I personally like is Jumper T12 (Pro). Also there is good gamepad compact size controller Jumper T-Lite. These are multiprotocol radios, means they can control almost any radio receiver.
Video receiver depend on the quad you want to build – from the nano sized VTX to the full 30x30mm sized VTX with heatsinks.
Also I would suggest to join the Beginner to FPV group on FB. (https://www.facebook.com/groups/737714537075441)