Guide: SmartAudio VTX control and how to set it up
What is the SmartAudio?
SmartAudio is a communication protocol between the FC (Flight Controller) and VTX (Video transmitter). SmartAudio has been invented by TBS in 2015. It is called SmartAudio because primarily it was intended to share the Audio signal input of the VTX together with the control line from the Flight controller. Later SmartAudio got separate dedicated input pin in the VTX, but the word Audio remained in the name.
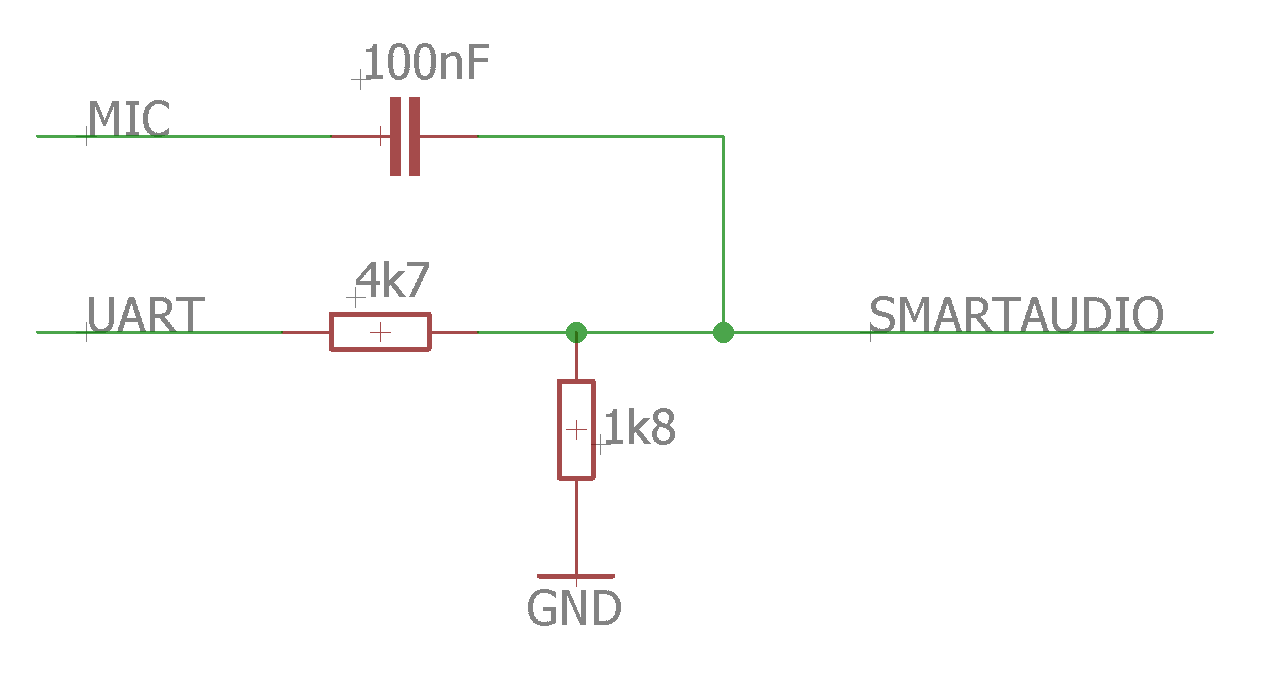
Betaflight firmware has ability to control the VTX parameters via SmartAudio. To use SmartAudio you need to connect the VTX SmartAudio pin to the TX pin of any UART port on the FC. SmartAudio will work via CLI commands, Betaflight OSD and LUA scripts. For LUA script to work, you need the FrSky receiver with SmartPort telemetry working. Betaflight OSD SmartAudio control works with any receiver. So you can use SmartAudio with any receiver.
How does the SmartAudio protocol work?
SmartAudio uses single wire half duplex communication based on UART. In Idle mode both host (FC) and VTX define the SmartAudio pin as input. If the host want to talk to the VTX, he defines the SmartAudio pin as output and start sending a command. Once the command is sent the host defines the SmartAudio pin as input and the VTX will answer according to the received command. The VTX only sends data if requested by the host.
SmartAudio protocol commands are GET SETTINGS, SET POWER, SET CHANNEL, SET FREQUENCY and SET OPERATION MODE (SmartAudio V2 only). So we can get the idea what can be controlled – Channels, Power level and Operating modes (pit mode, lock/unlock).
More detailed protocol specification can be found here: http://www.team-blacksheep.com/tbs_smartaudio_rev08.pdf
Licensing
TBS (Team Black Sheep) has opened the SmartAudio standard but requests a license fee if you plan to make
money with it. Participants will receive an authorization logo that can be placed on product
and packaging. However I have never seen the mentioned logo on any product using SmartAudio and never heared about someone paying the License Fee to TBS.
Connecting the VTX to FC with SmartAudio
As already mentioned, in order to be able to use SmartAudio features you need to connect the VTX SmartAudio pin to the TX pin of any UART port on the FC.
Below is an example of the Eachine VTX03S connected to the Matek F405-AIO FC. Green wire from the VTX is SmartAudio wire connected to the TX4 on the Flight Controller.
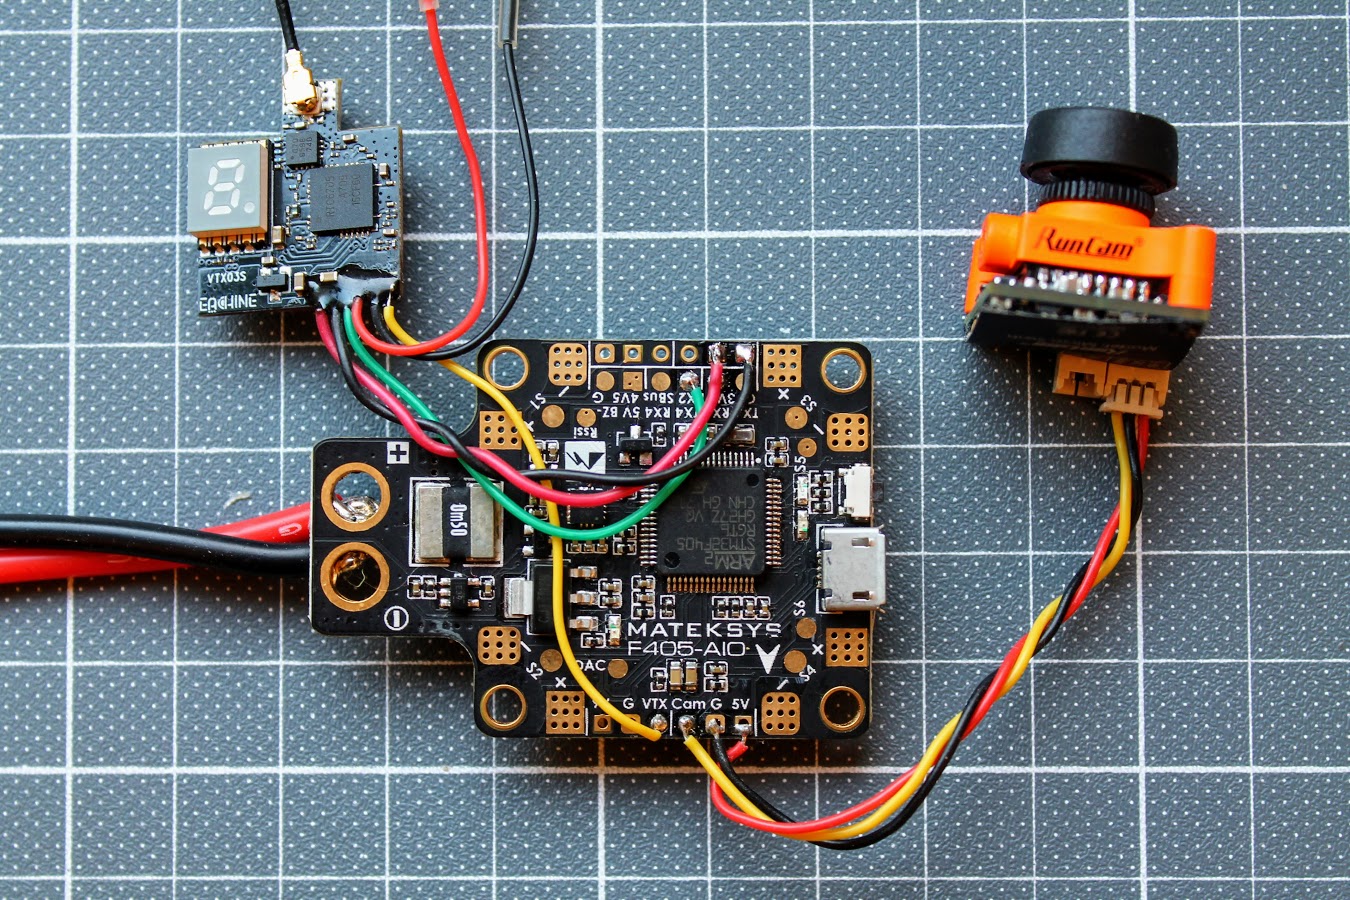
Of course you can connect to any free TX of any available UART. You can even use any SoftSerial port for controlling SmartAudio.
Setting up the SmartAudio in BetaFlight
The only thing you need to set is sellect the type of the Peripherals you have connected (TBS SmartAudio) in the Ports tab. In our case we have connected the SmartAudio control wite to the TX4 pad of the UART4.
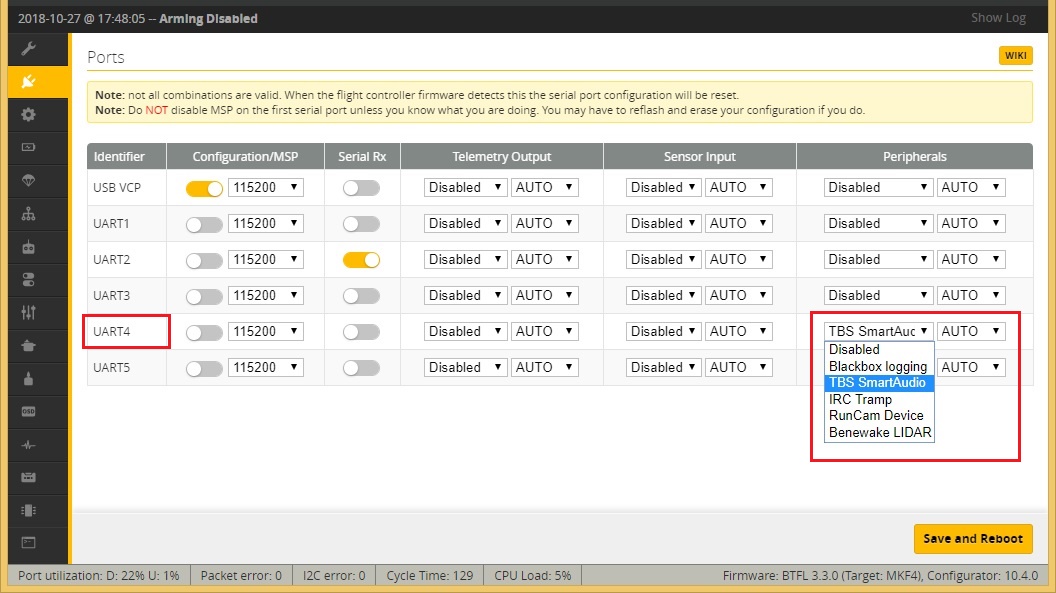
Save and reboot and you are done setting up the SmartAudio.
Note: Starting from Betaflight 4.1.0, you will need to set up the VTX Tables. Read the guide on setting up the VTX Tables.
CLI commands
Starting from the Betaflight 3.3.0, you can control the VTX settings by issuing the CLI commands. Type GET VTX or SET VTX in the CLI tab and you will see all the current VTX settings.
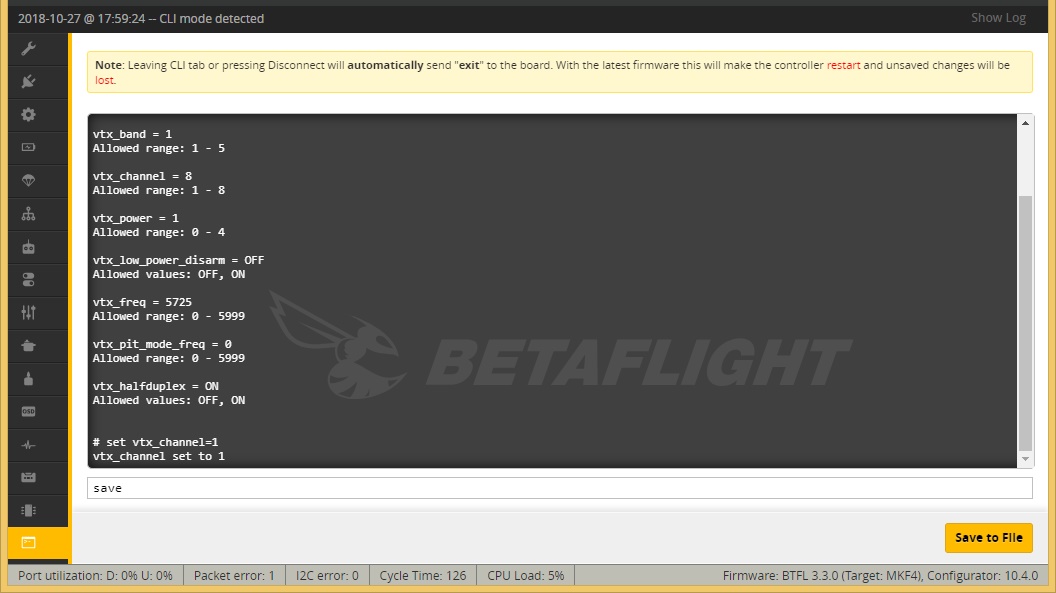
Available SmartAudio CLI commands:
vtx_band = #
Allowed range: 0 – 5
vtx_channel = #
Allowed range: 1 – 8
vtx_power = #
Allowed range: 0 – 5
vtx_low_power_disarm = ON|OFF
Sets the lowest power level while disarmed
vtx_freq = ####
Allowed range: 0 – 5999
For example, to configure the VTX to use band ‘R‘ and channel ‘3‘ (5737 MHz), enter the CLI and input:
set vtx_band = 5
set vtx_channel = 3
save
Lowest power while disarmed
Setting the vtx_low_power_disarm = ON can be usefull for the aircrafts with the higher power output VTX. This setting lowers the VTX power output to the minimal (25mW) while the aircraft is disarmed (on the ground) thus preventing the overheating the VTX and also reduces the power consumption from the battery. Typical scenario is long range aircraft with a GPS unit and high power output VTX and has to wait for a couple of minutes to get the GPS satellites fixed.
Note: this setting does not affect the power output in the case of the disarm after receiver failsafe has occurred. In this case the output power will not be lowered.
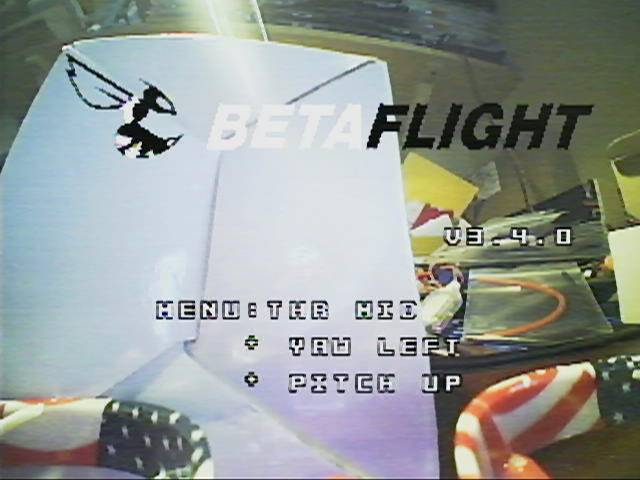
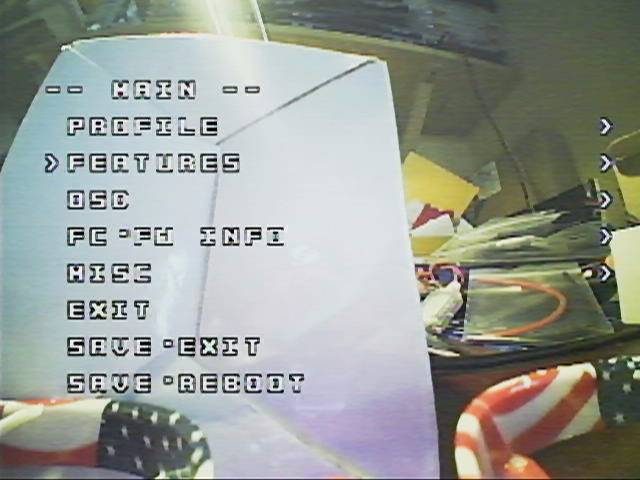
Betaflight OSD
VTX settings can be controlled from Betaflight OSD. To enter the Menu, you need to move the Throttle to middle, Yaw to the Left and push the Pitch stick Up, while the quadcopter is disarmed.
Select Features menu.
Then VTX SA (Smart Audio).
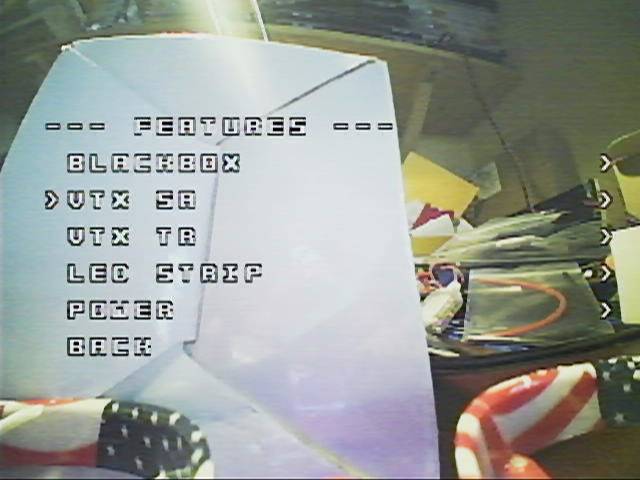
You can change the Band, Channel, Power output level in the menu.
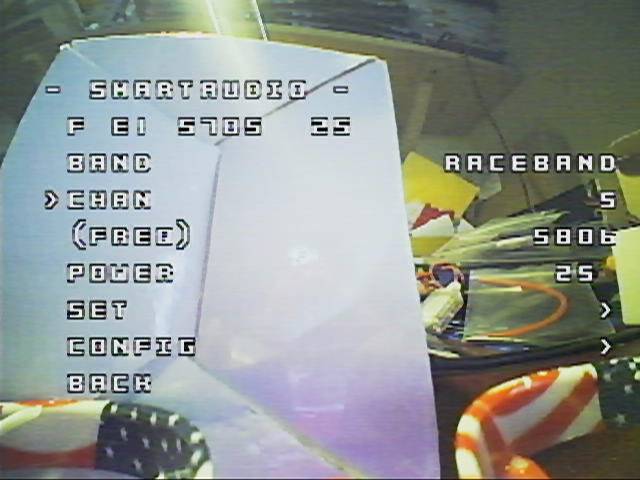
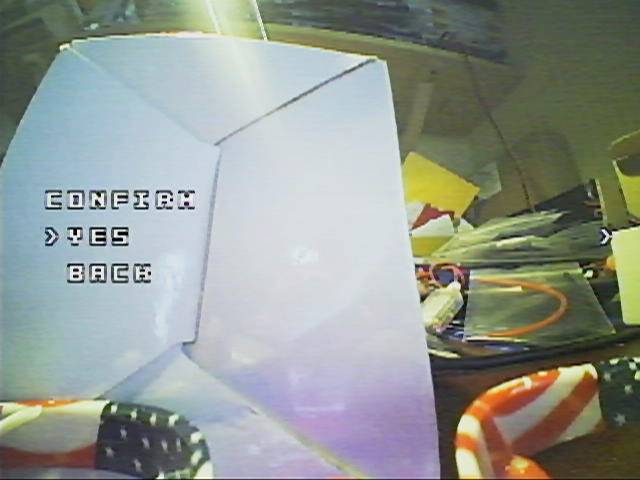
Configuration changes are commited to the VTX only after the confirmation SET > YES.
VTX control via LUA script
In order to be able to control VTX via LUA script, you need to setup LUA script on your transmitter, running OpenTX and you need to have Smart Port telemetry working in your quad.
We will cover the setting up of the LUA scripts in the separate Guide.
History:
2018-11-02 Article created
2019-05-14 vtx_low_power_disarm added
-
 ESC Firmware Guide
In this concise overview, we’ll explore the evolution of ESC (Electronic Speed Controller) firmware,
ESC Firmware Guide
In this concise overview, we’ll explore the evolution of ESC (Electronic Speed Controller) firmware, -
 List of brushless whoop/toothpick flight controllers
This is the list of brushless tiny whoop/toothpick style flight controllers with brief description
List of brushless whoop/toothpick flight controllers
This is the list of brushless tiny whoop/toothpick style flight controllers with brief description
Why does a push sound appear on the VTX image after setting up Smart Audio?
When turned off, the sound disappears
Interesting. What VTX do you have? Does it share the input for audio and SmartAudio?