Review: Jumper T-Lite V2 ELRS radio
Jumper has released the new version T-Lite V2 of the popular compact size T-Lite radio. Let’s take a look at it closer and see what’s changed.
Page Contents for Review: Jumper T-Lite V2 ELRS radio
Features and specifications
- EdgeTx / OpenTX Firmware
- Hall Sensor Gimbals
- Two options: internal CC2500 JP4IN1 Multi-Protocol Module or internal ELRS Module
- Jumper AION ELRS, TBS Crossfire Nano & ImmersionRC Ghost module support
- USB-C Charging
- Voice & Vibration feedback
- Frequency: 2.4GHz ISM
- JP4IN1 Version RF Chipsets:
- A7105 for Flysky,Hubsan,AFHDS2A etc
- CC2500 for Frsky, Futaba SFHSS, Hitec, Radiolink, Esky etc
- CYRF6936 for DSM / DSMX,Walkera Devo,Wfly etc
- NRF24L01 for HISKY,Syma,ASSAN etc
- ELRS version:
- RF Output Power: 10mw/25mW/50mW/100mW/(
150mW) - Packet Refresh Rate: 25Hz/50Hz/100Hz/250Hz/500Hz/1000Hz
- RF Output Power: 10mw/25mW/50mW/100mW/(
- Full-size adjustable hall sensor gimbals
- 1.3 ” LCD screen, resolution 128*64
- OpenTX/EdgeTX native support
- Voice and Vibration function
- Input Voltage: DC 3.5-4.2V
- Battery: 1×18650 Li-ion cell (Battery not included, needs button top 18650 battery as flat end batteries are too short)
- USB Type-C internal charging
- Support External module including Full Power Jumper AION ExpressLRS External Module and TBS Crossfire module
- 16 Channels
- Micro SD Card included
- Link Range: >5KM
- Size: 166x106x56mm
- Weight: 207g
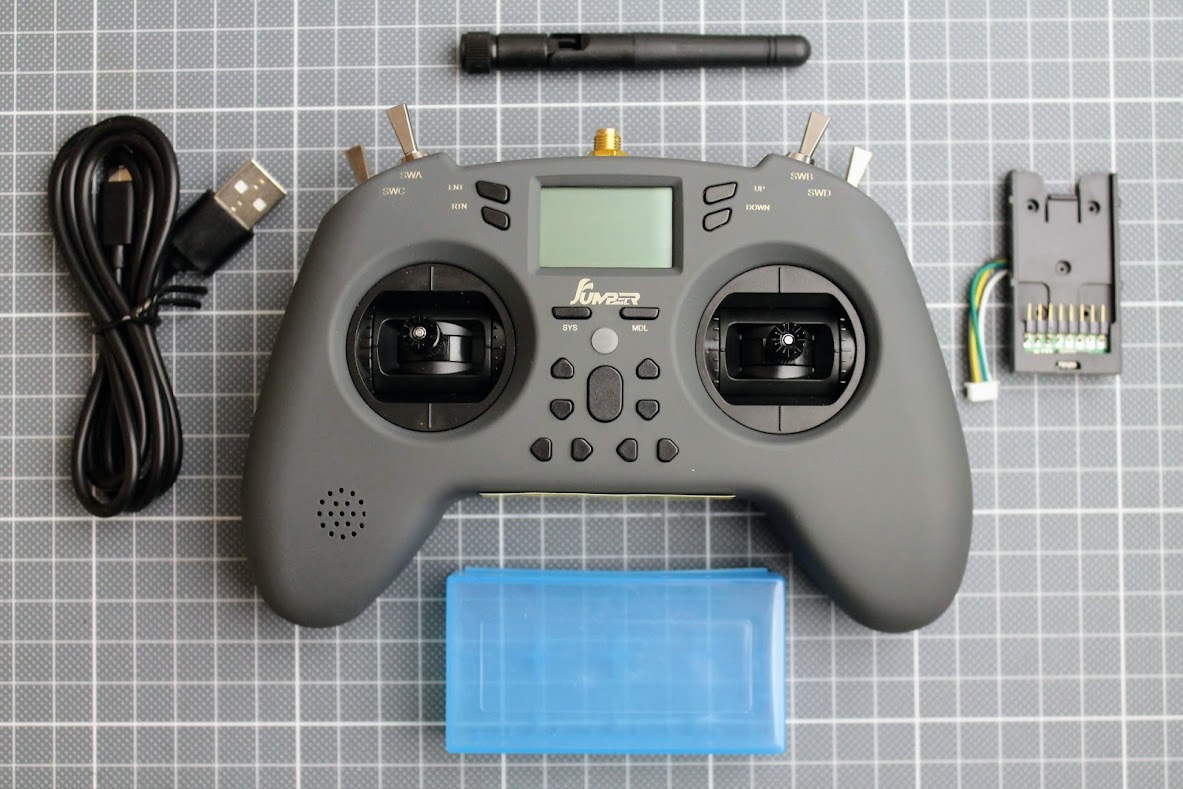
Package contents
You will get the T-Lite V2 radio, Antenna, USB Type-C cable, external nano sized module bay and a case for two 18650 batteries.
T-Lite V2 differences from V1
- The power supply circuit improved
- The main MCU was changed
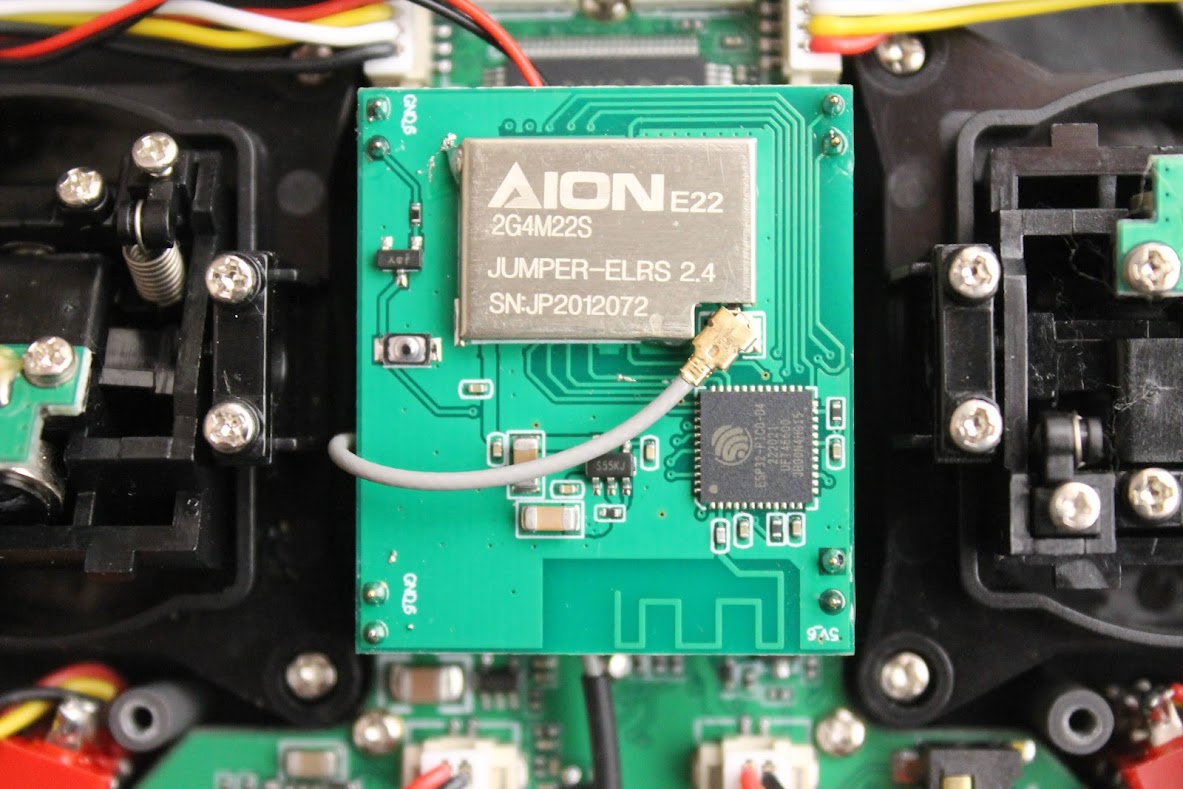
- The internal ELRS module option
- Power led indicator changed
- Slightly brighter color
More on each of the changes are described below
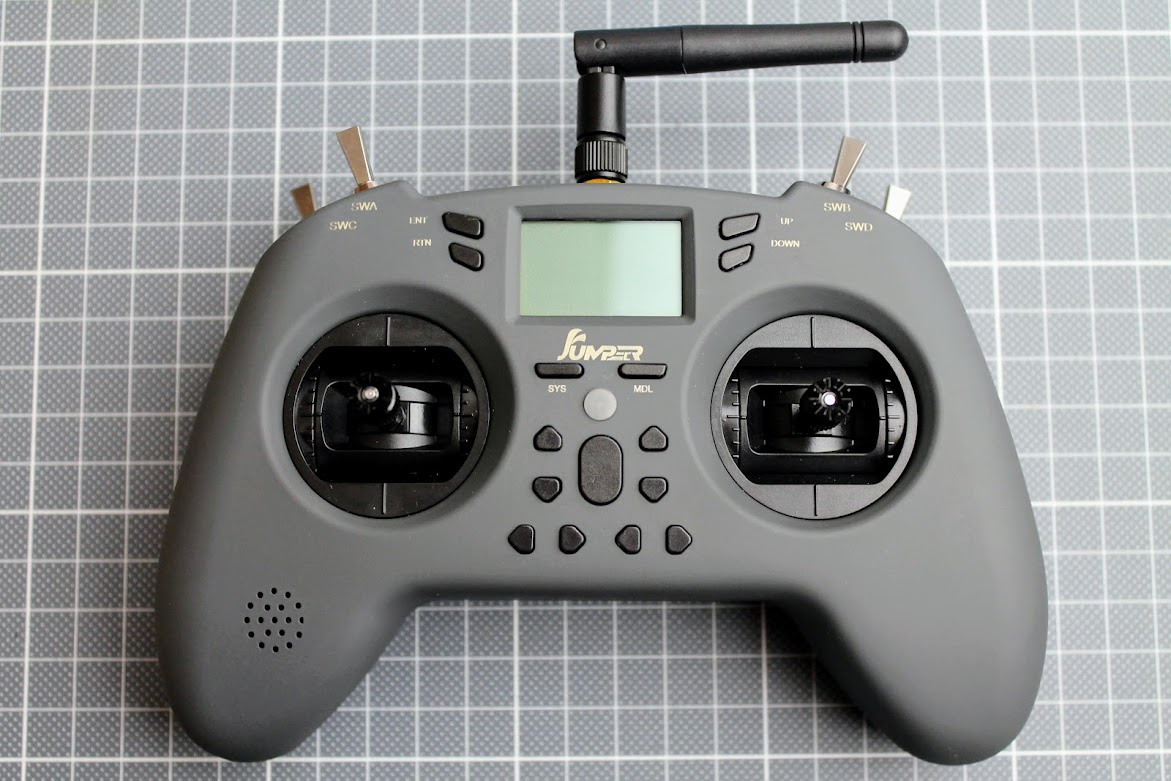
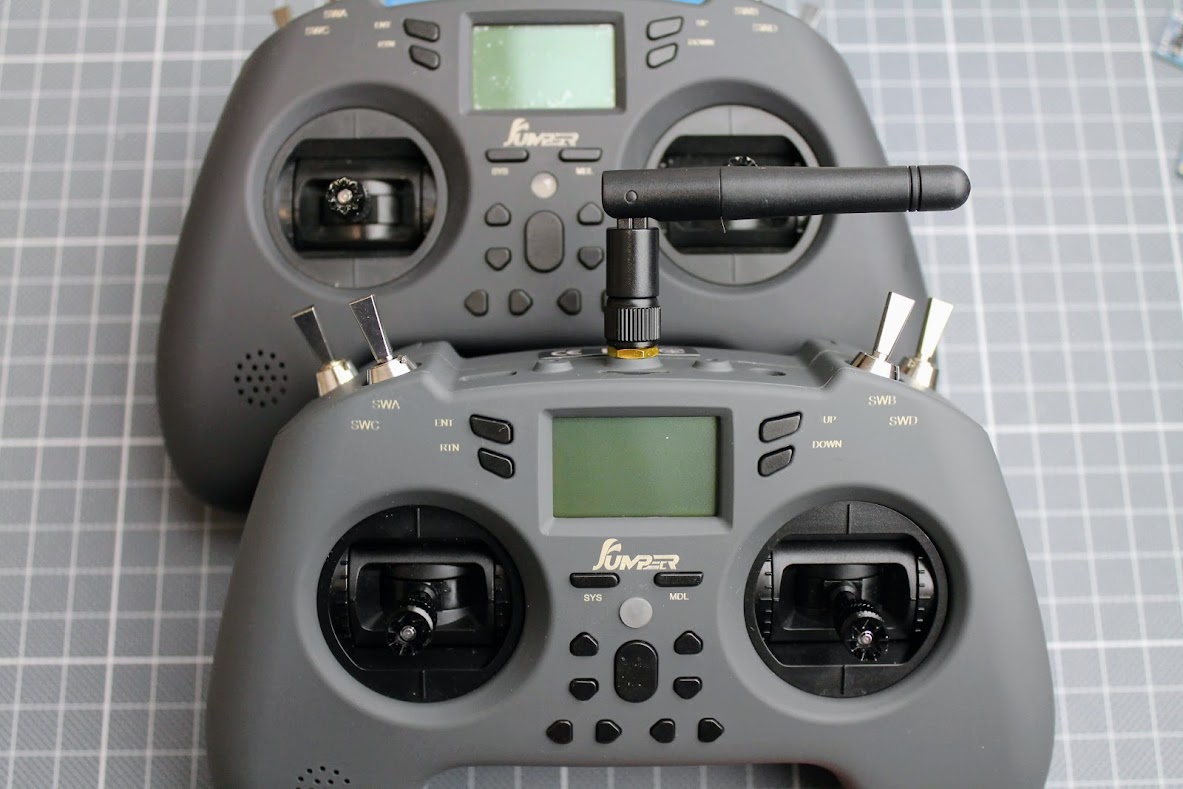
Closer look
Radio hasn’t changed much. The only visible changes – radio power indicator led was changed to the led with less brightness and the T-Lite V2 has slightly brighter gray color.
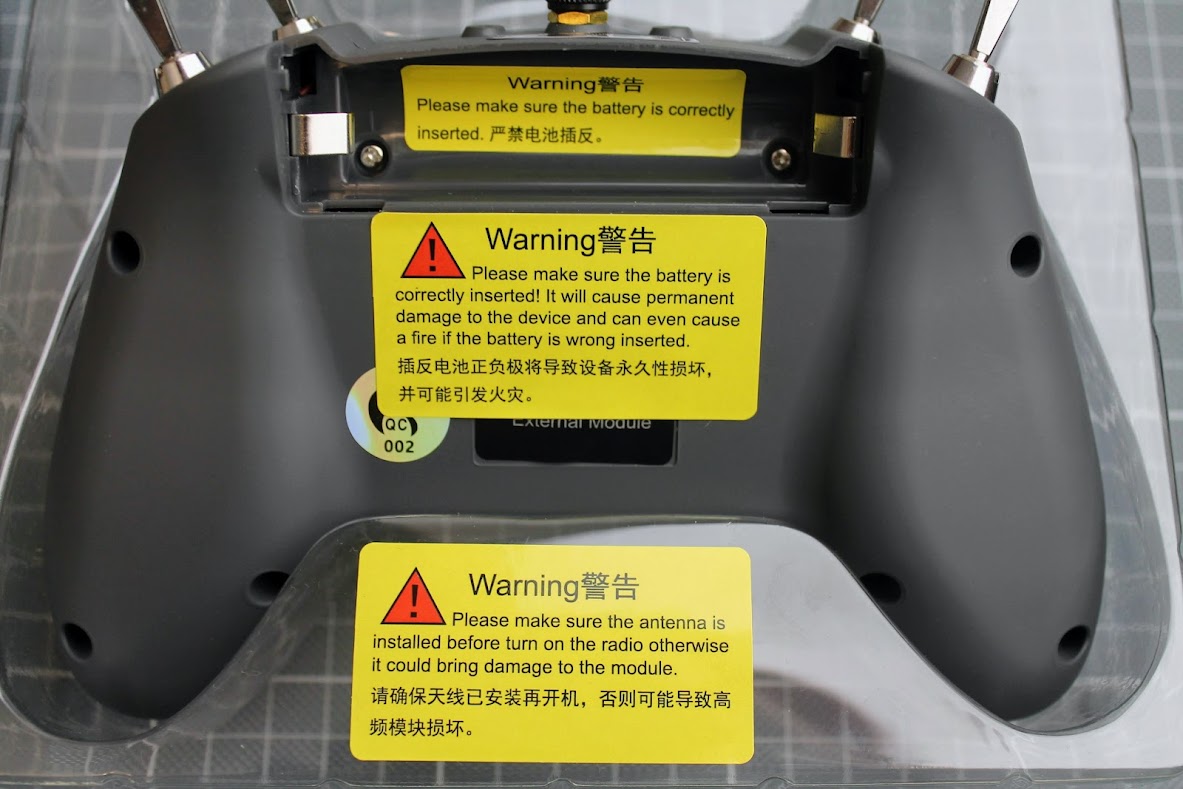
A lot of warnings on the stickers.
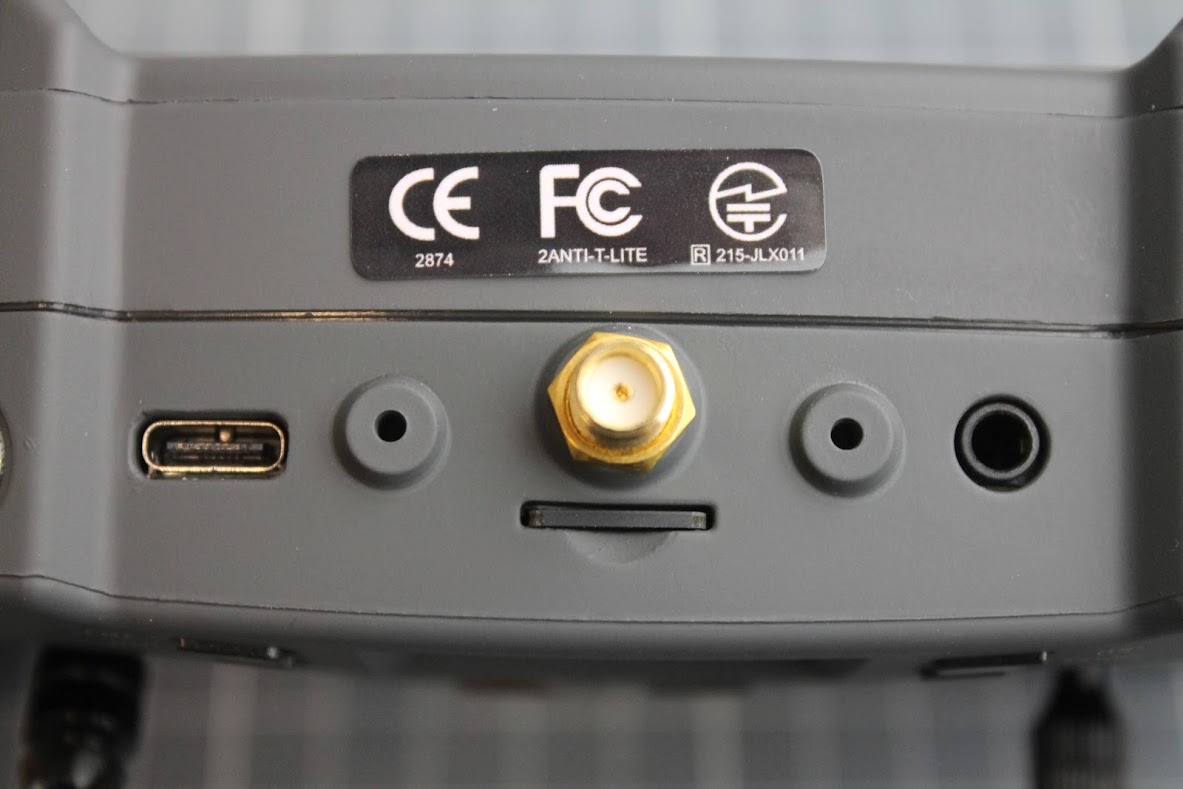
On the top side of the radio you will find the same USB Type-C and trainer sockets. Also the SD card slot with preinstalled SD Card and SMA type antenna connector.
Inside the radio
Inside the radio you will find the same hall effect gimbals, switches, nothing has changed except the main board.
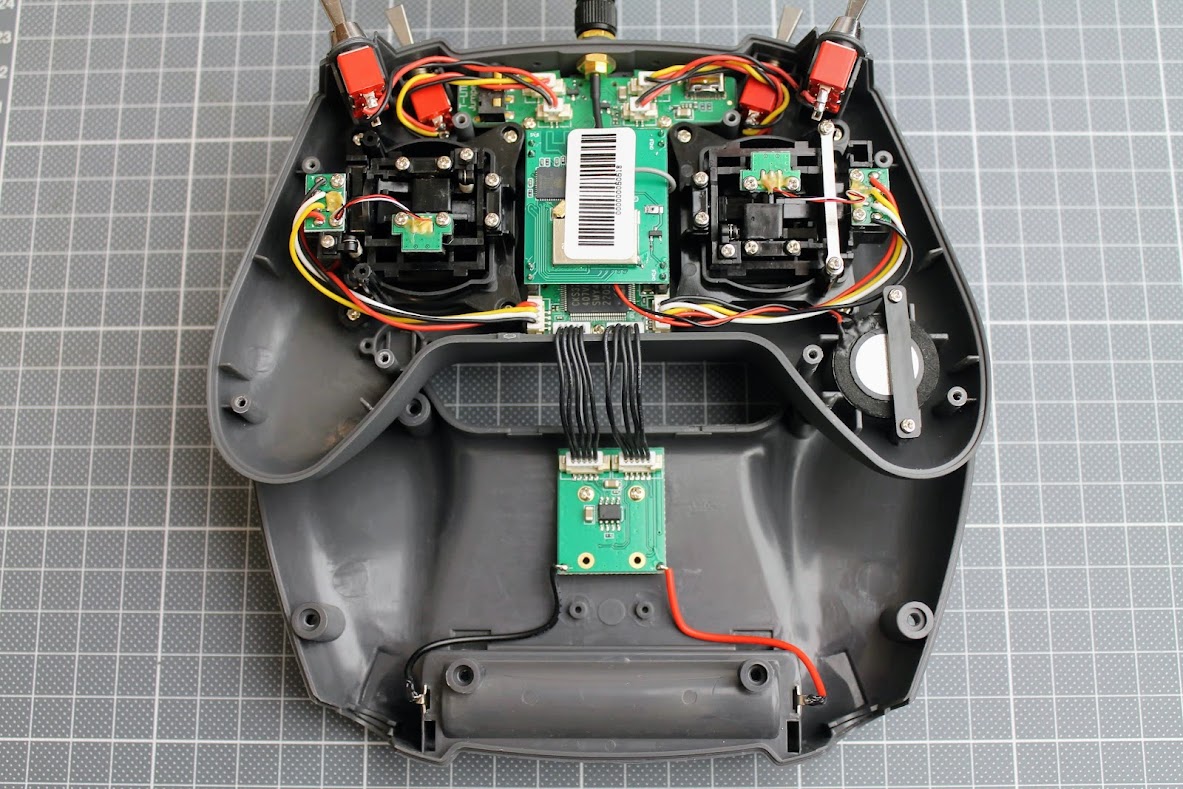
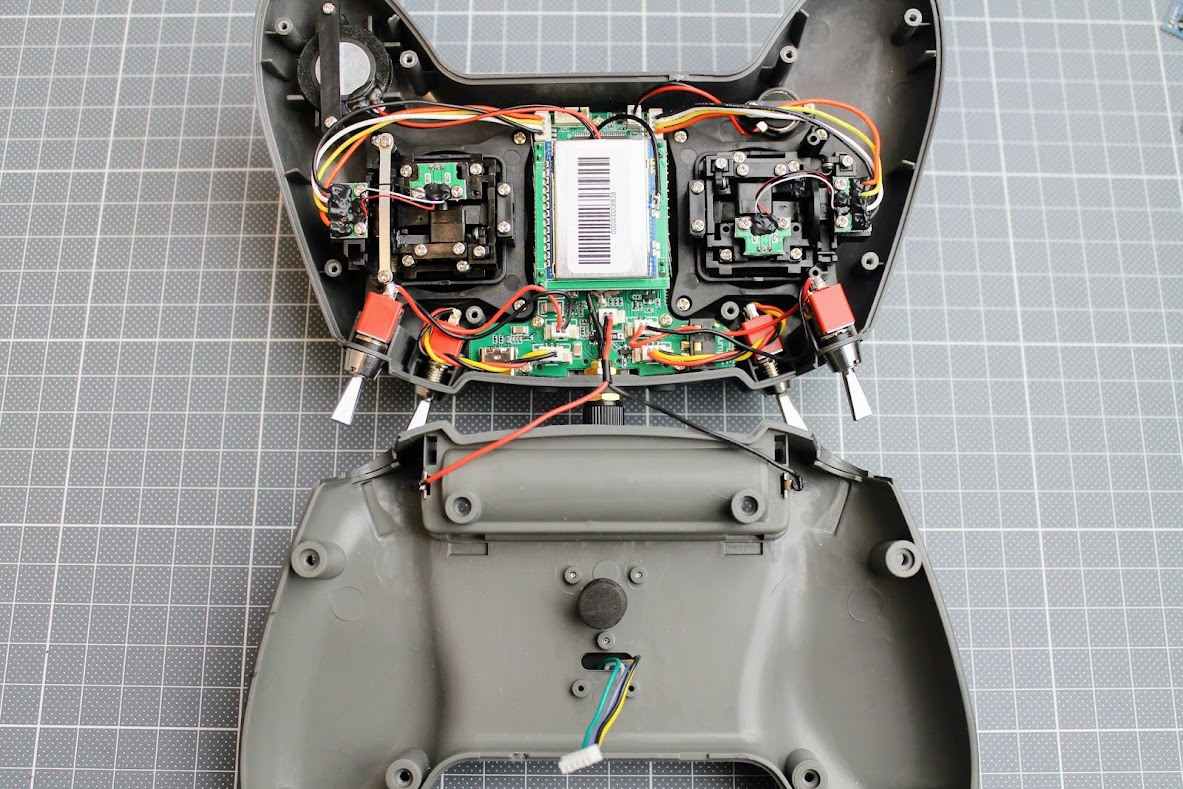
The main board was redesigned. The changes are mainly for the power supply part of the radio.
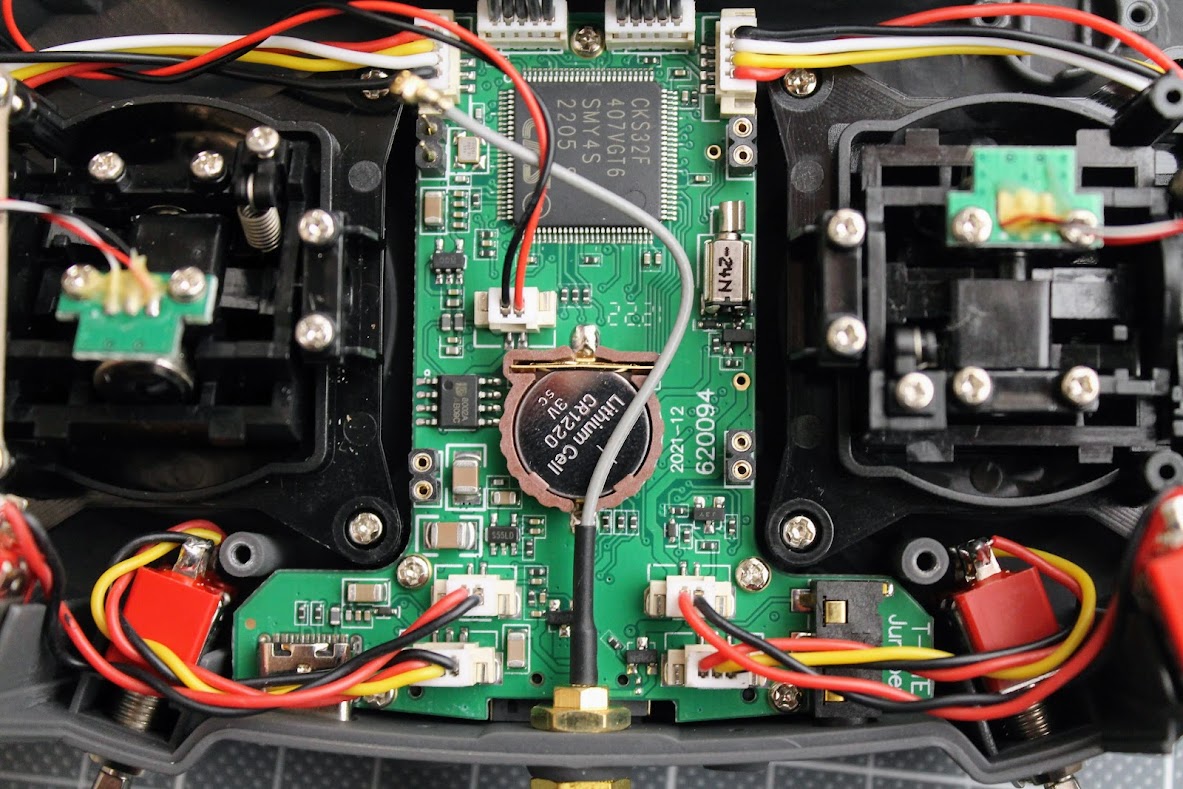
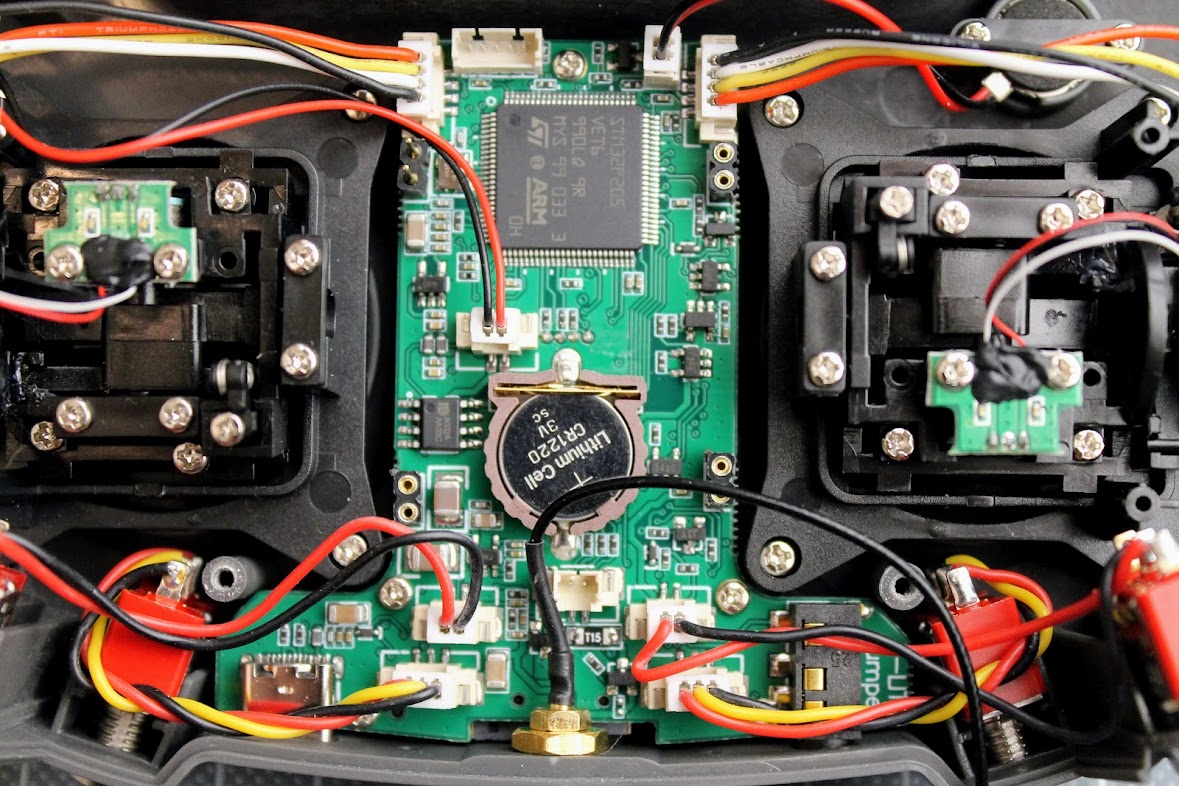
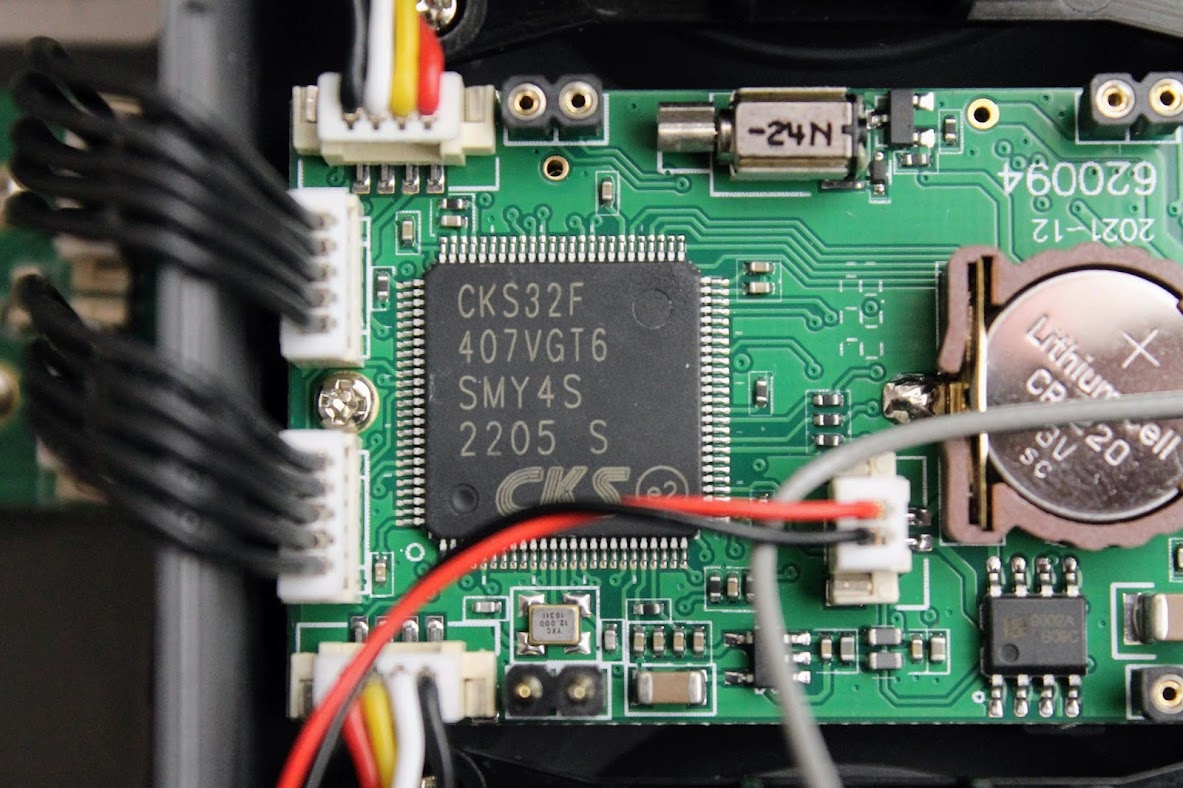
The main MCU was changed from STM32F205 to some cheaper cloned CKS32F407 MCU. Probably the chip shortage and skyrocketed prices influenced it. While it is cheaper MCU (cloned from STM32F407VGT6) it has ~25% faster clock speed and twice more the flash size (1 Mb compared to 512 Kb). So faster and bigger is better.
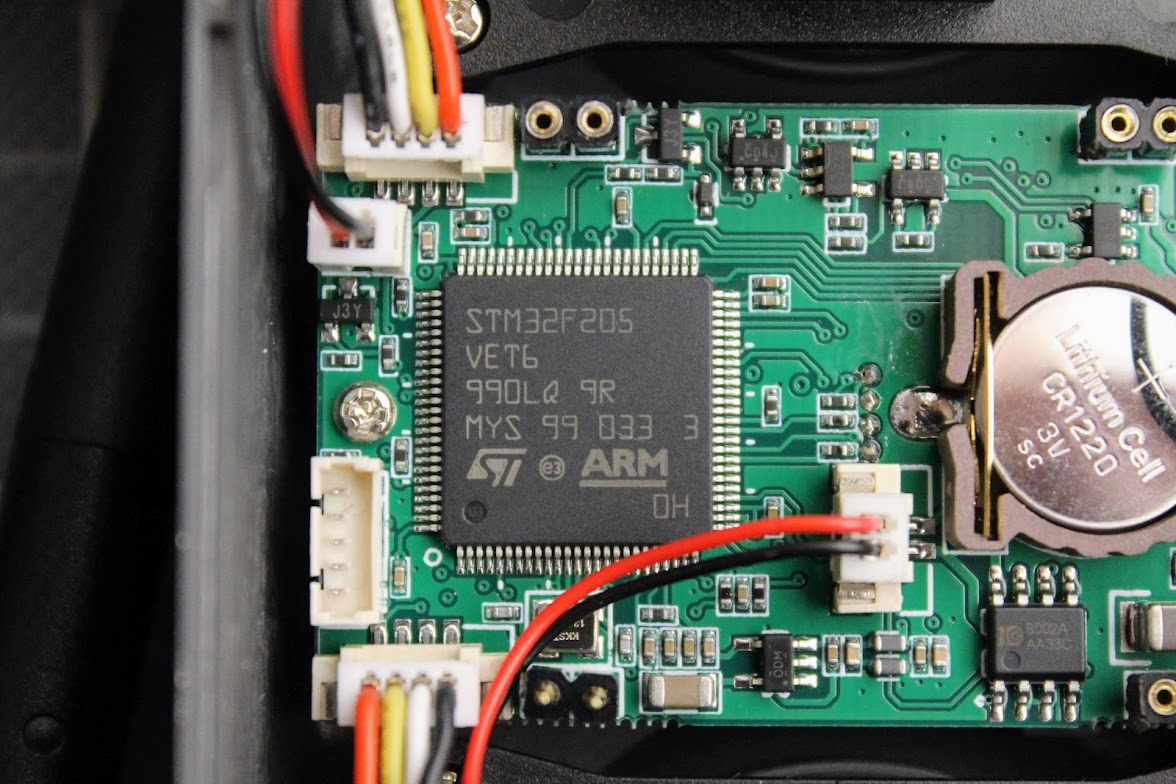
T-Lite V1
The lion battery charging circuit is located on the separate PCB which also populates the external module bay connector.
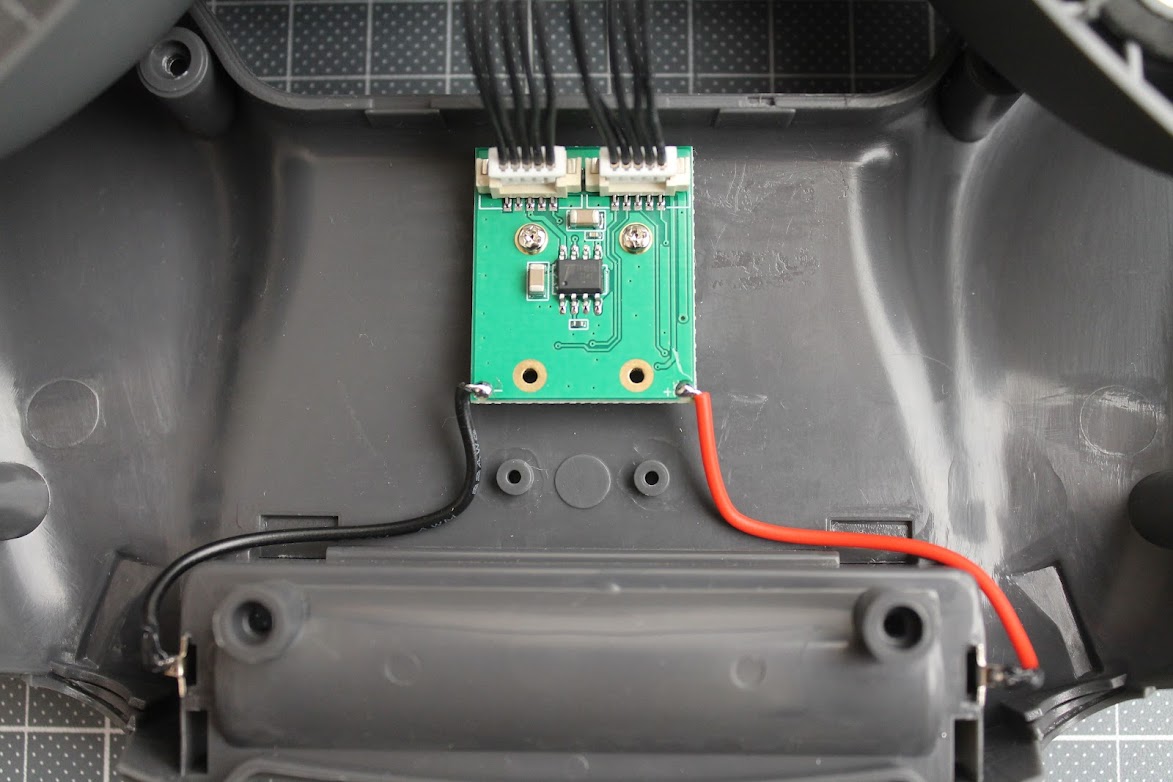
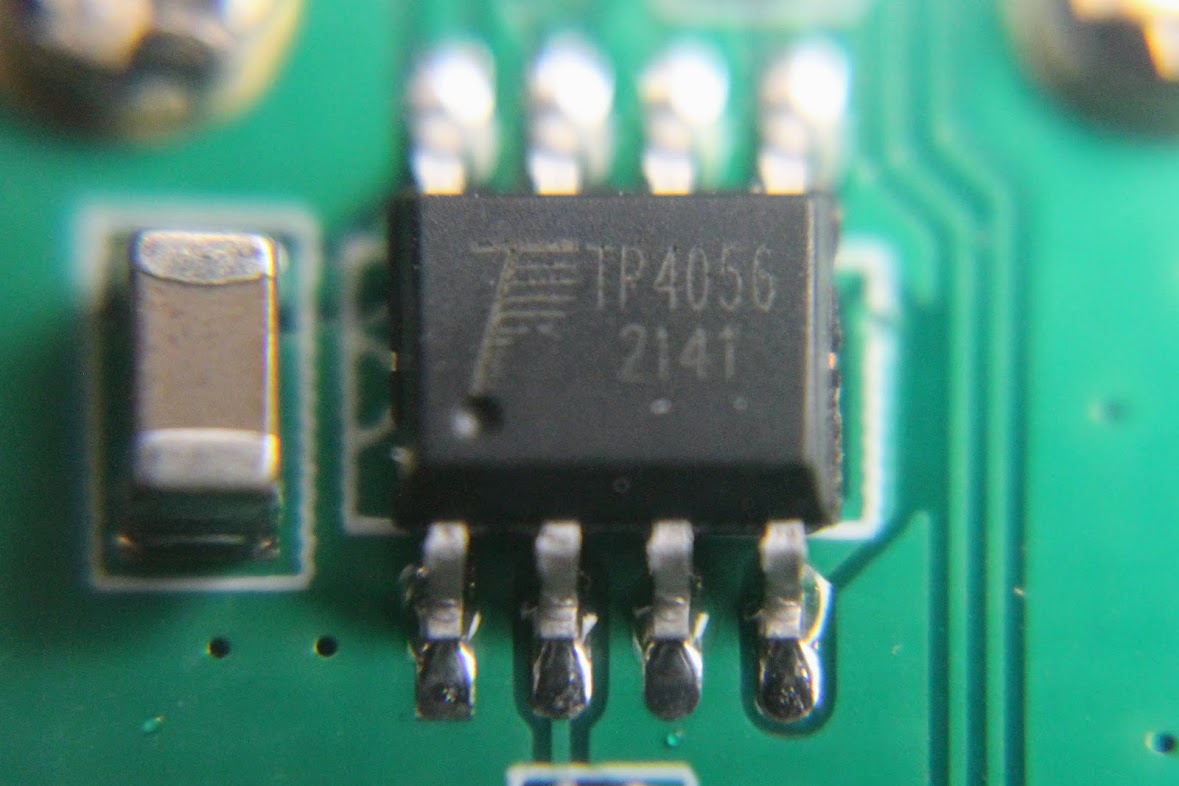
The battery charging process is controlled by simple and widely popular TP4056 IC.
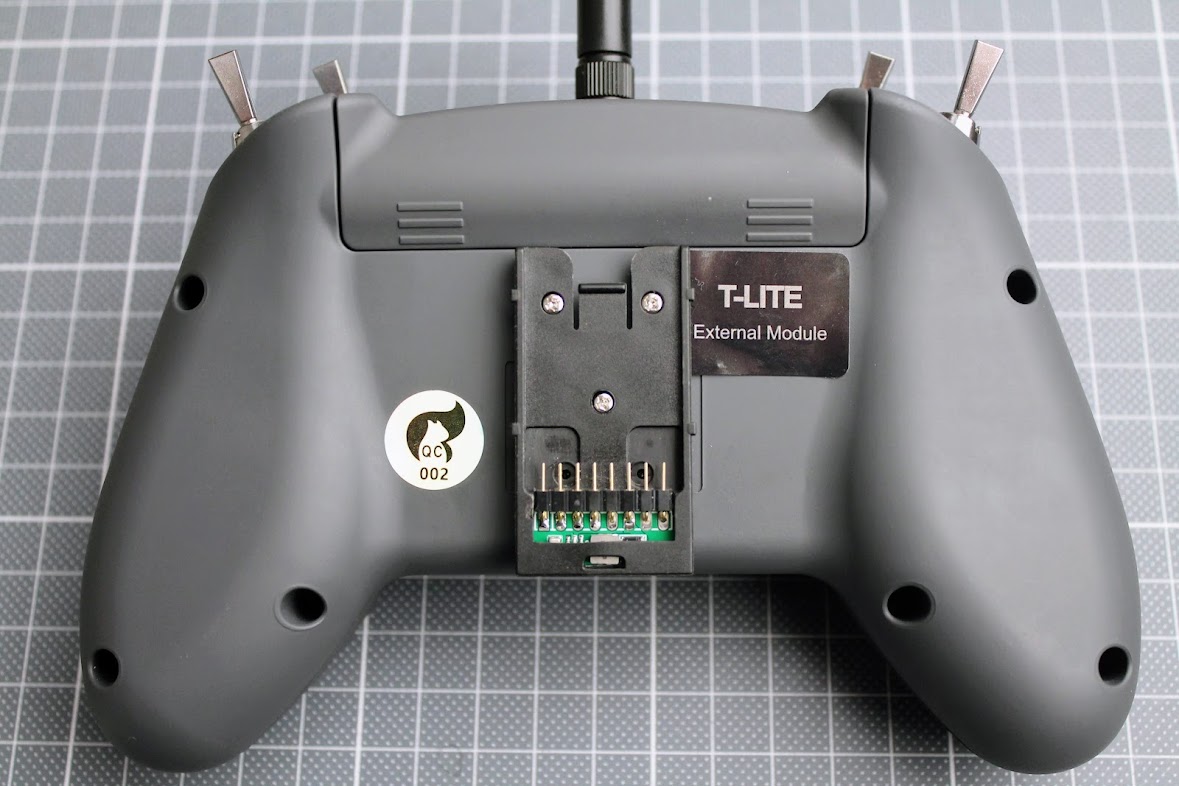
External module bay
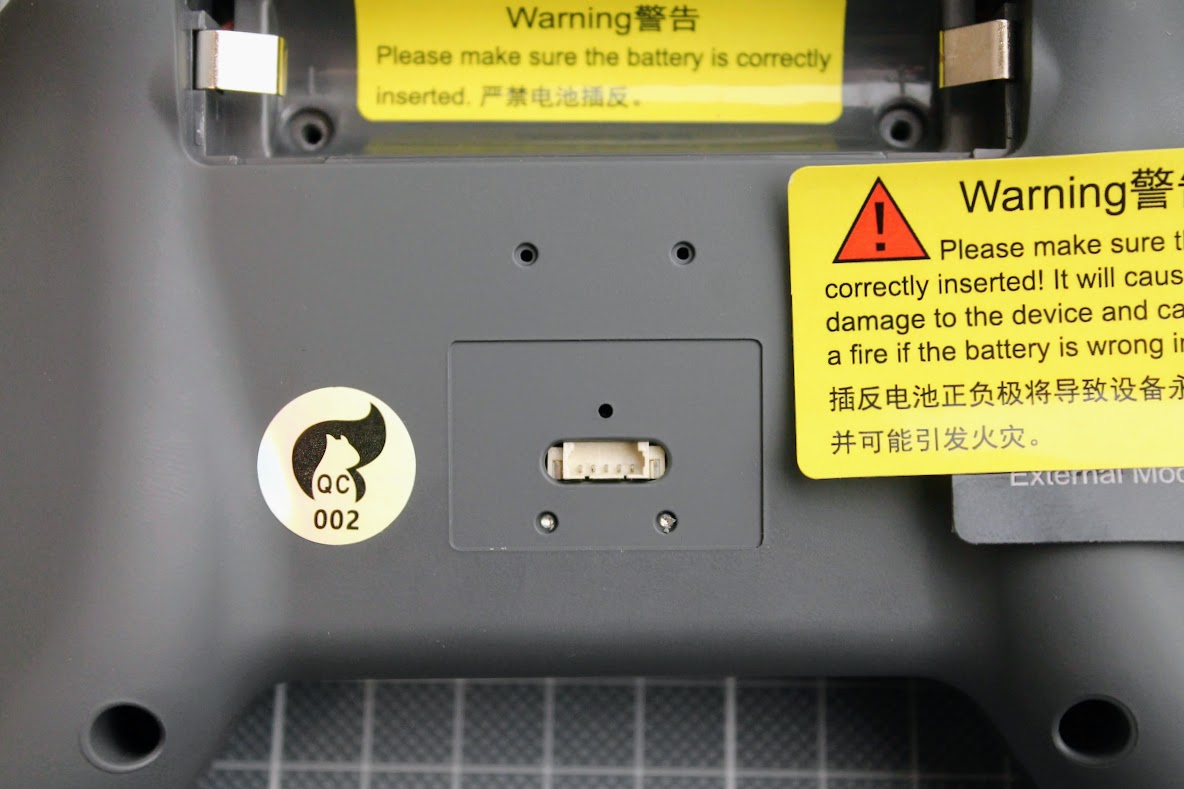
External module connector is hidden under the sticker on the back side of the radio. This connector was inaccessible from the outside in the T-Lite V1 and required opening the radio in order to connect the external module cable to the radio mainboard. You don’t need to to open the T-Lite V2 and it makes the installation of the external module bay much easier.
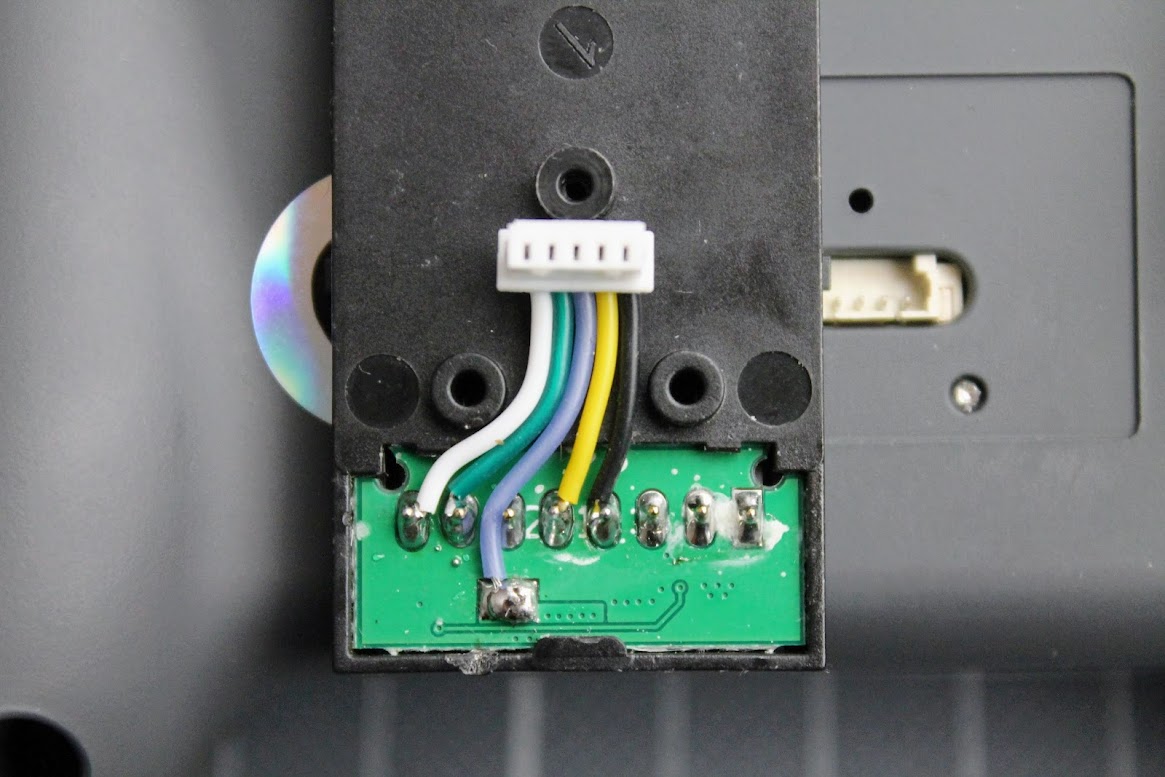
The external module bay connection cable lengh was ok for the T-Lite V1 radio, as the connector was inside the radio and mosto of the cable stays inside. However on the T-Lite V2 this connector cable is way too long and stick outside.
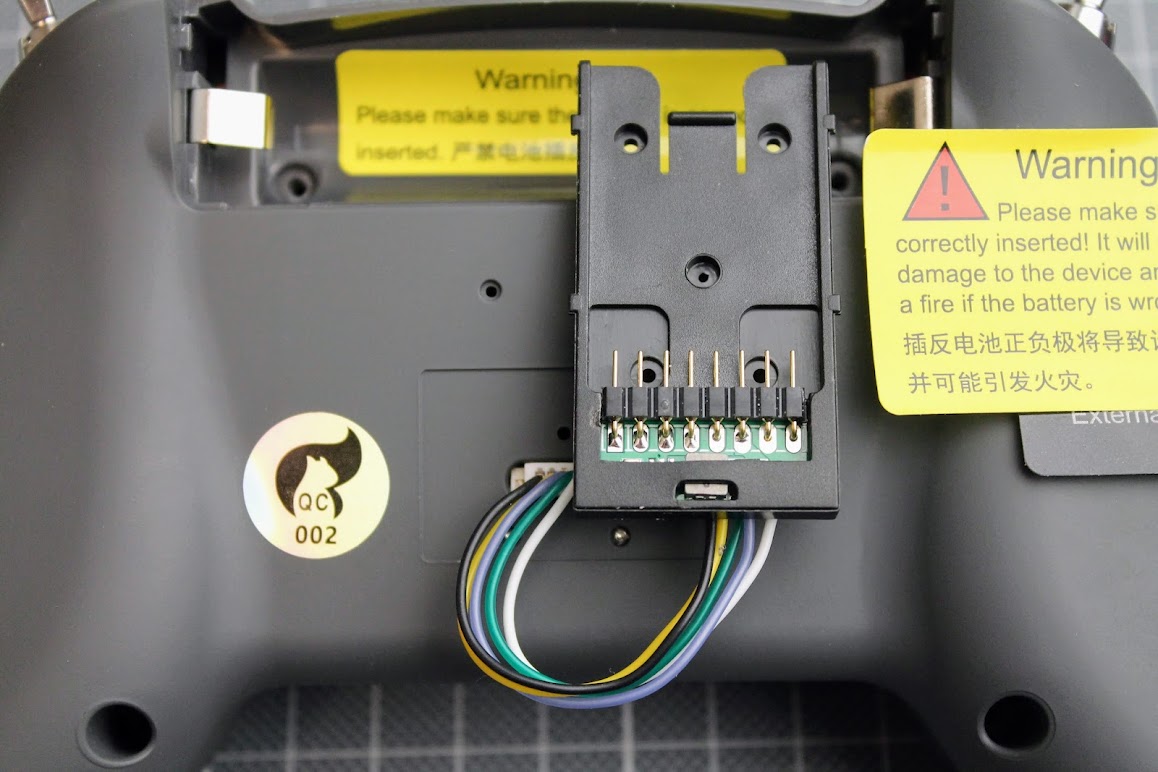
I had to trimm and solder the wires to make the cable shorter.
Clear and neat installation – no cables are seen.
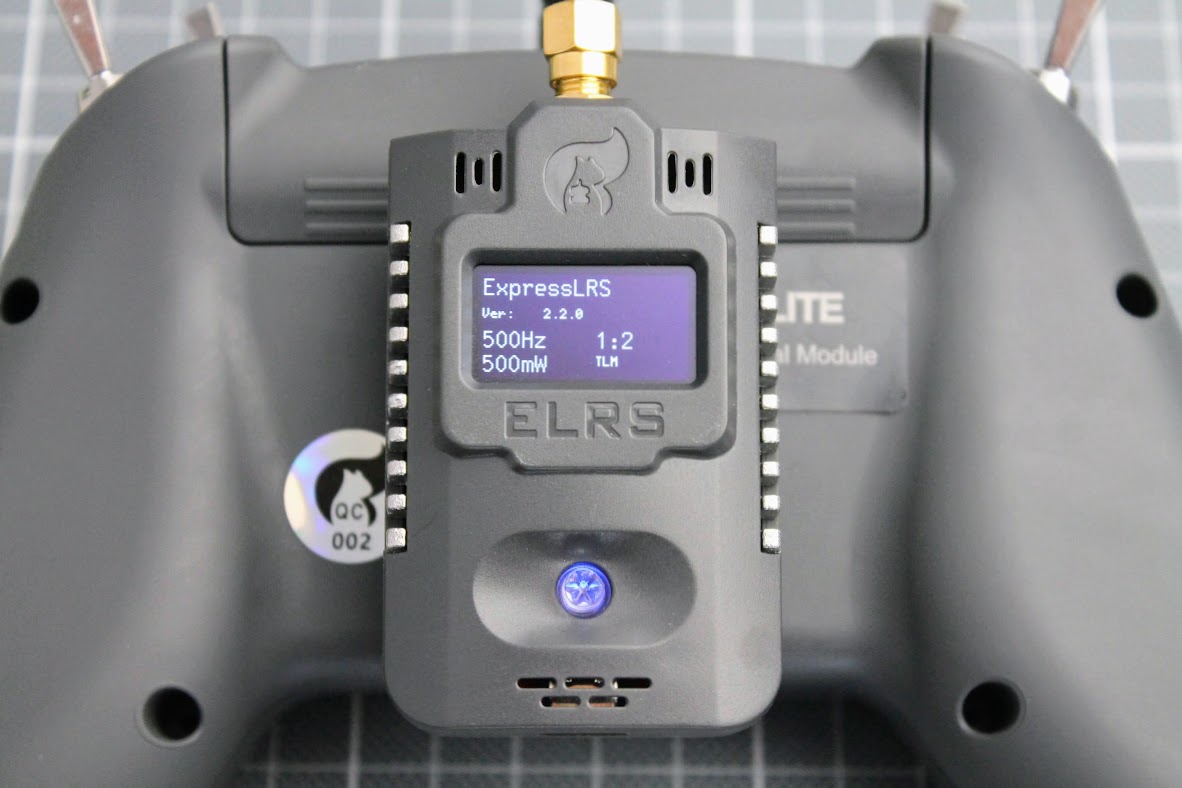
The power supply in the T-Lite V2 is capable of providing the enough current to the higher power external modules. Quick test with Jumper AION TX module on 500mW setting confirmed if – no problem with power supply. It was unable to use power hungry external TX modules on the T-Lite V1 – not enough current and modules were tending to shut down.
Battery notes
Jumper T-Lite radio is designed to use the lion 18650 batterie with the button top.
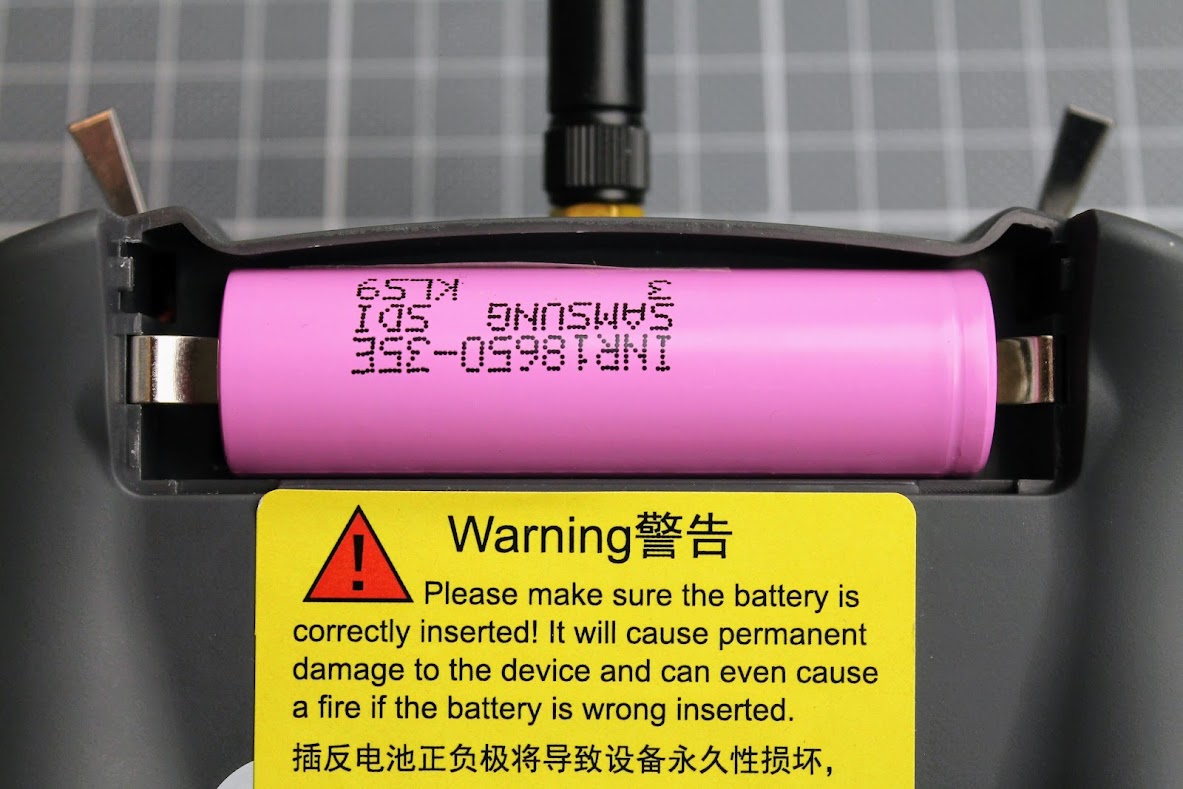
Simple hack enabling to use the batteries with flat ends is to bend the battery tabs inwards. After this small mod you can use the most common lion 18650 batteries with flat end.
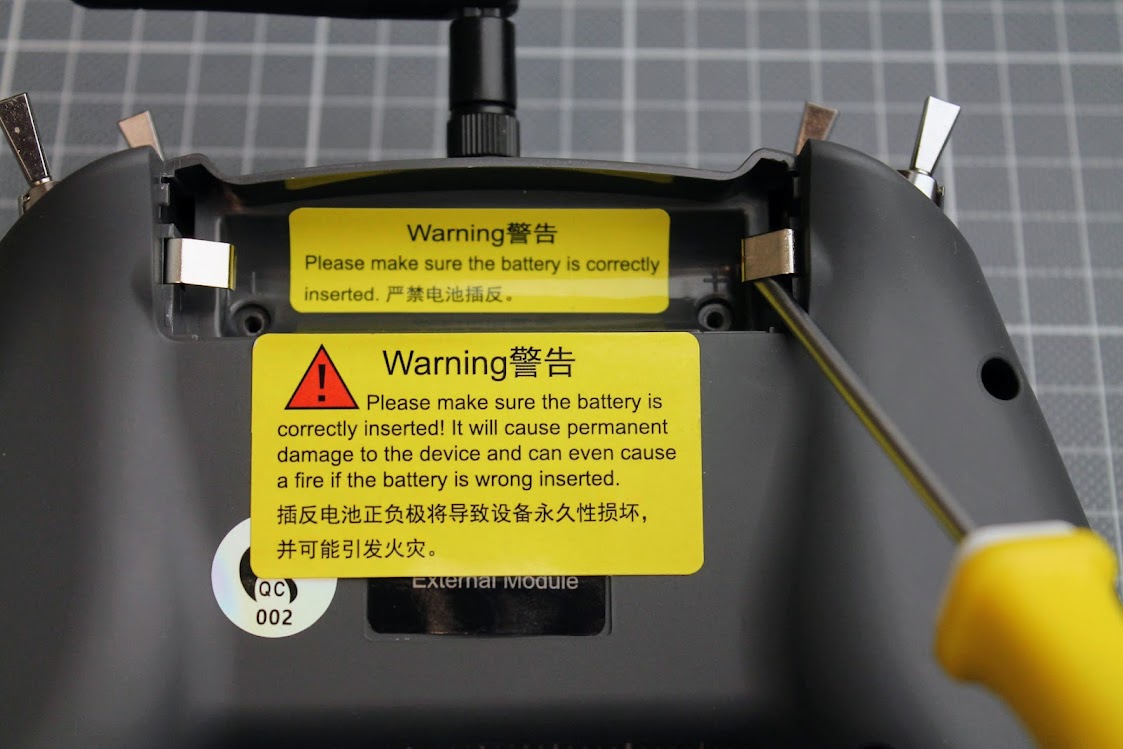
I also marked the polarity of the battery with a marker to make sure it is installed in correct way. There is a warning sticker saying that inserting the battery in reverse polarity will damage your devce. I have accidentally inserted the battery in reverse several times, however it did no harm to the T-Lite V2 radio.

RF power output test
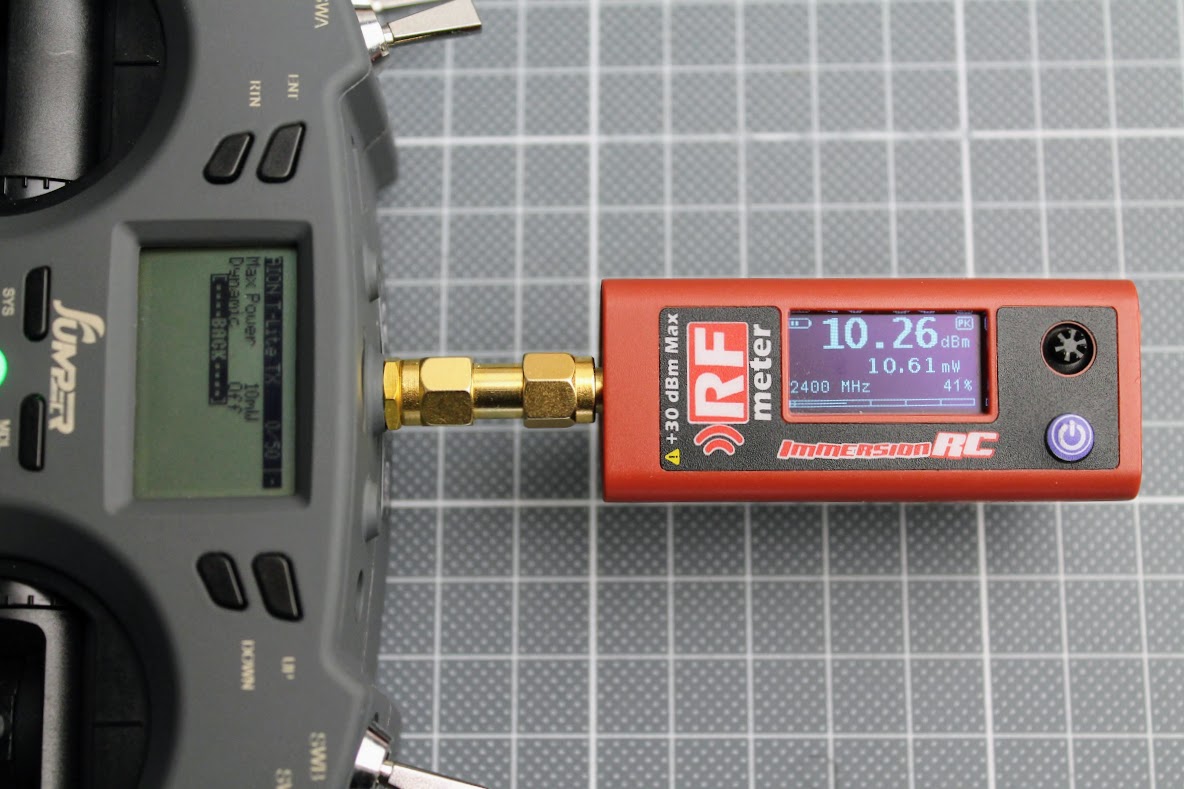
I have testedthe RF power output of the Jumper T-Lite V2 ELRS Radio. On the 10 mW setting (Dynamic power set to OFF) it outputs almost exactly the 10 mW
On the maximal 100mW power setting (Dynamic power set to OFF) radio outputs 124 mW.
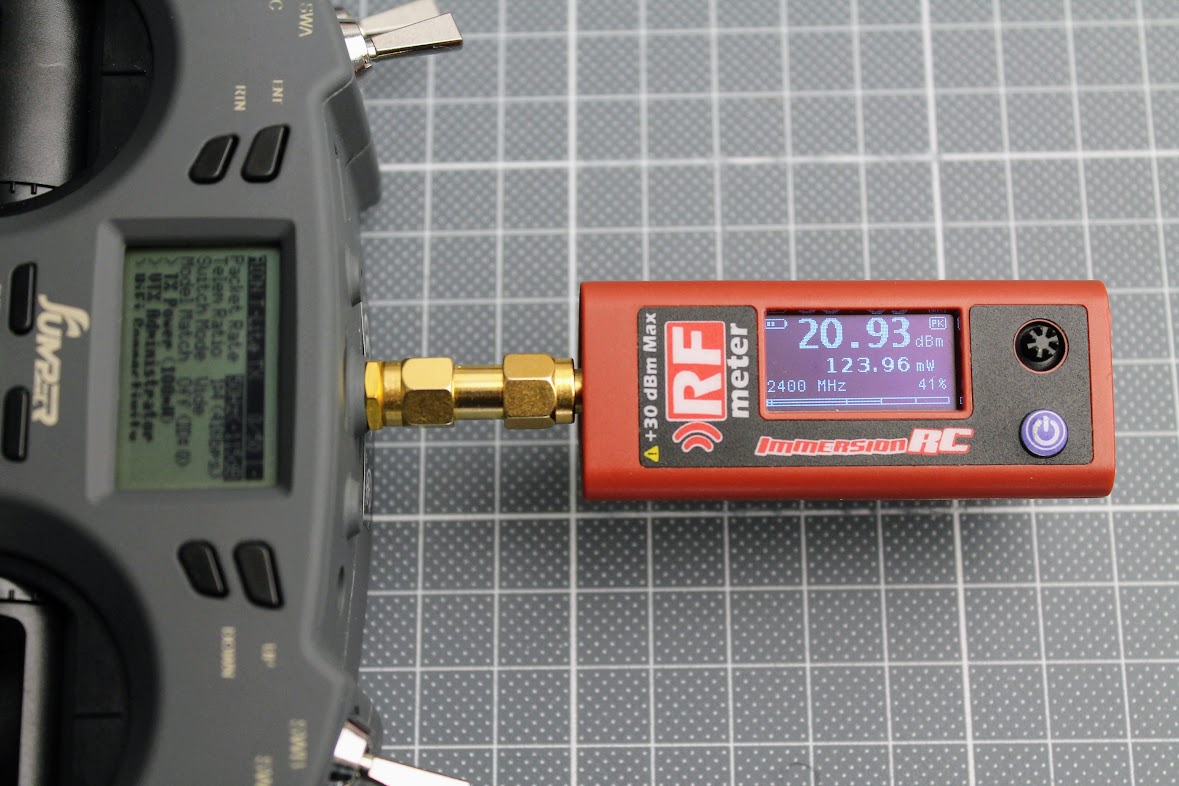
There is no 150 mW output setting in the ELRS firmware for the Jumper AION T-Lite ELRS module despite the specifications on the Jumper website.
T-Lite V2 internal ELRS module firmware upgrade
The T-Lite ExpressLRS TX module can be upgraded by WiFi, EdgeTX passthrough or UART. WiFi and EdgeTX passthrough are recommended as UART method requires additional hardware and is the most complicated one.
Upgrade by WiFi
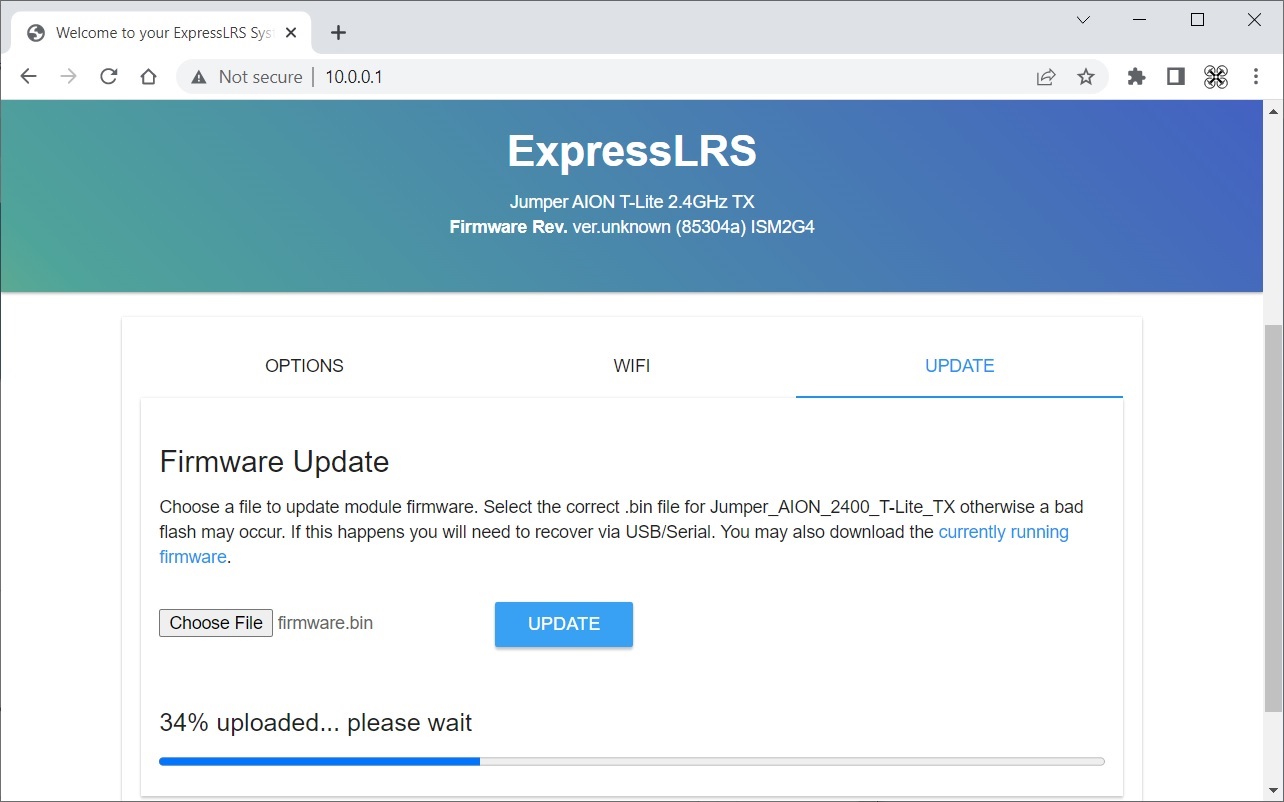
Go to ExpressLRS LUA script on the radio, select WiFi connectivity and enable WiFi. Then open the url http://10.0.0.1 on your web browser. Select the UPDATE tab and choose firmware file.
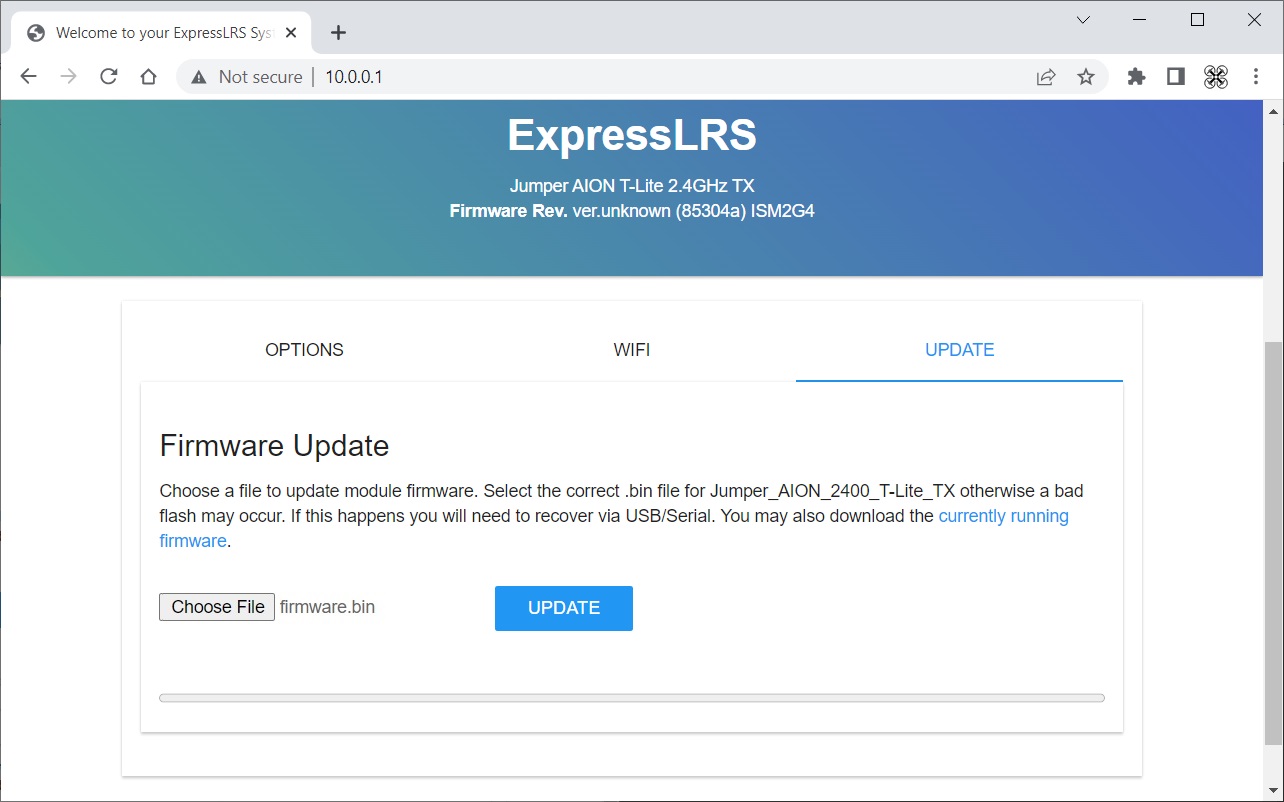
Hi the update button and wait for the firmware to update.
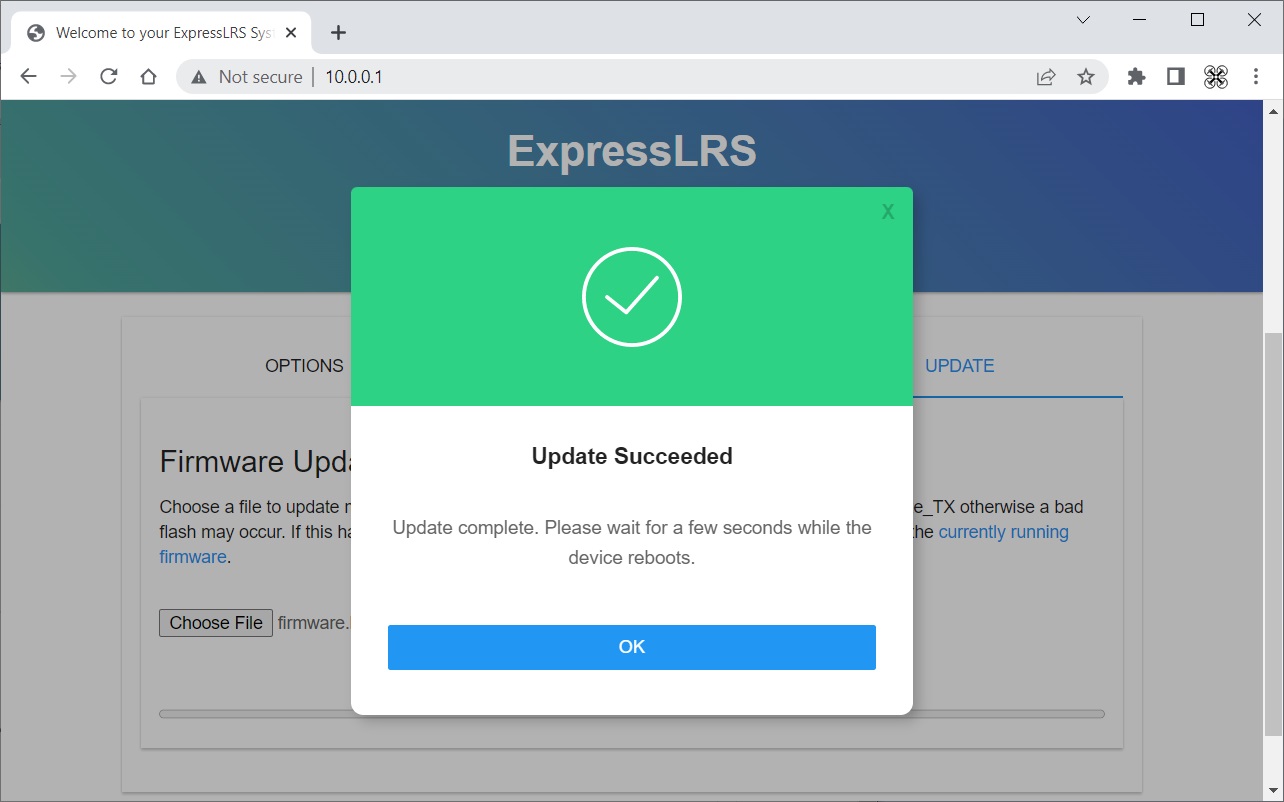
ExpressLRS firmware successfully updated!
Update by EdgeTX serial passthrough
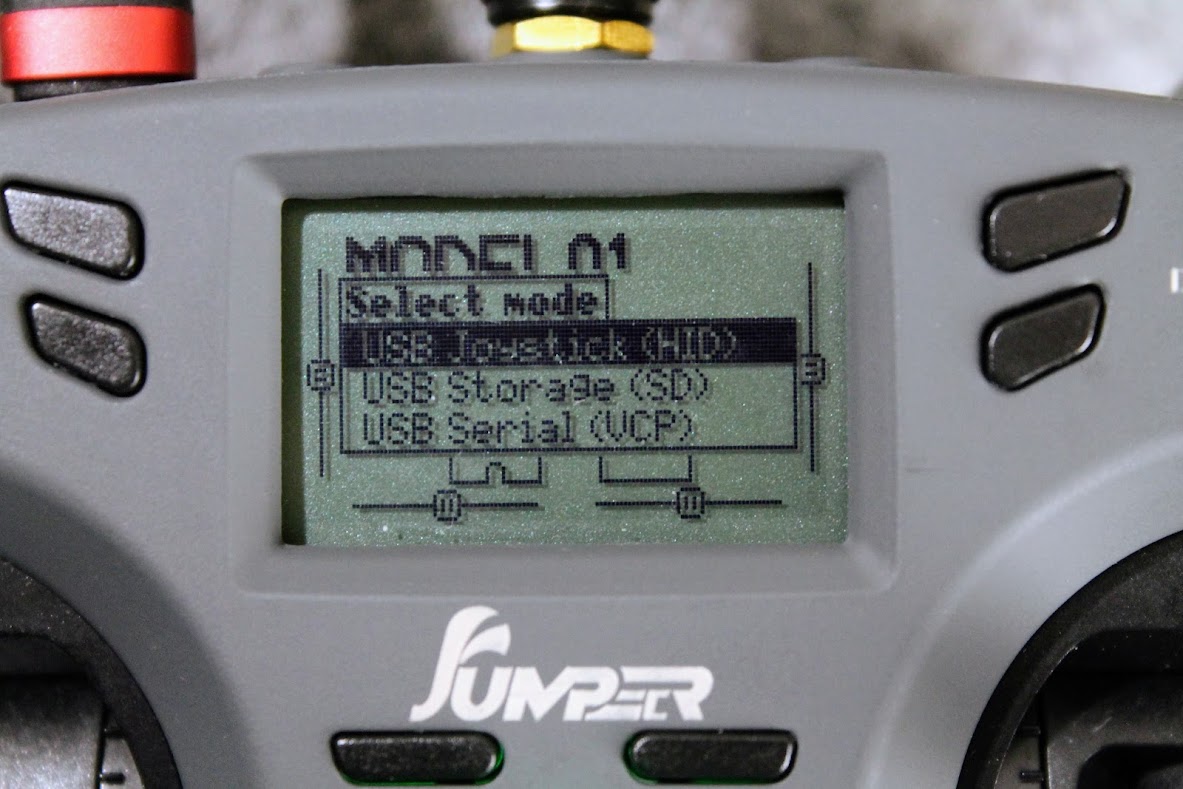
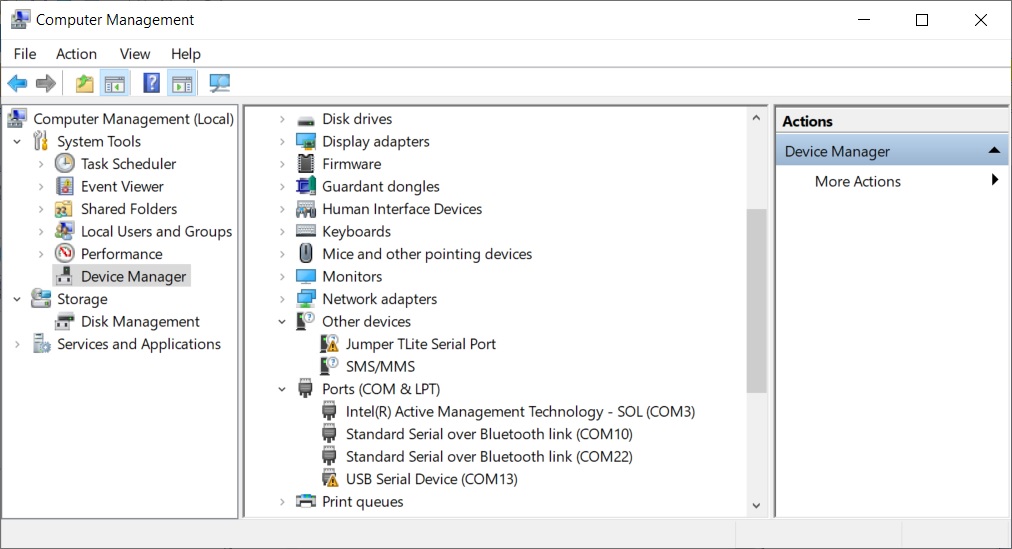
EdgeTX has ability to connect directly to the internal TX module. This is called EdgeTX serial passthrough. It can be enabled by connecting the radio to the PC by USB TypeC cable and selecting the “USB Serial (VCP)” option in the popup menu on the radio.
After this you should see the Serial port device in the Device manager, however it didn’t worked on my pc at first. All I could see were some Jumper TLite Serial Port and USB Serial Device with exclamation marks, meaning that these devices don’t work properly or the device drivers are incorrect.
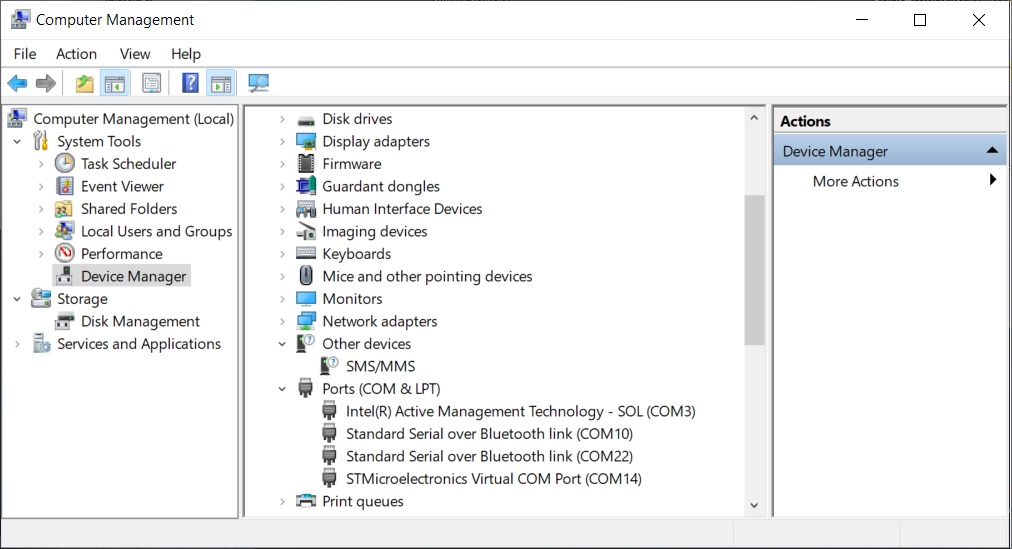
I downloaded the STM32 virtual serial port drivers from the STM32 MCU manufacturer website. Here is the link (or you can google it): https://www.st.com/en/development-tools/stsw-stm32102.html

After I installed the driver it worked like charm. Now I can see the STMicroelectronics Virtual COM Port device in my Device Manager.
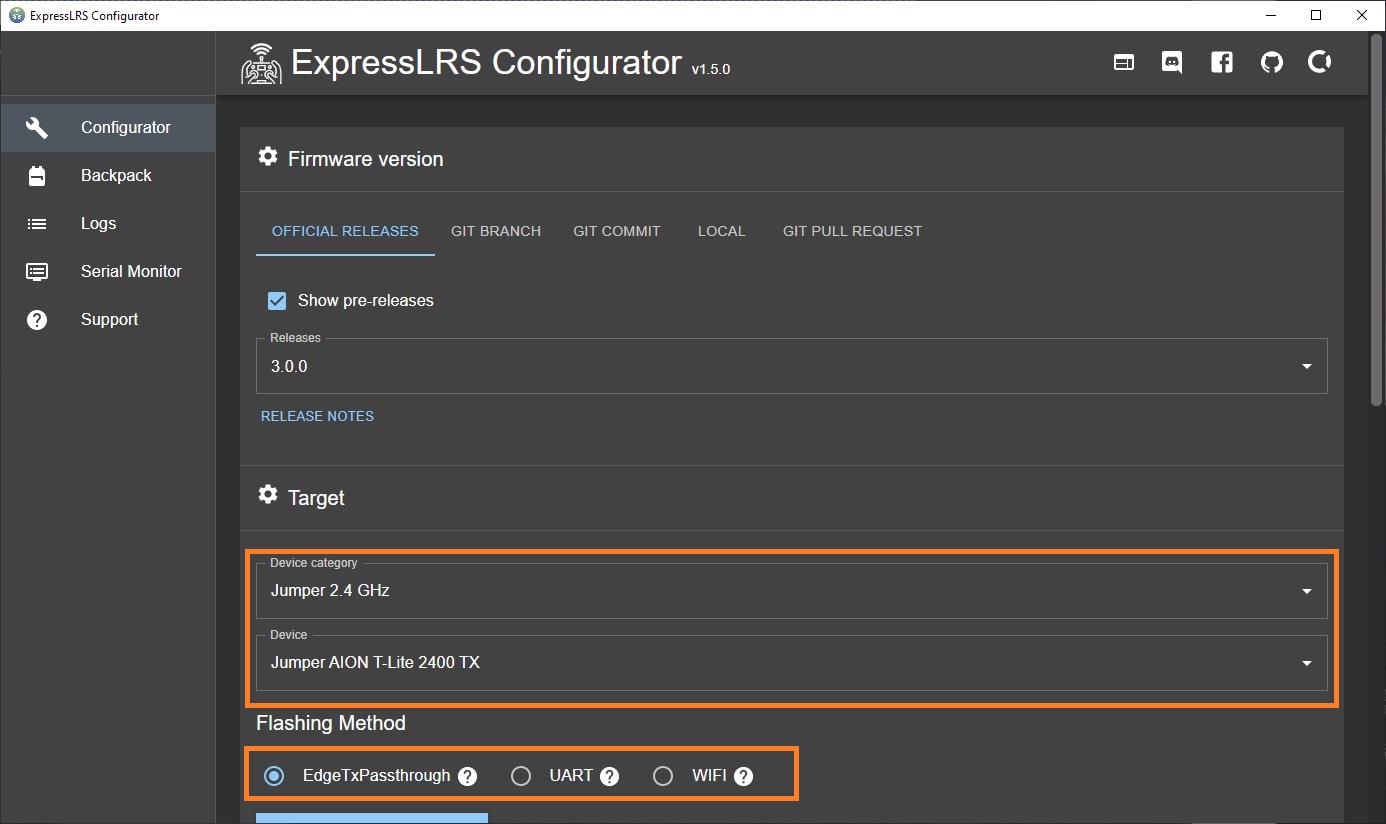
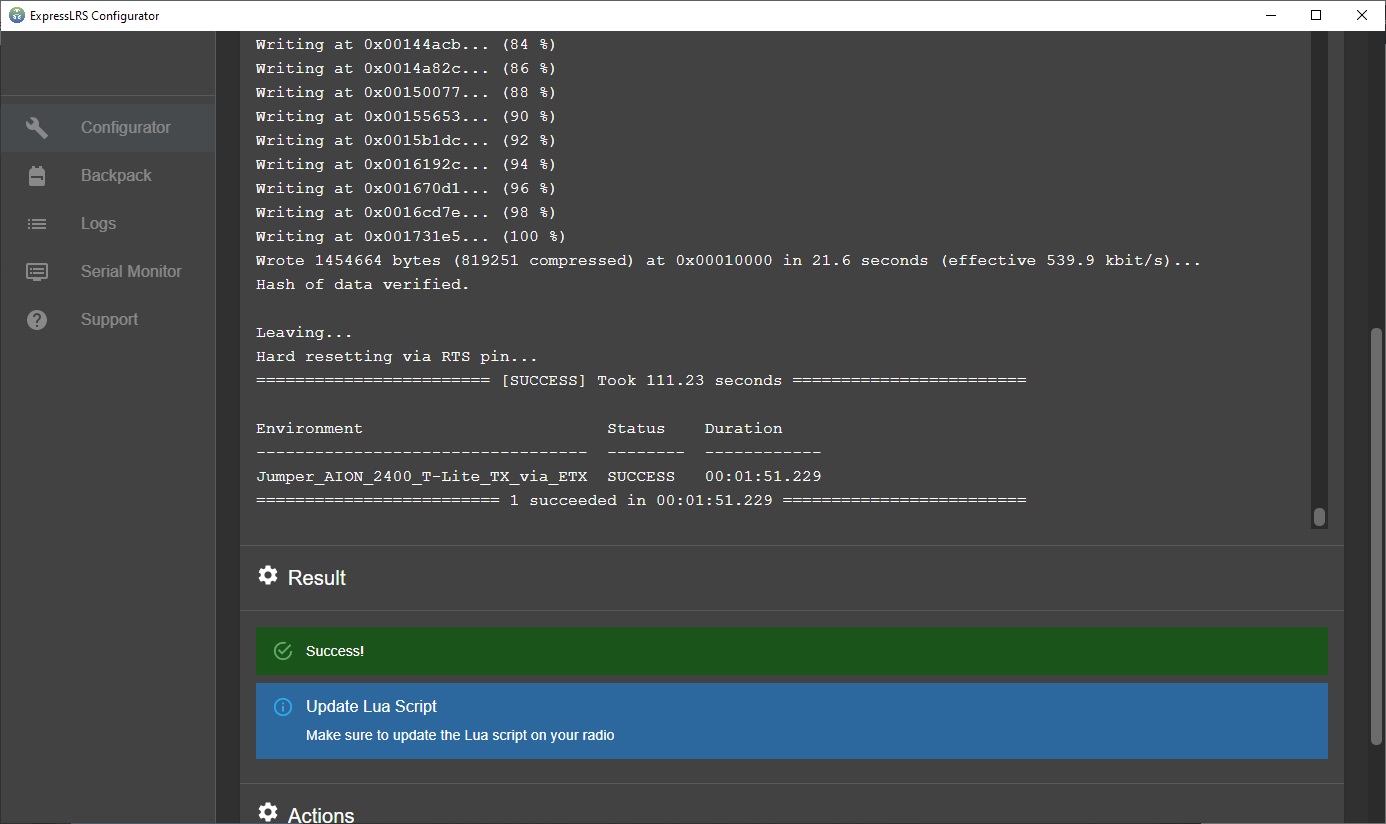
Once your T-Lite Radio EdgeTX serial passthrough is working, you can open the ExpressLRS Configurator and select the EdgeTxPassThrough as Flashing method.
Choose COMxx STMicroelectronics as serial port from the drop down below. Hit the BUILD & FLASH button and wait for the firmware to be updated.
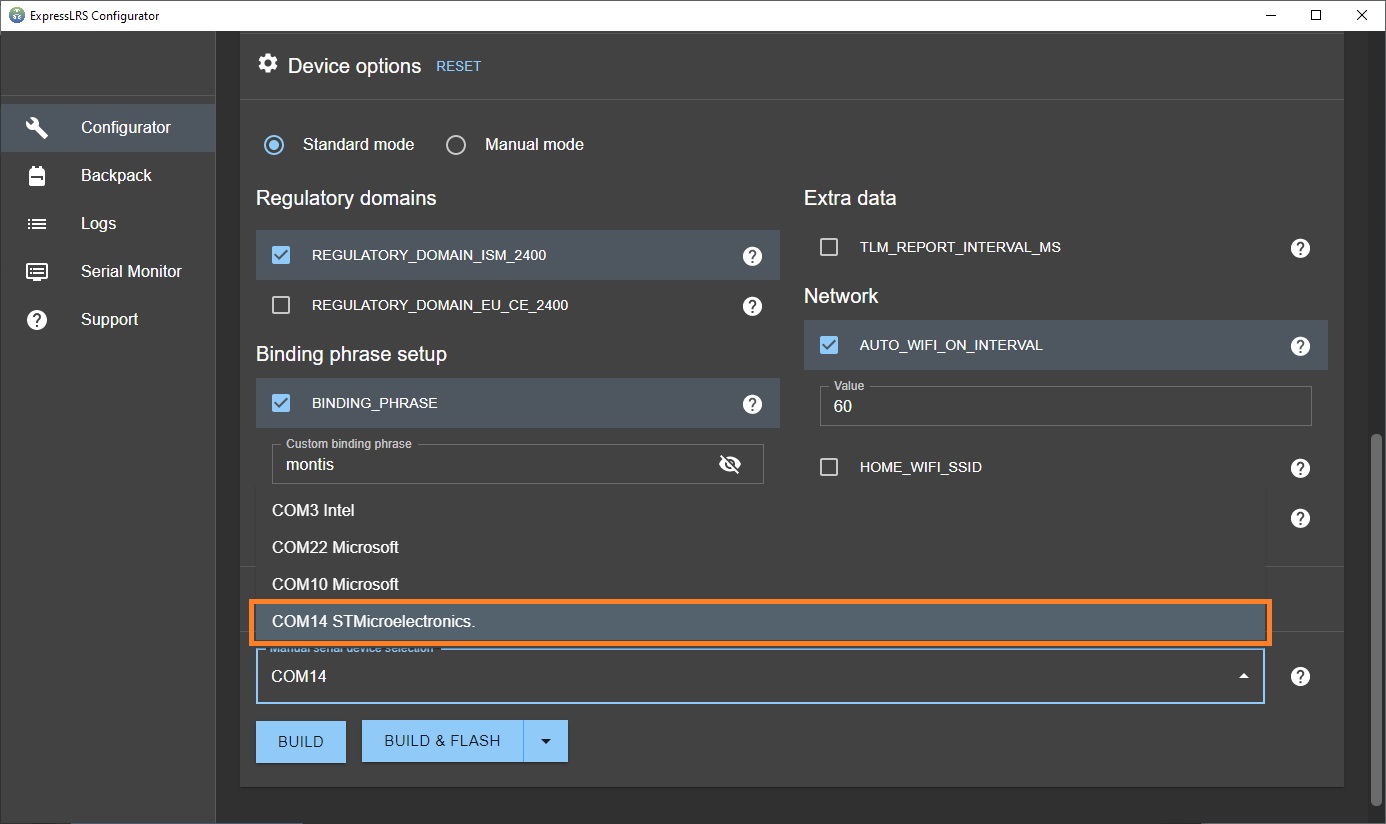
ExpressLRS firmware successfully updated.
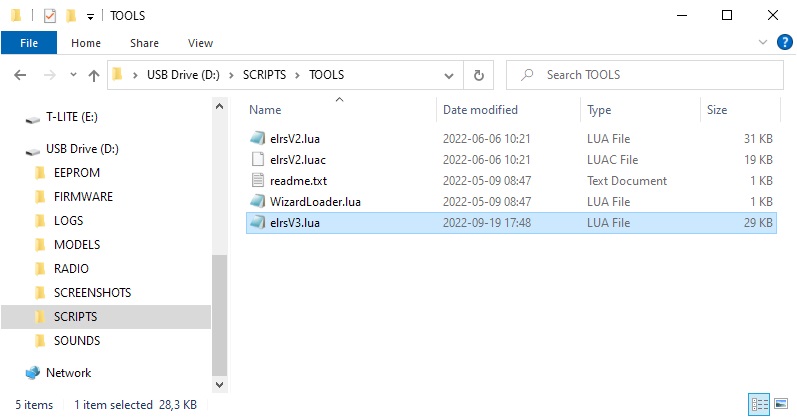
Don’t forget to download the newest ExpressLRS lua script after the TX module update. Especially if you are upgrading from the versions 1.0 or 2.0. You can download the Lua script from here https://github.com/ExpressLRS/ExpressLRS/tree/master/src/lua or from the ExpressLRS Configurator.
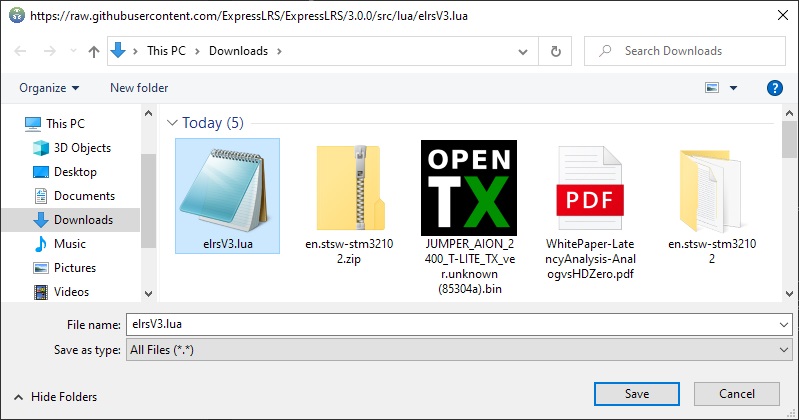
Place it on the radio SD card folder \SCRIPTS\.
ExpressLRS Lua script in action.

Things I don’t like
The menu navigation buttons are definitely too small. Unfortunately this is due to the extremely compact radio size. Actually the radio is so small that sometimes I wish it was just a bit bigger.
I would swap the upper three position switches with the lower two position switches as I use the top one for arming and the two position is just enough for this task.
Things I like
T-Lite is the most compact full featured OpenTX/EdgeTX radio in the market. I really like it’s compact size and from. It is very convenient to carry this radio in the backpack. T-Lite is half the size of the full sized radio.
Only one Lion 18650 battery is needed and it lasts for hours. You can also bring another one for the backup battery.
Jumper T-Lite V2 can be purchased from:
Banggood: https://www.banggood.com/JumperRC-T-Lite-V2-…-Radio-Transmitter-for-RC-Drone-Airplane-p-1959513.html
Disclaimer: This item was supplied by Banggood for a fair and unbiased review. Banggood never asked for a positive review and never influenced my opinion in any way. I’m trying my best to stay uninfluenced and give you only my own opinion. All affiliate links, if there are any, help me purchase items for reviews and tests.
-
 Review: MEPS Space SZ F7 Mini FC
MEPS (Mepsking) is a new, but emerging manufacturer, making its mark in the RC
Review: MEPS Space SZ F7 Mini FC
MEPS (Mepsking) is a new, but emerging manufacturer, making its mark in the RC -
 HGLRC Thor Pro parallel charging board
HGLRC Thor Pro charger board is battery parallel charging board with protection fuses and
HGLRC Thor Pro parallel charging board
HGLRC Thor Pro charger board is battery parallel charging board with protection fuses and
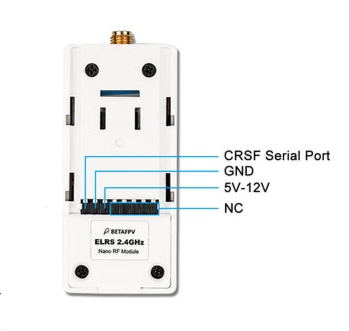
Would You Know The Pinout Of The External Jumper AION Nano TX Per Chance?
Thanks In Advance Kevin Nelundeniya
Look at the standard pinout of the nano TX module from BetaFPV: