Review: BetaFPV ExpressLRS 2.4GHz system
ExpressLRS is the first Open Source radio control system that became so popular. BetaFPV is also getting into the ExpressLRS train and released their ExpressLRS hardware. BetaFPV ExpressLRS comes in two options: 2.4GHz and 900MHz bands.
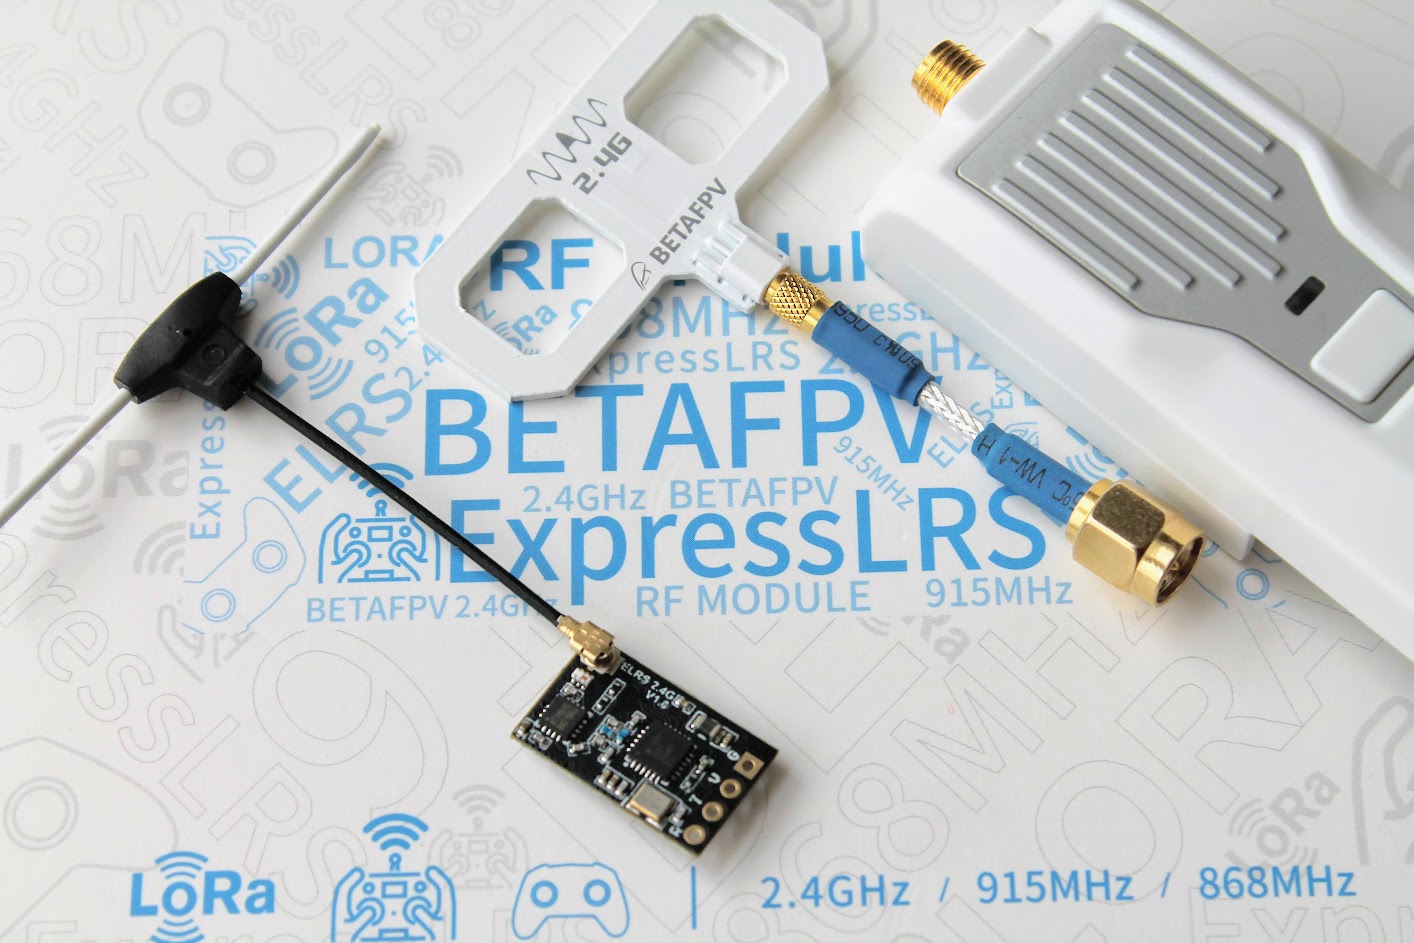
Lets take a look at the BetaFPV 2.4GHz ExpressLRS Nano TX and RX modules.
Page Contents for Review: BetaFPV ExpressLRS 2.4GHz system
Specifications
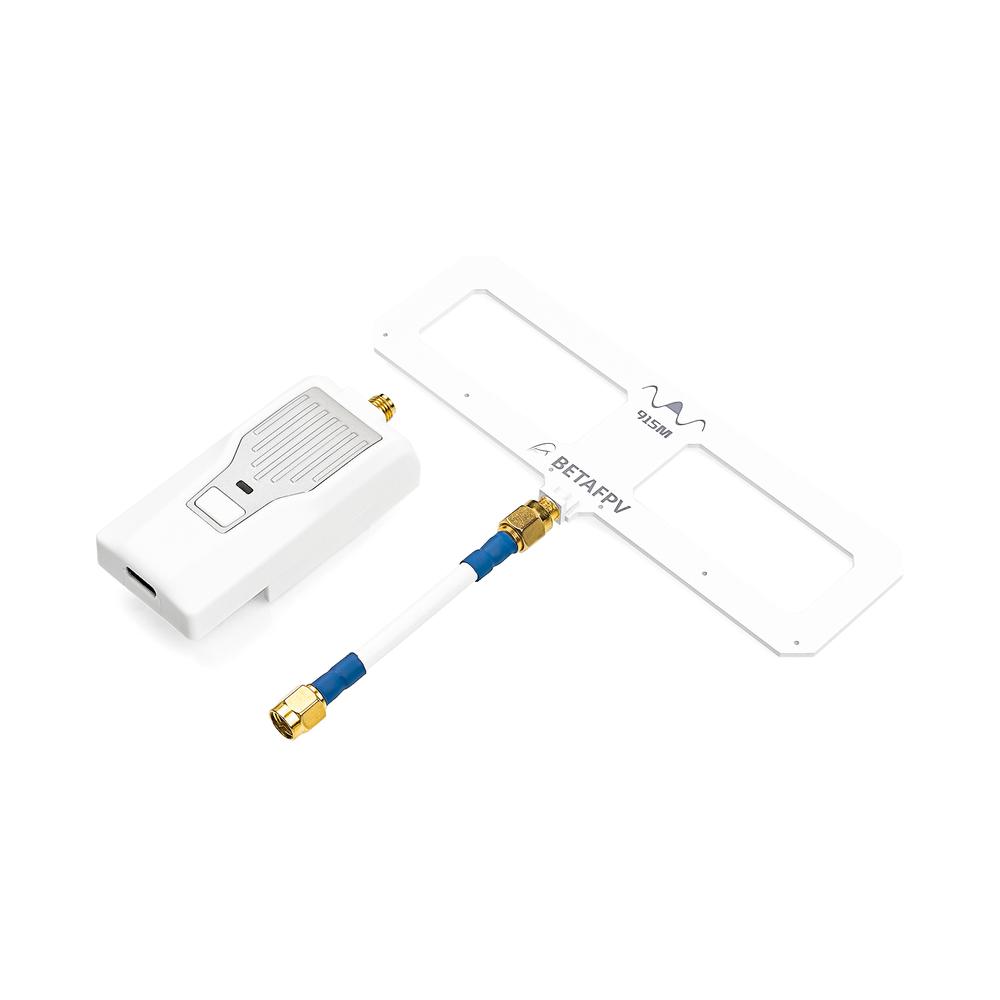
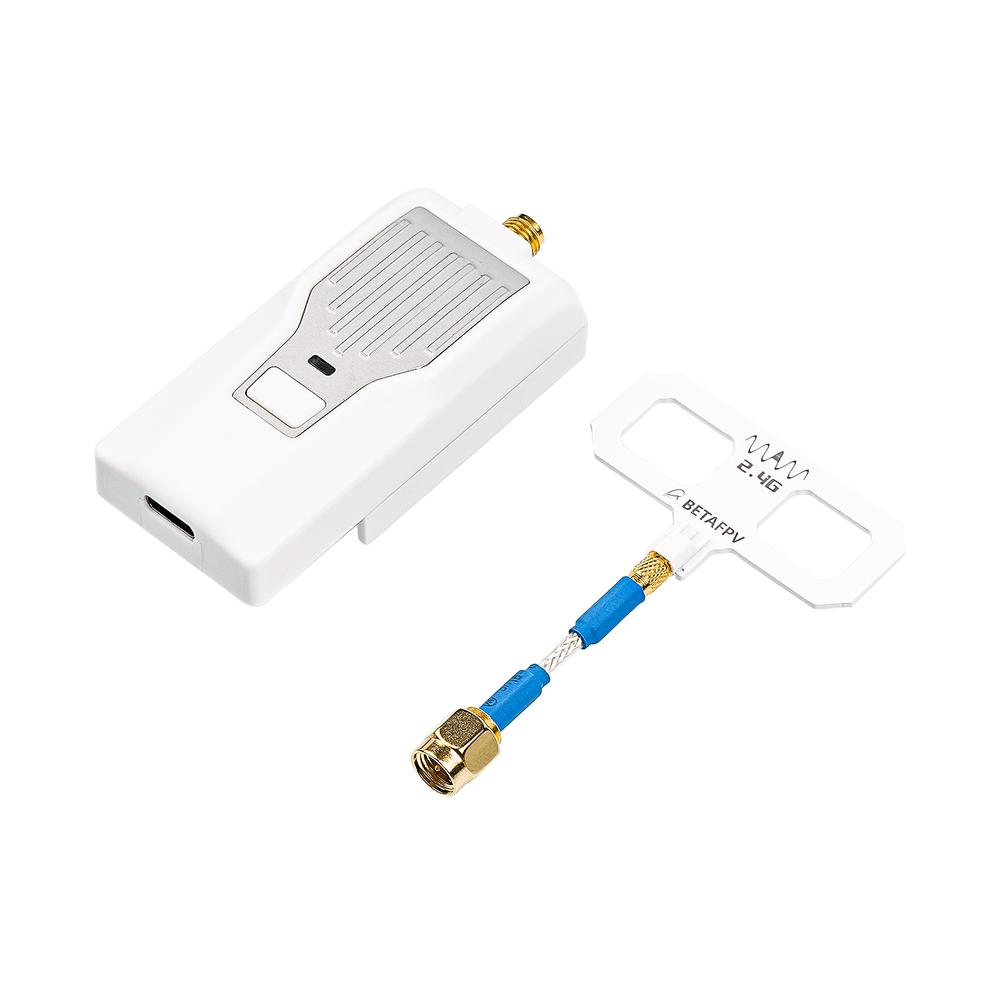
BetaFPV Nano TX transmitter
 |
 |
Available @ BetaFPV: https://betafpv.com/collections/expresslrs-series/products/elrs-nano-tx-module
Banggood: https://www.banggood.com/search/betafpv-expresslrs.html
Packet refresh rate: 25Hz/50Hz/100Hz/200Hz (915MHz/868MHz)
25Hz/50Hz/150Hz/250Hz/500Hz (2.4GHz)
RF output power: 100mW/250mW/500mW
Frequency bands (Nano RF Module 2.4G version): 2.4GHz ISM
Frequency bands (Nano RF Module 915MHz/868MHz version): 915MHz FCC/868MHz EU
Input voltage: 5V~12V
USB port: Type-C
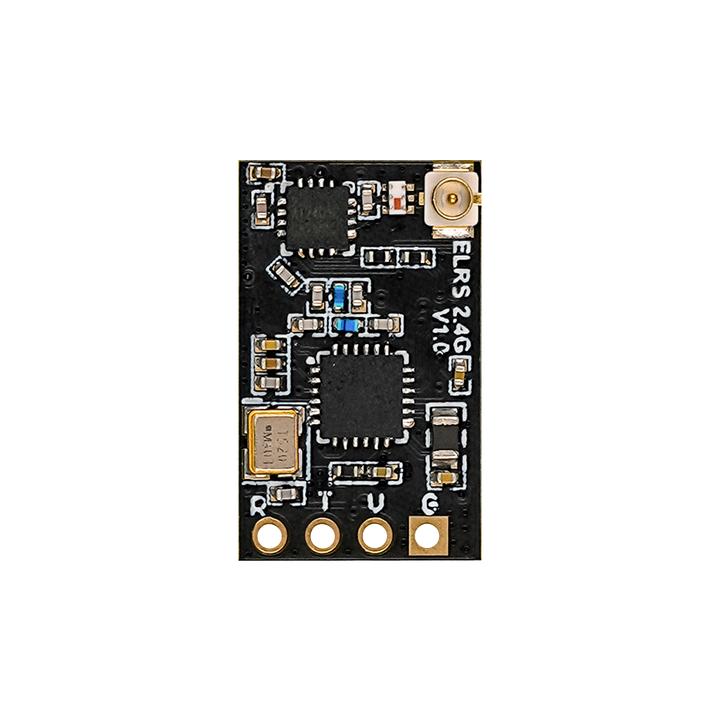
BetaFPV Nano receiver
 |
 |
Available @ BetaFPV: https://betafpv.com/collections/expresslrs-series/products/elrs-nano-receiver
Banggood: https://www.banggood.com/search/betafpv-expresslrs.html
Weight: 0.7g (receiver only, w/o antenna)
Size: 12mm*19mm
Telemetry power: 20dBm
Frequency bands (Nano receiver 2.4G version): 2.4GHz ISM
Frequency bands (Nano receiver 915MHz/868MHz version): 915MHz FCC/868MHz EU
Input voltage: 5V
Antenna connector: IPEX MHF
Closer look
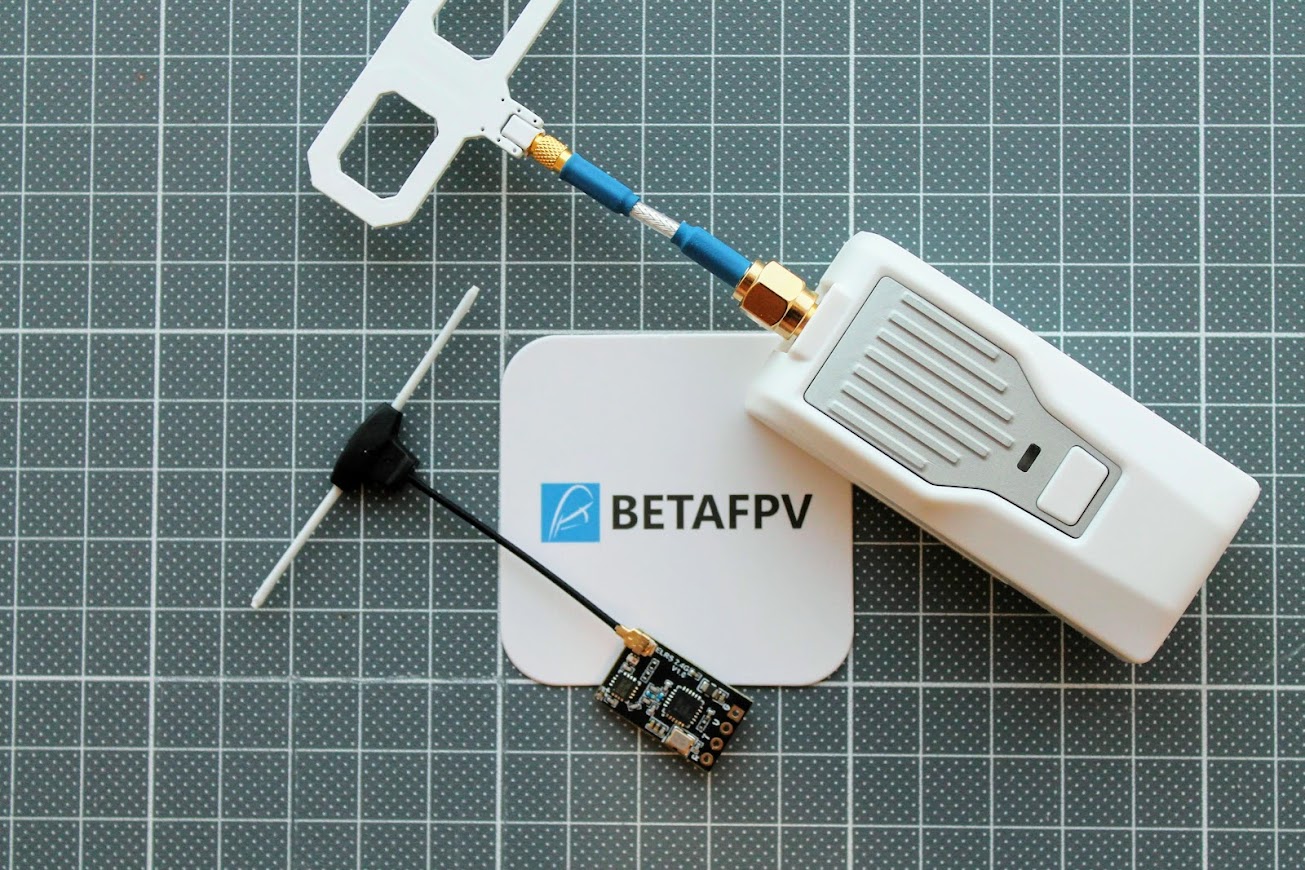
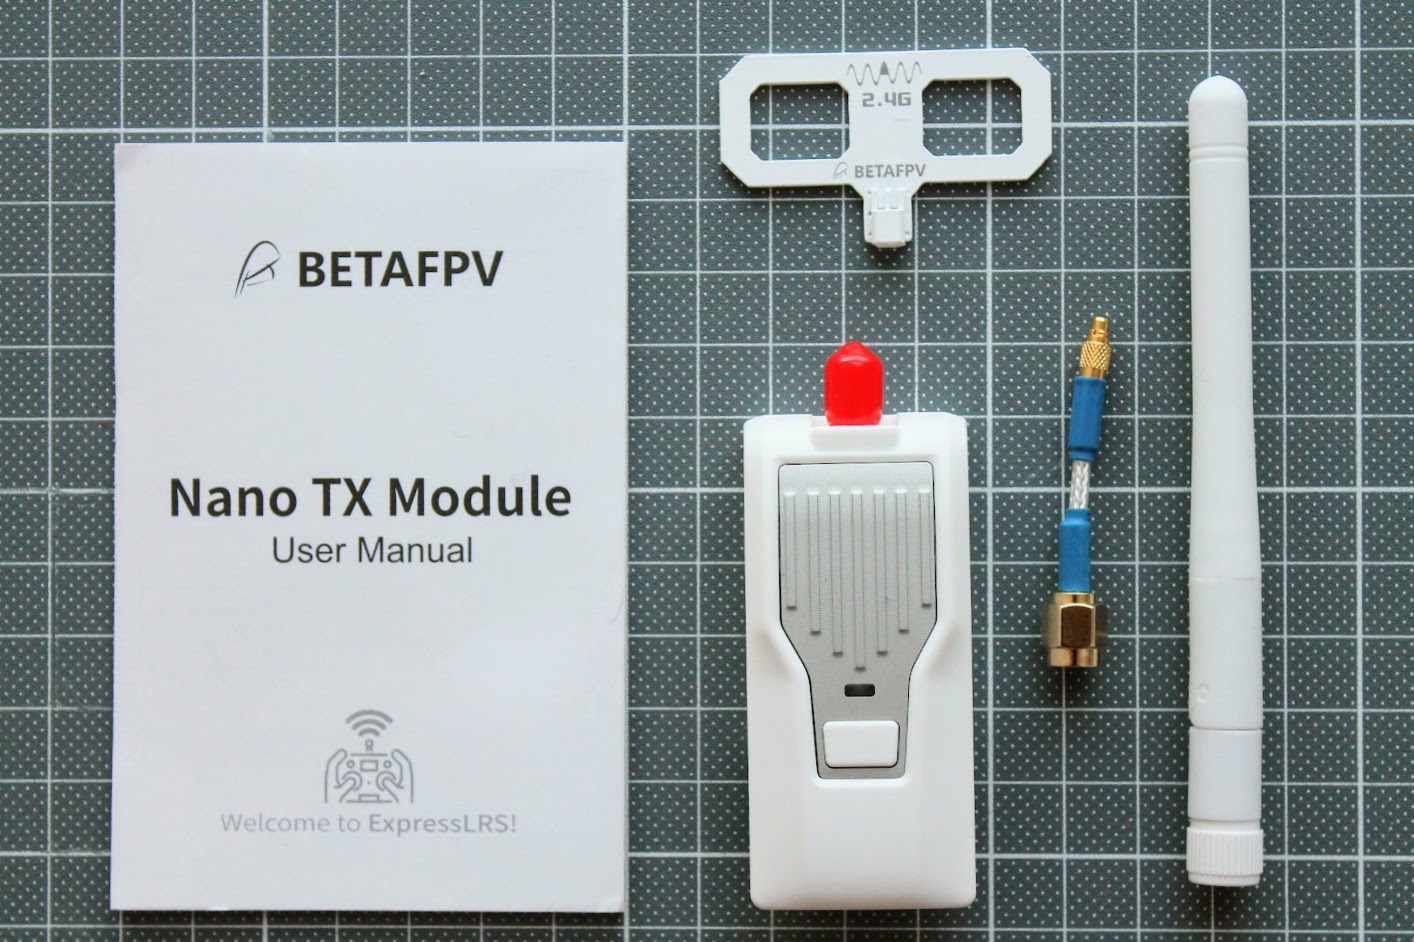
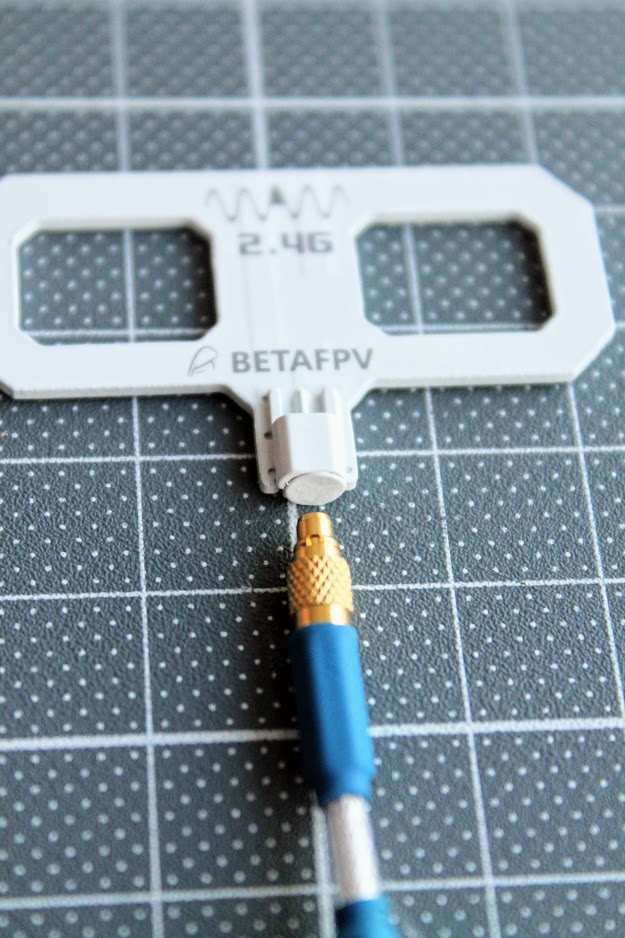
BetaFPV ExpressLRS Nano TX module comes with two antennas – linear whip style dipole antenna and Moxon type antenna
Disassembled BetaFPV Nano TX module.
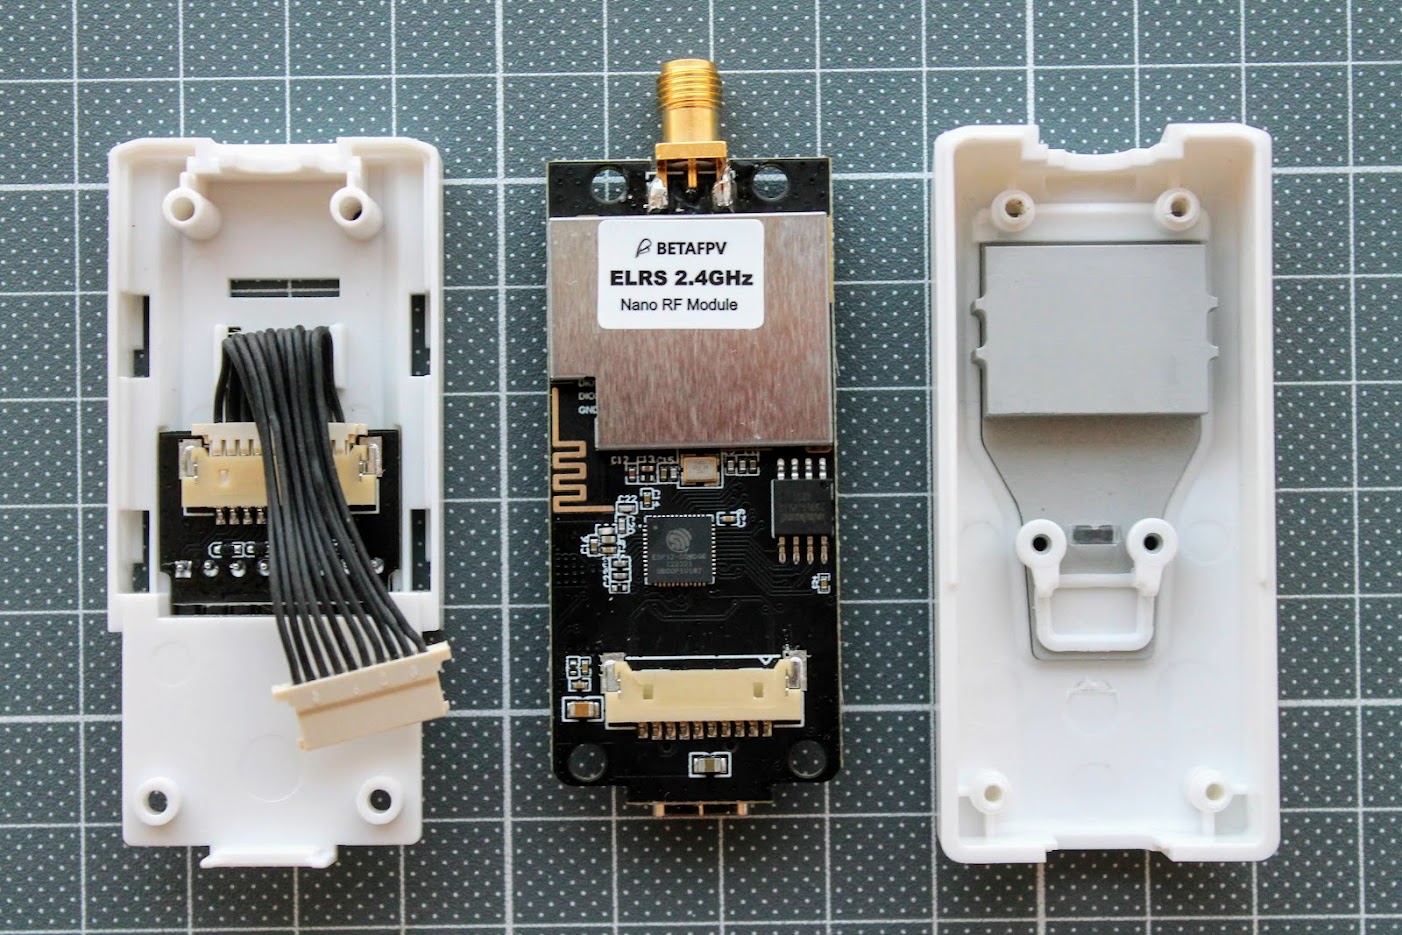
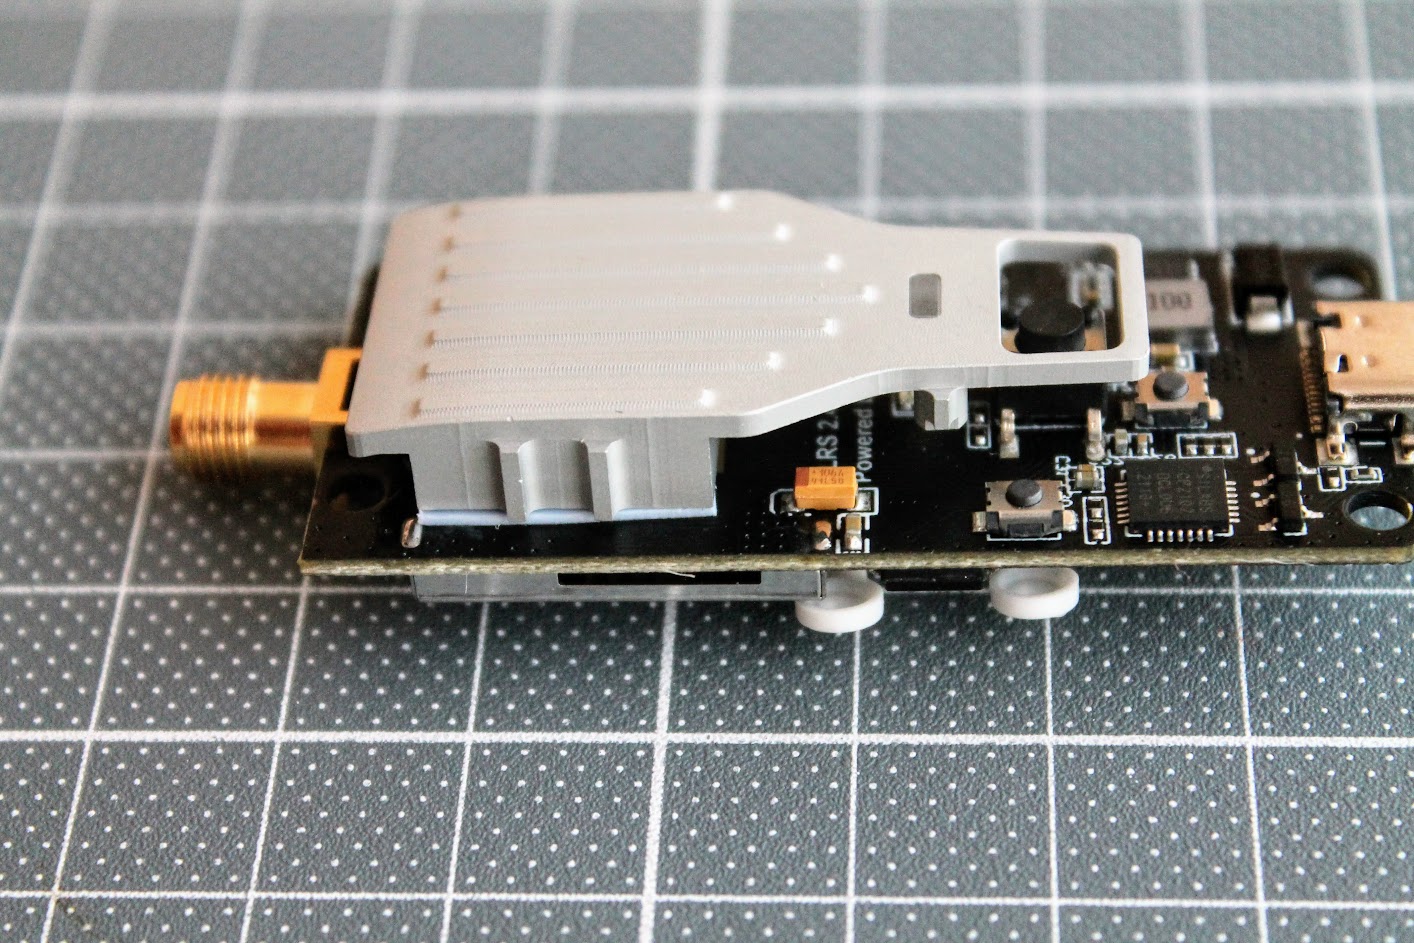
BetaFPV Nano TX module has thick metal heatsink for cooling the RF chip. It is exposed to the outside and can get pretty hot on higher power output levels. This heatsink does the job well and the module does not overheat even on the 500mW output.
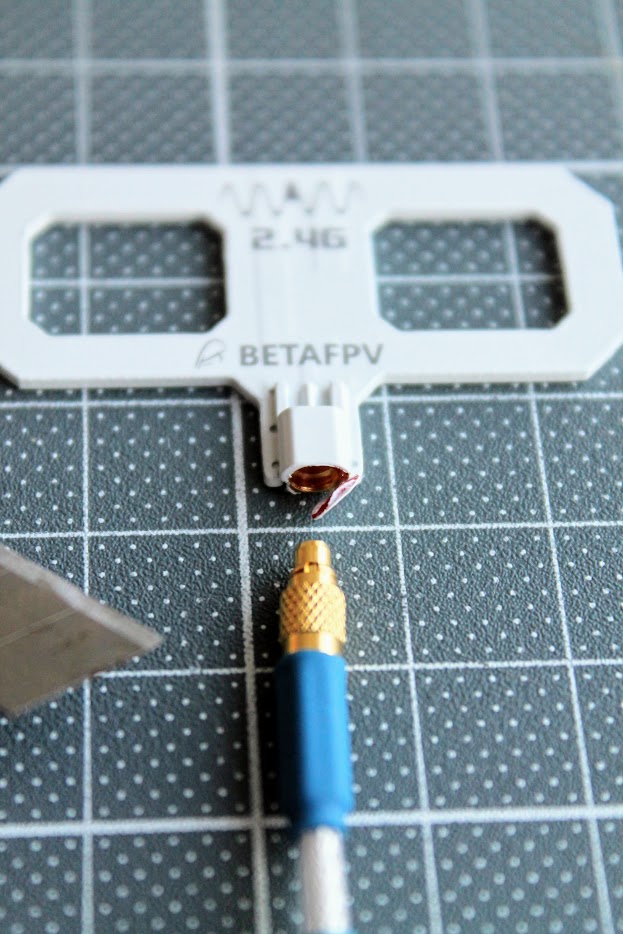
The supplied Moxon type antenna has a cover on the MMCX connector. You should remove it before plugging the MMCX pigtail.
 |
 |
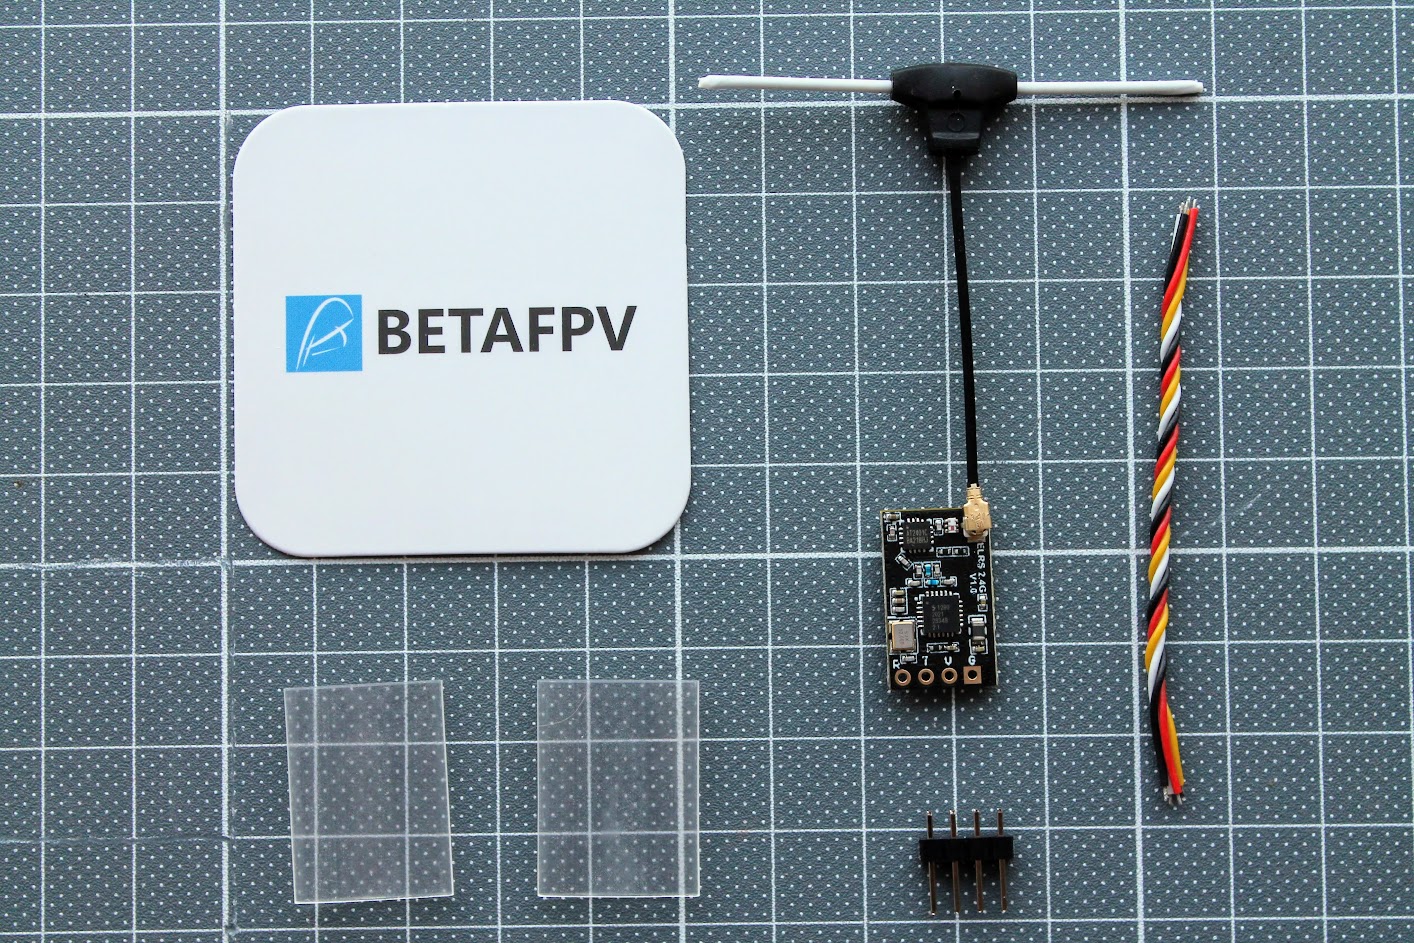
BetaFPV ExpressLRS Nano receiver comes with T-style dipole antenna, silicone wires, two heat shrinks and a pin header if you need to solder one.
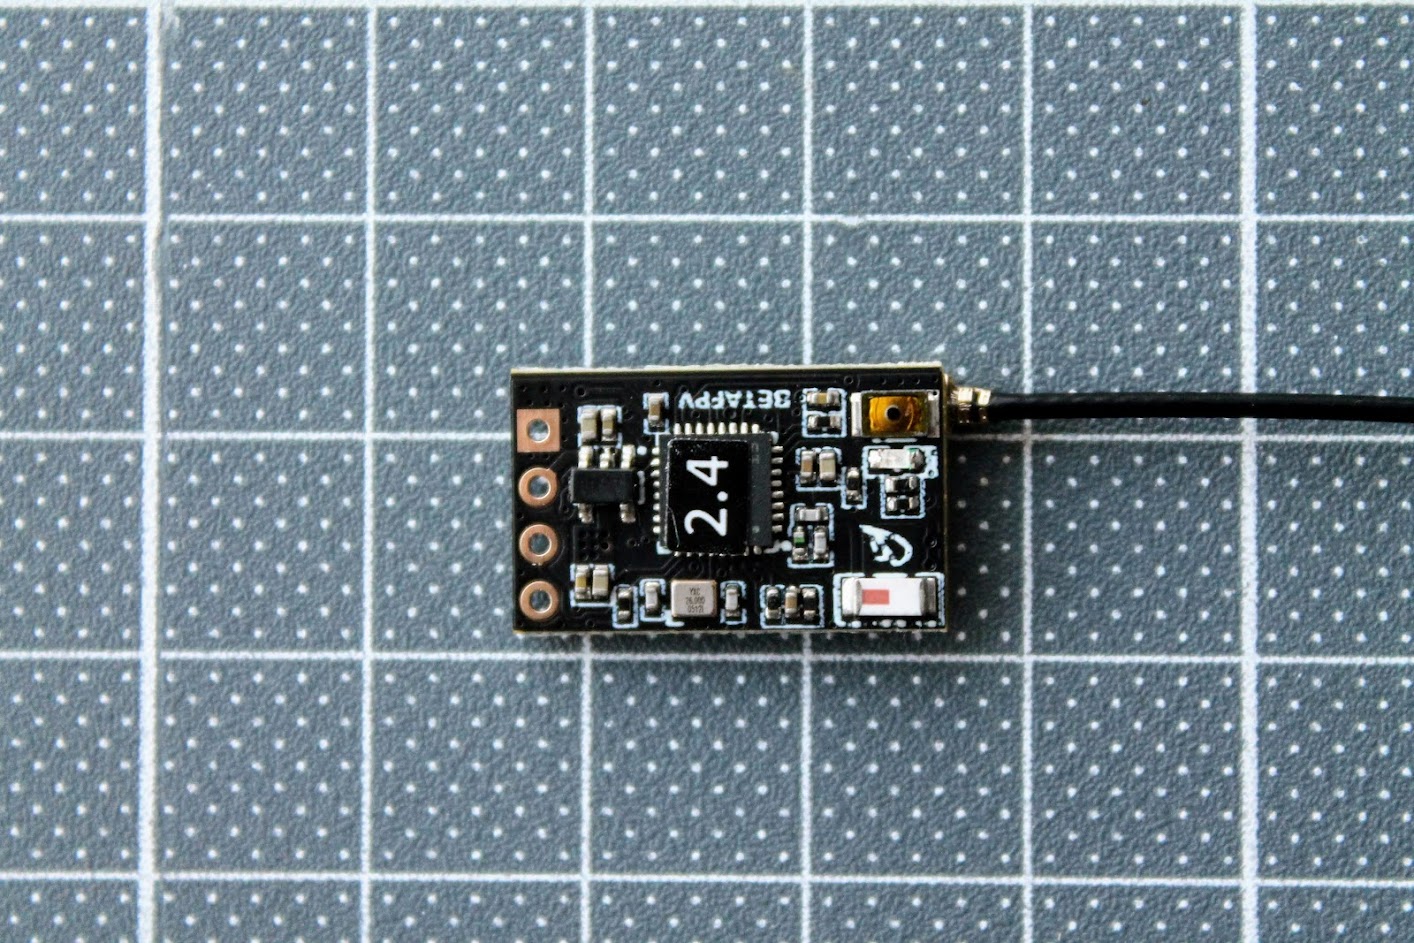
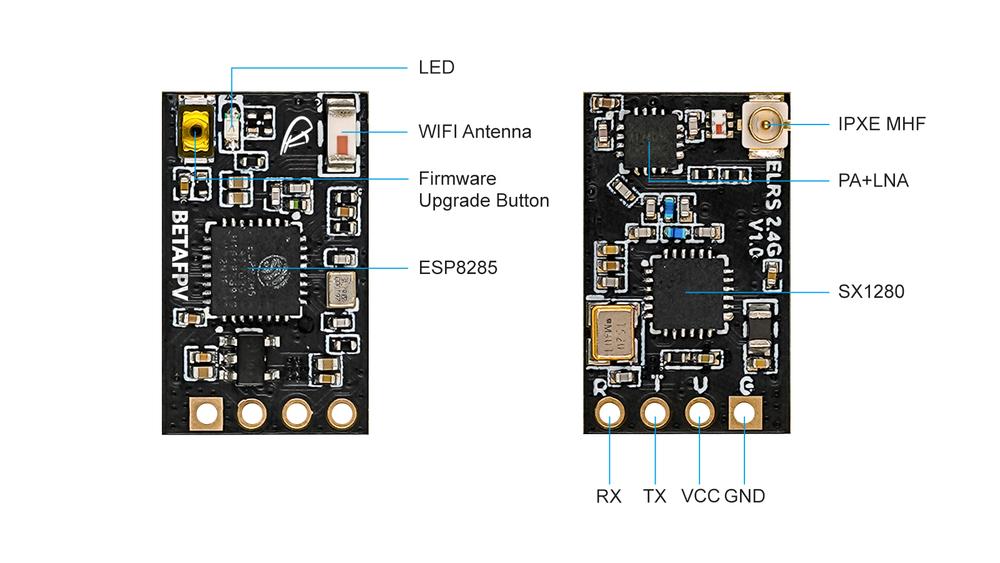
You can see the standard pinout pattern R T V G (RX, TX, +V, GND) on the antenna side. This is the same pinout as on TBS Crossfire Nano receiver, and is recommended design pattern for all ExpressLRS receivers.
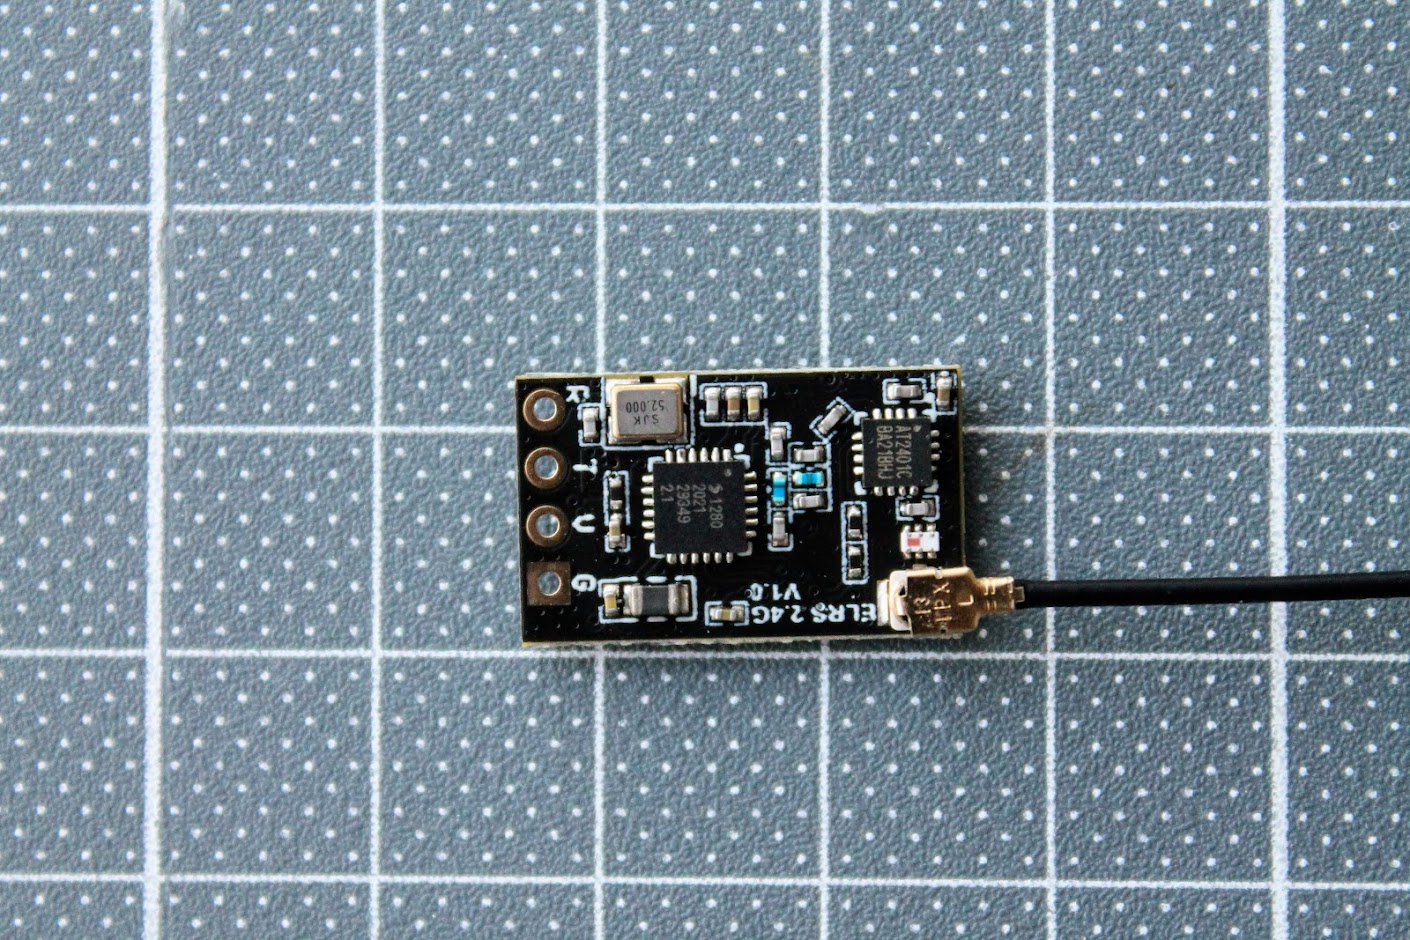
There is a ceramic antenna for WIFI connectivity, the boot button and the LED on the other side of the receiver.
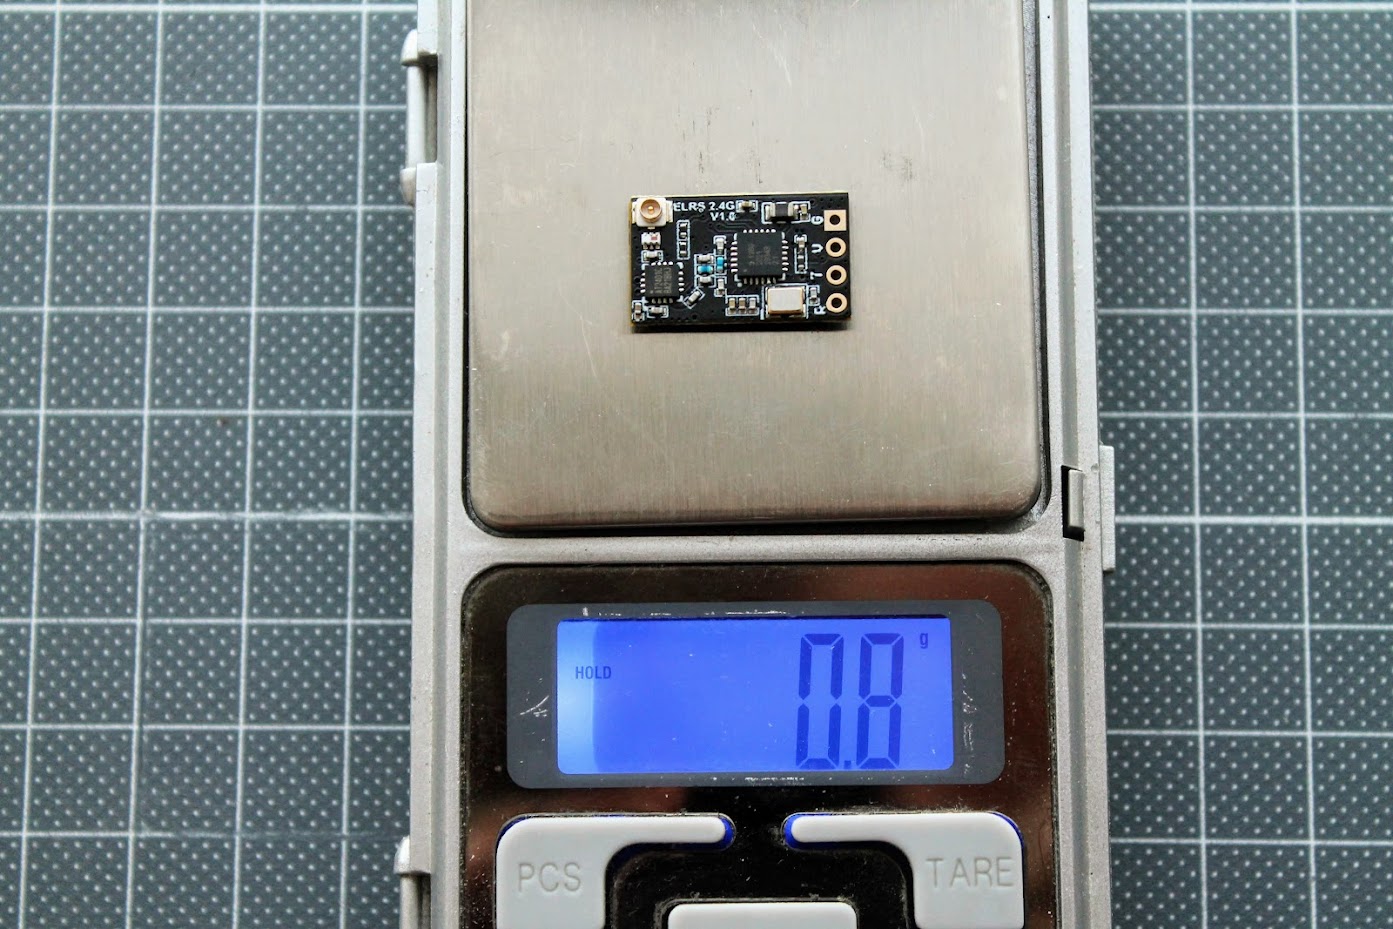
The weight of the bare BetaFPV Nano receiver is only 0.8 grams.
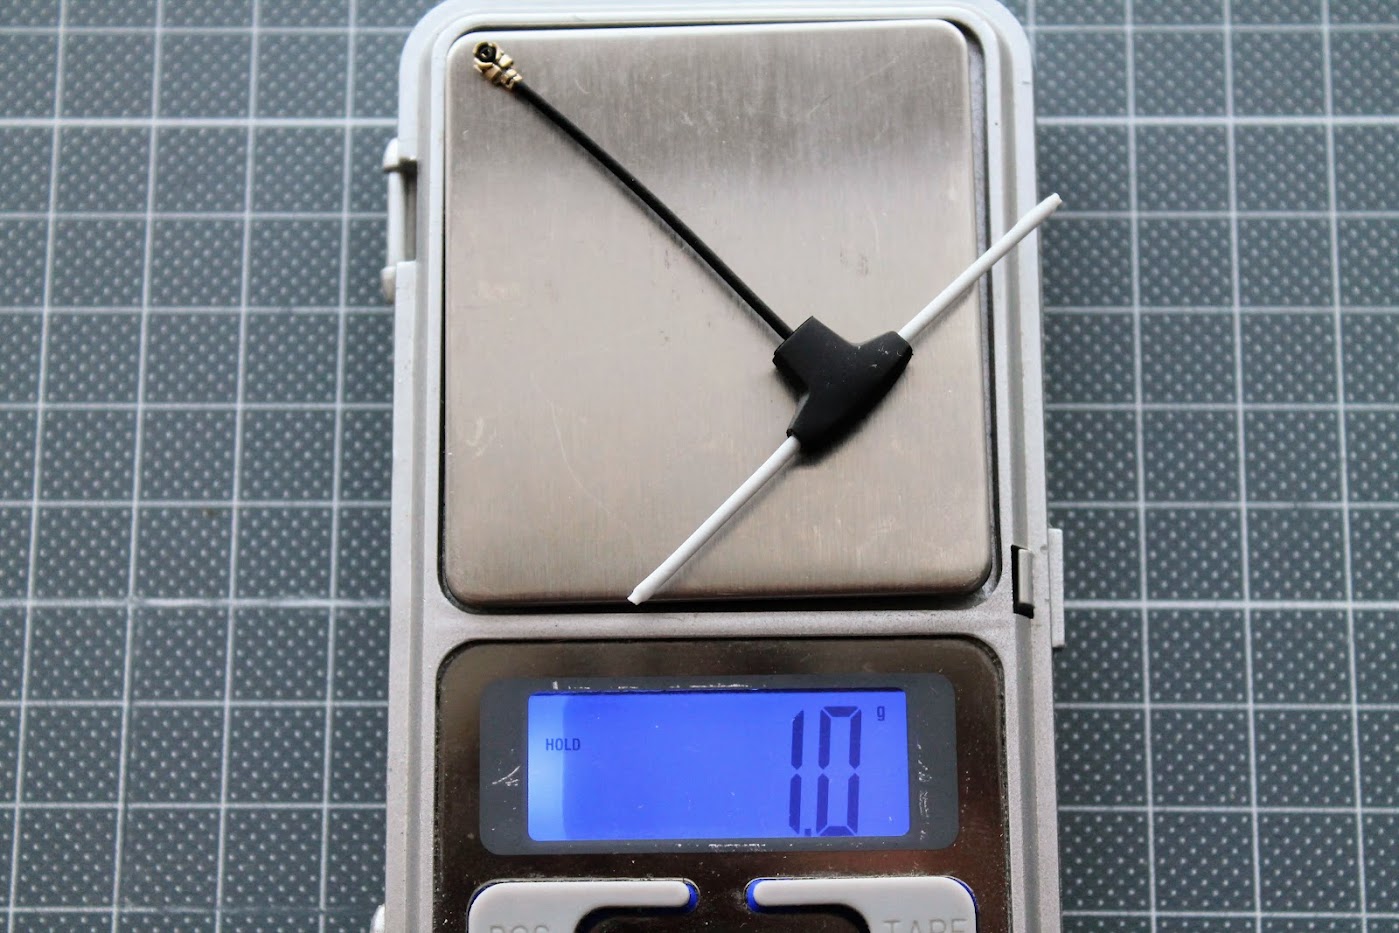
The weight of the supplied T-style antenna is 1 gram.
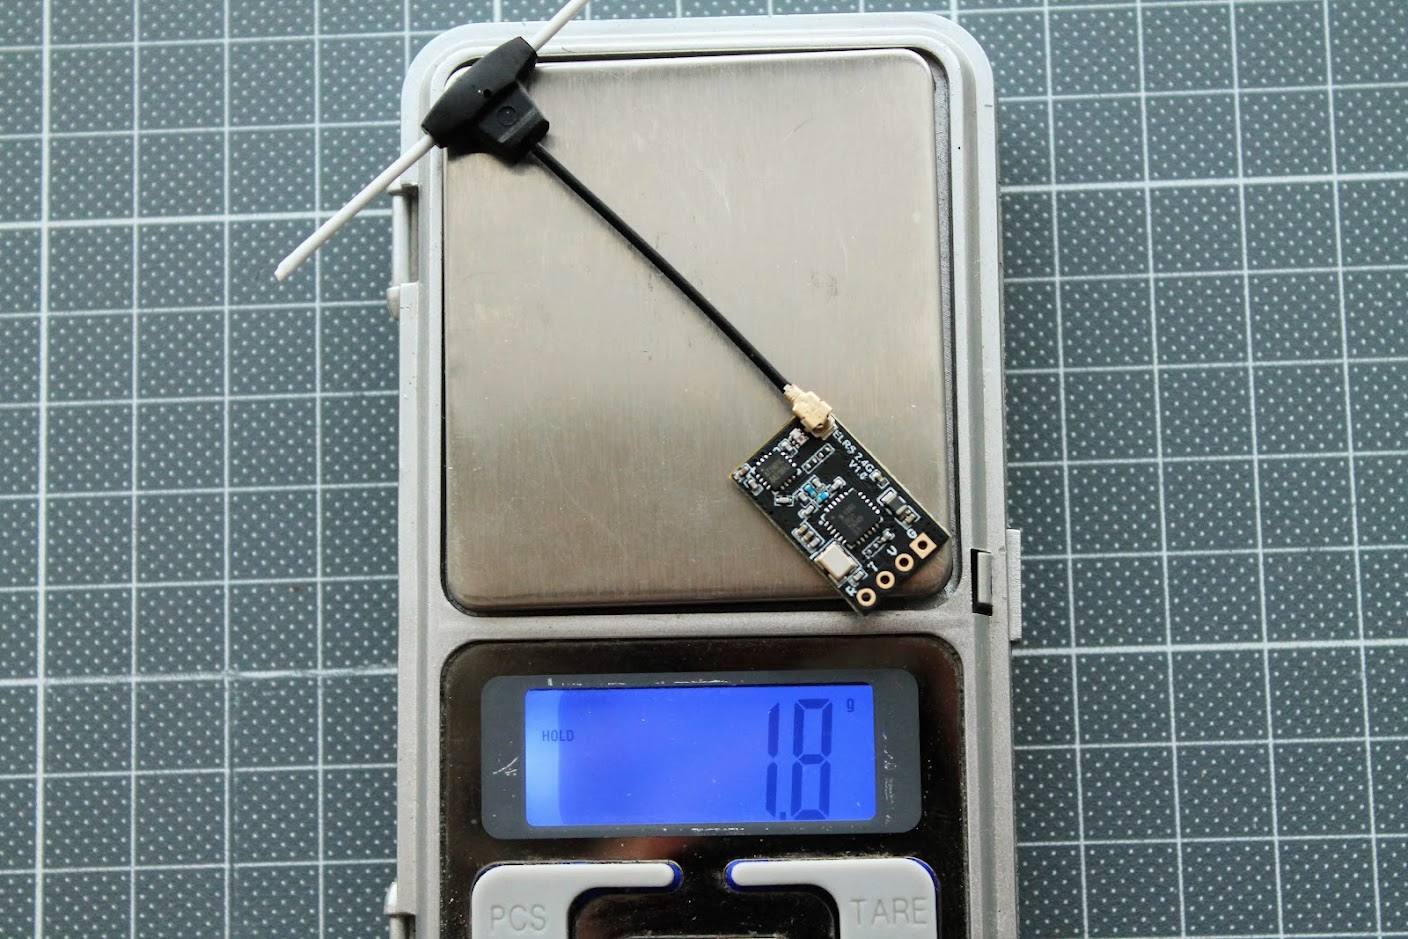
And the total weight of receiver and antenna is 1.8 grams.
BetaFPV Nano receiver is the first and (so far) the only receiver with power amplifier (PA+LNA). It has 100mW telemetry output and in theory better sensitivity (longer range).
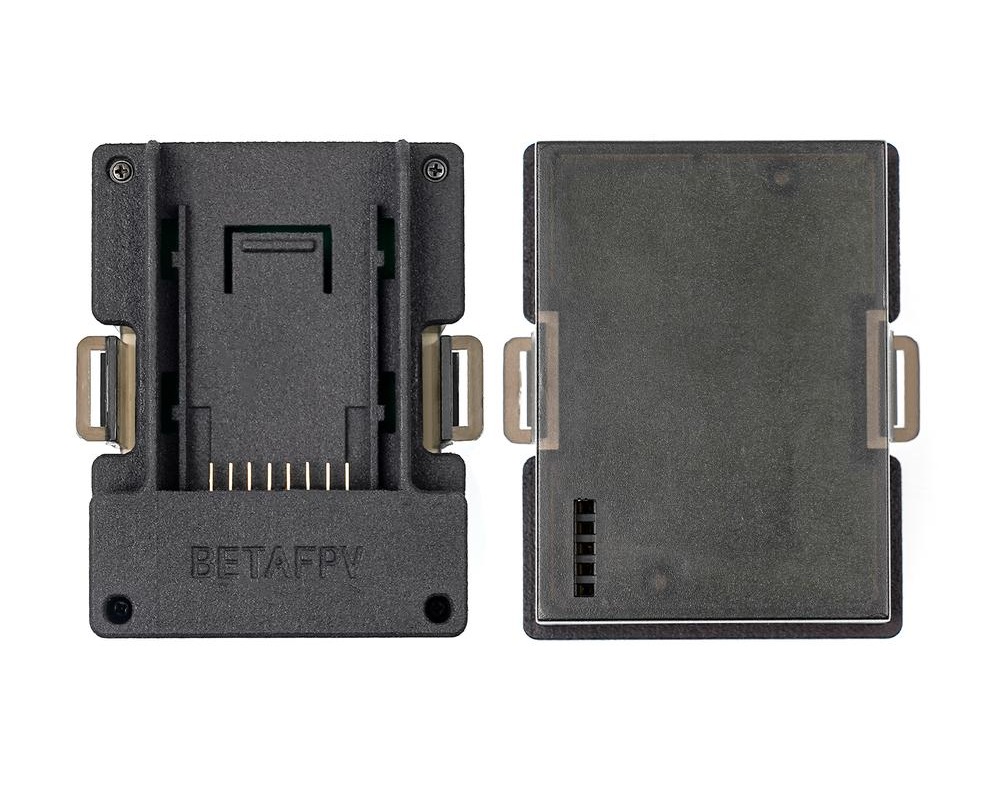
BetaFPV also sells the JR Lite to JR type (or so called Nano to Micro) adapter box.
BetaFPV adapter: https://betafpv.com/collections/rx-tx/products/micro-nano-module-adapter
BetaFPV TX module firmware upgrade
There are two options how to upgrade the TX module firmware – via WIFI or via UART(USB). For WIFI method you will need the OpenTX radio with ExpressLRS Lua script running. For UART method you can connect the TX module directly to the PC and you don’t need the Radio for flashing the ExpressLRS firmware to TX module.
Compiling the firmware
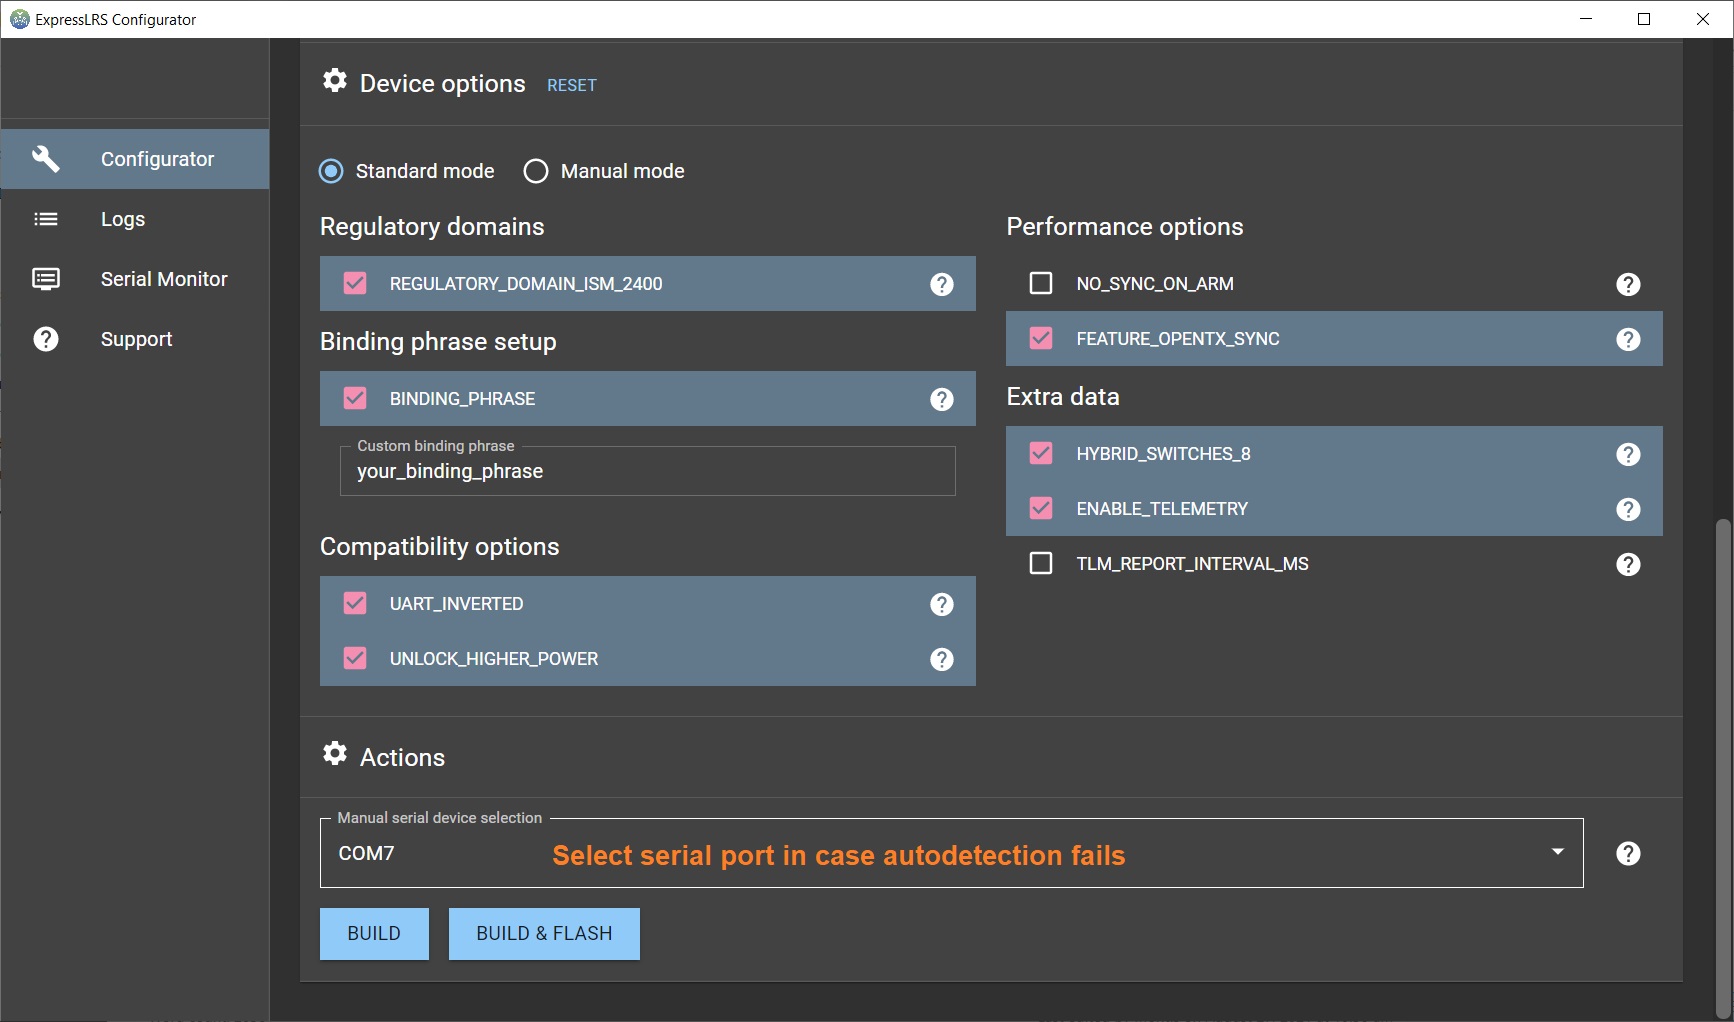
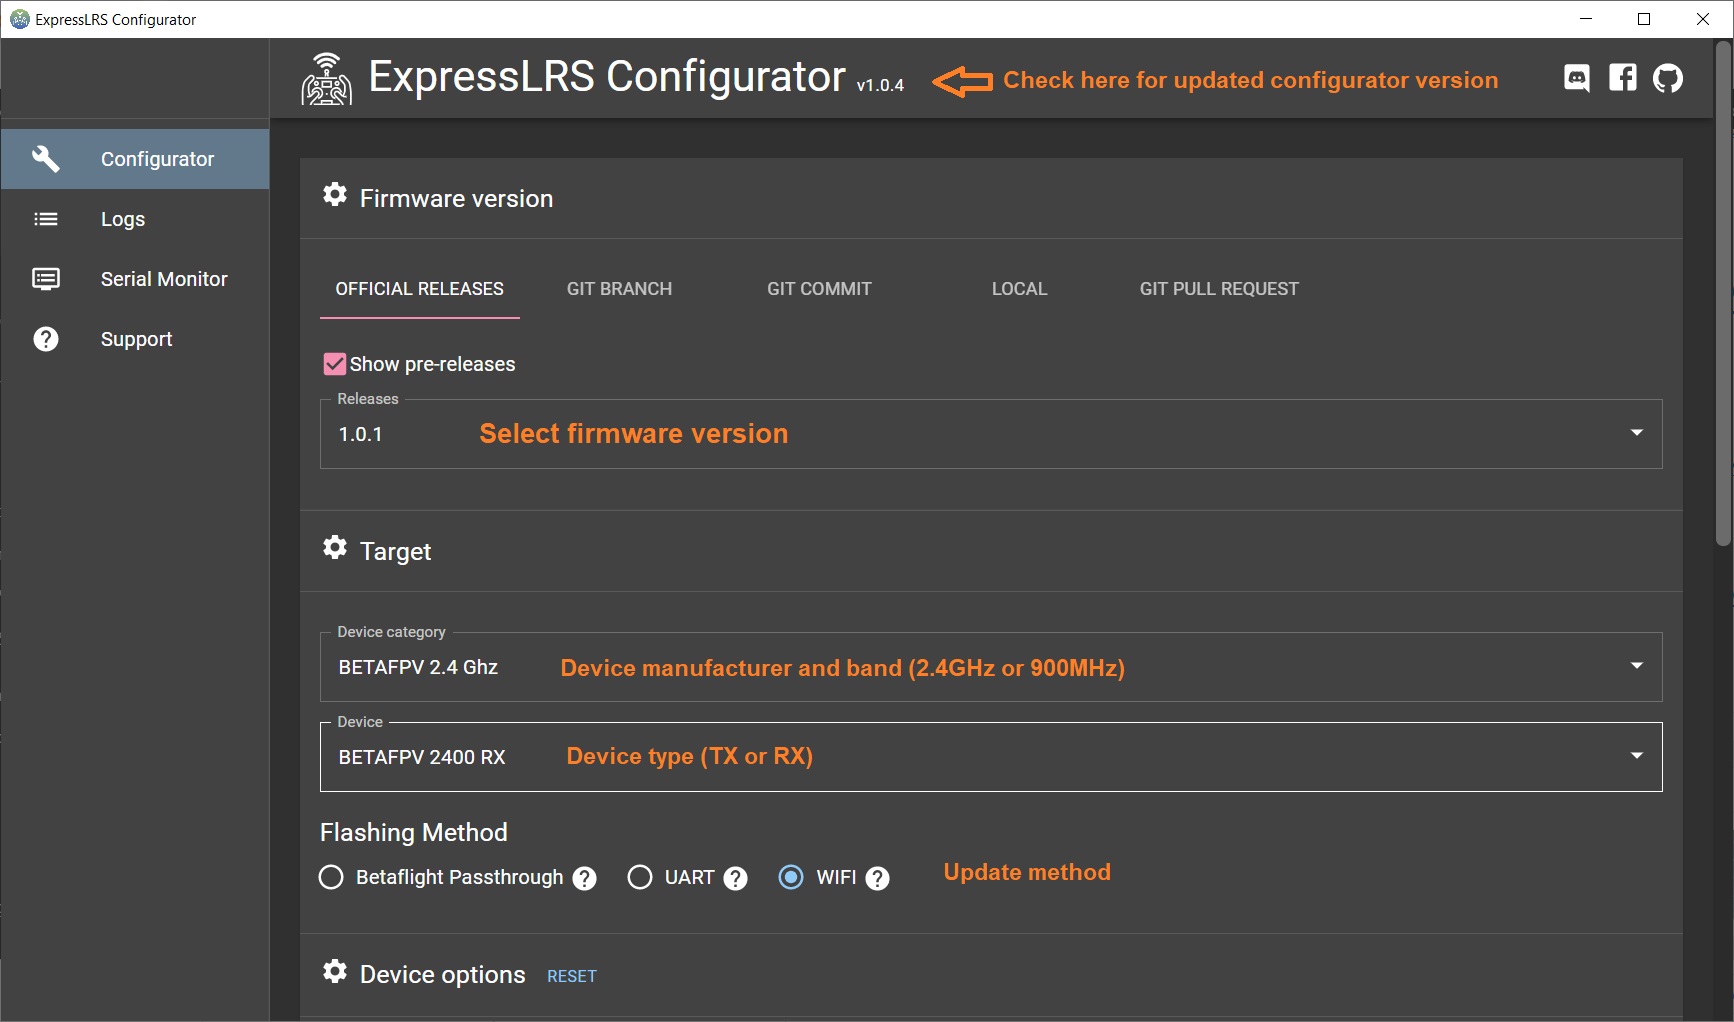
First you need to compile the firmware with the ExpressLRS Configurator. Select the firmware version, device type and flashing method.
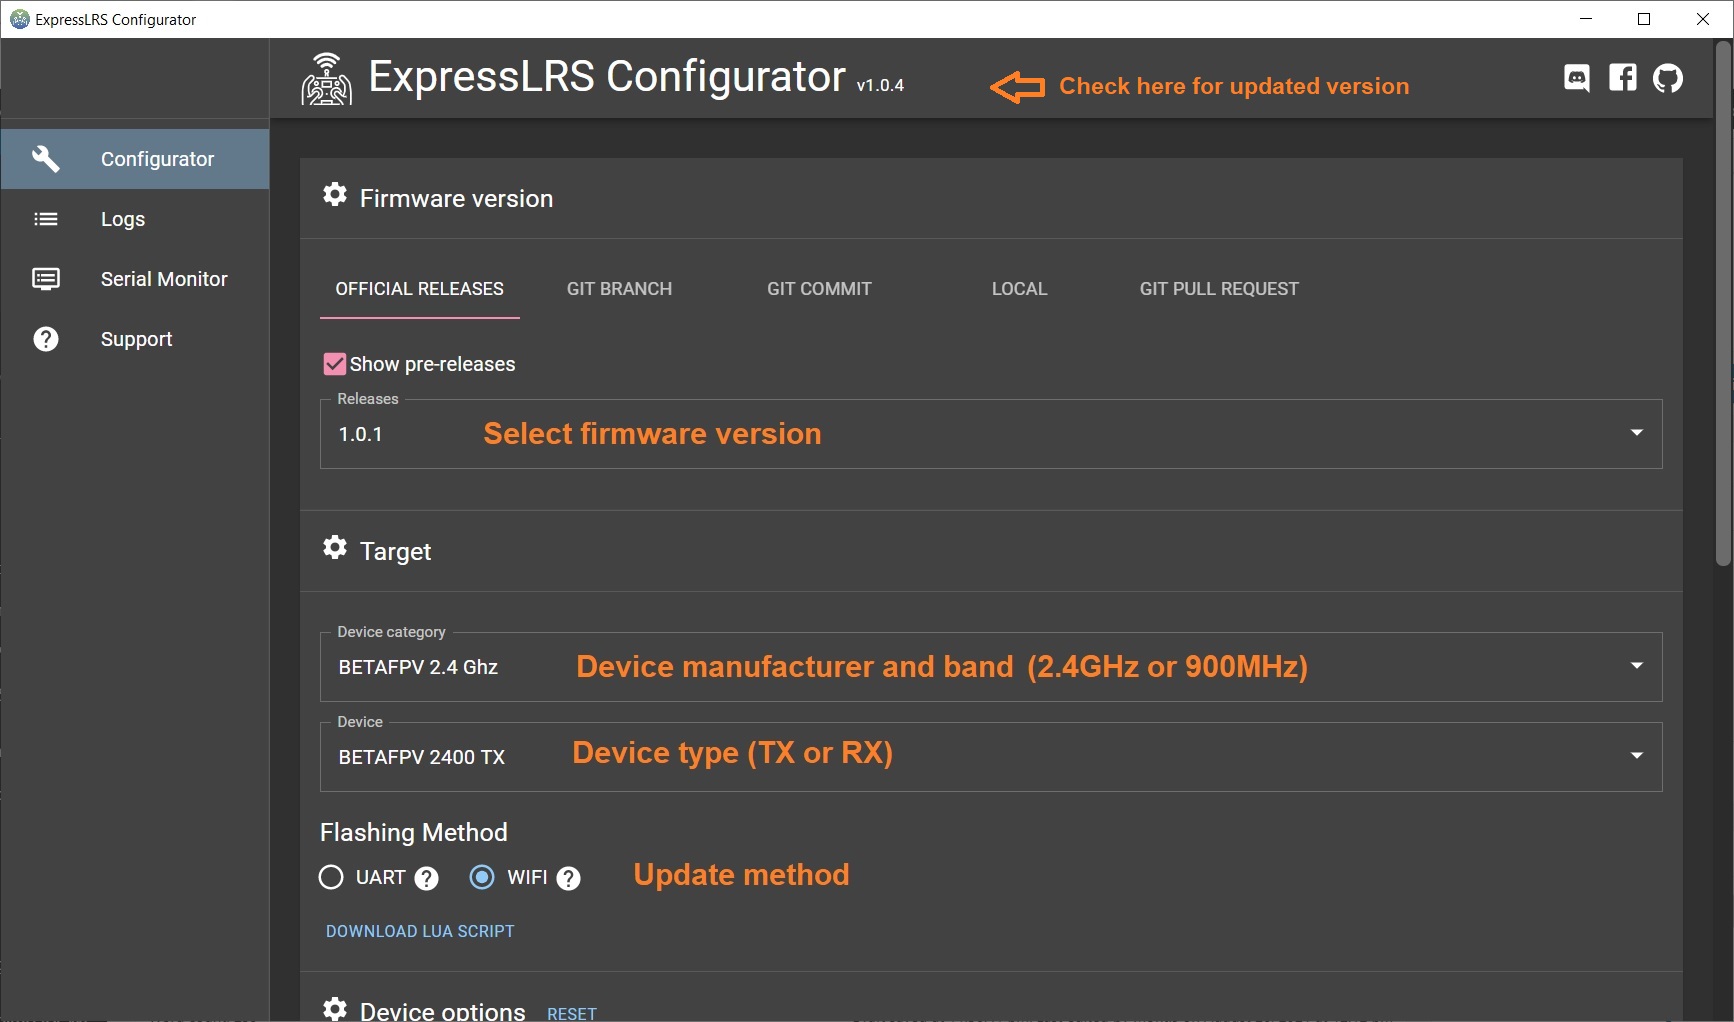
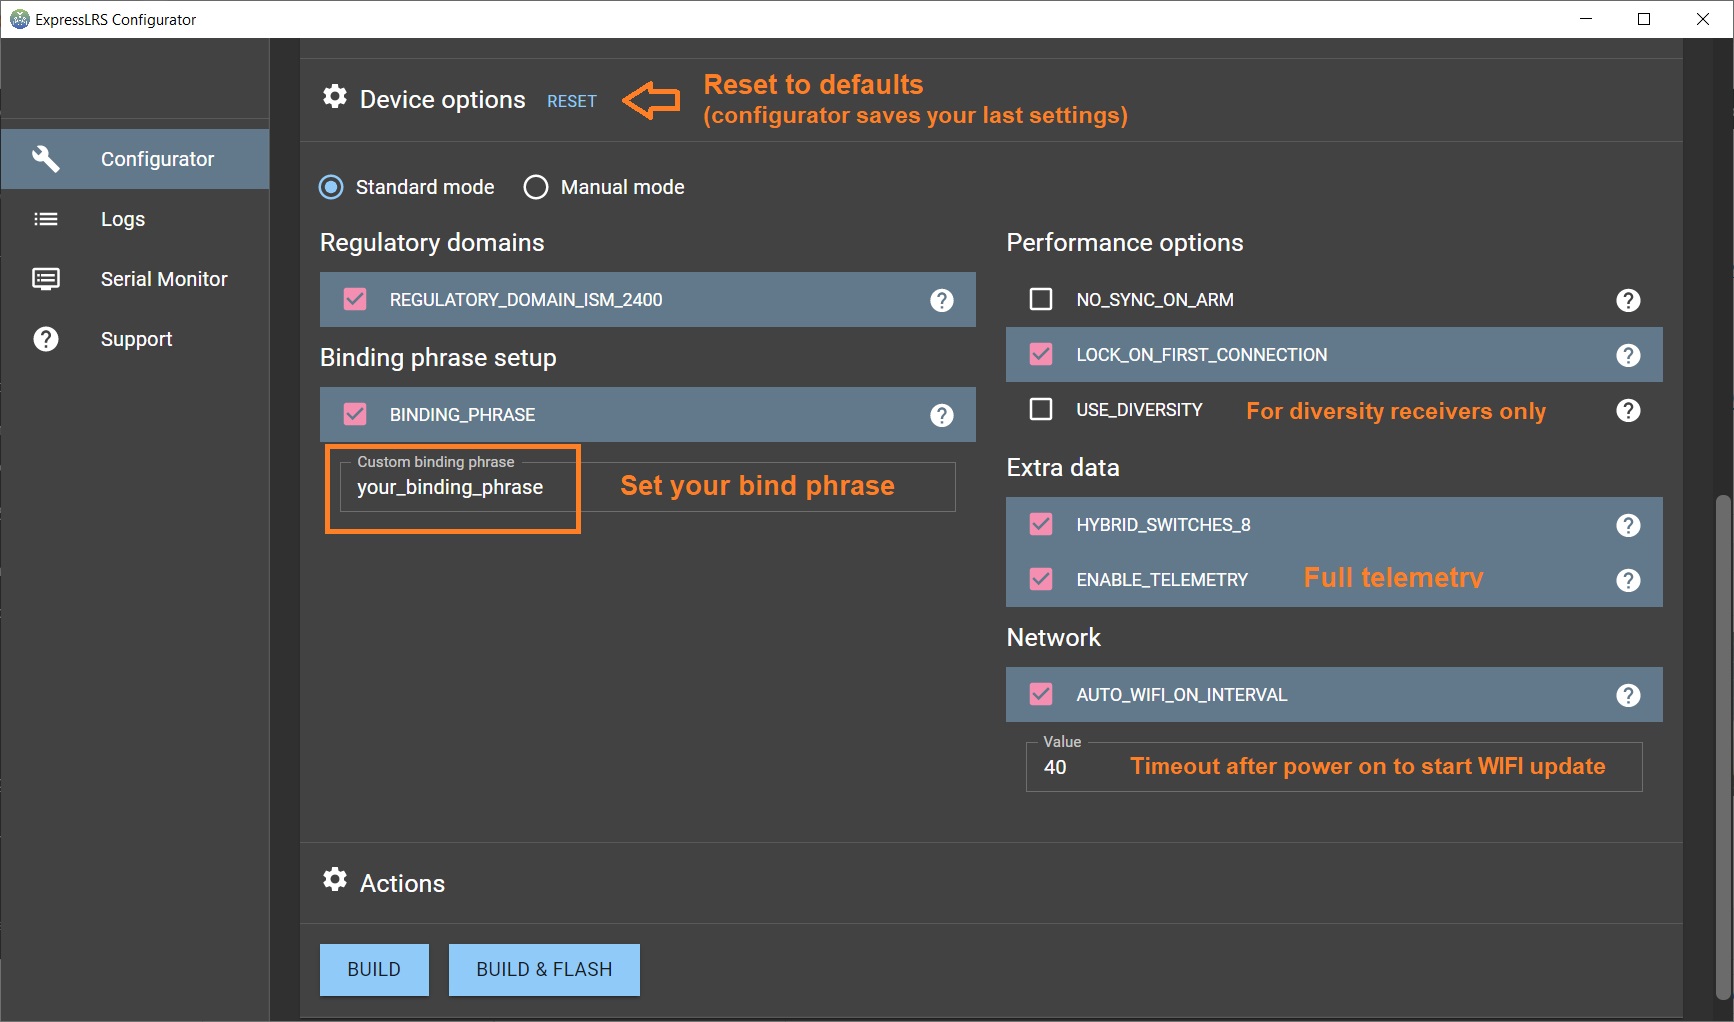
Set the device options.
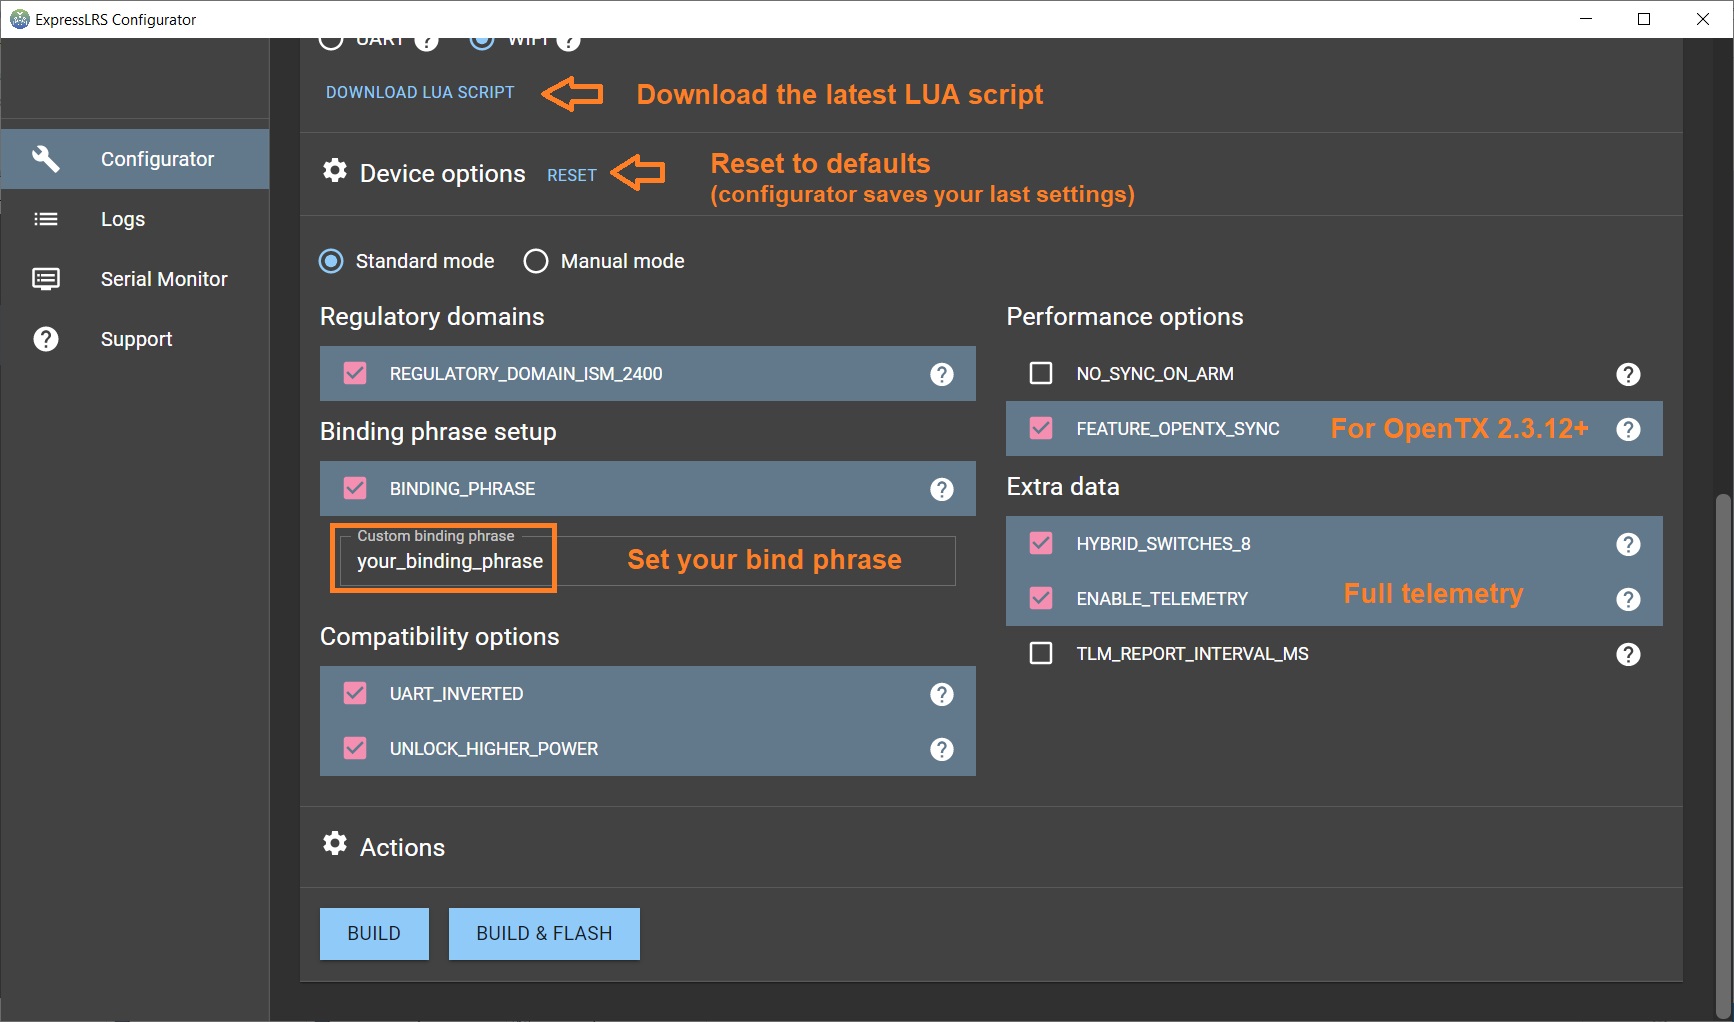
And press the [Build] button. The compiling result should be thefirmware.bin file that can be uploaded via WIFI or UART.
Via WIFI
Select WIFI Update from the ELRS Lua script. The TX module will enter into the WIFI mode. Then you have to connect your PC to the WIFI Hotspot the TX module created. It will show up in your network as ExpressLRS TX Module, and the password is expresslrs. Then open the browser and go to a specific IP Address http://10.0.0.1/. In the web page, select the the compiled firmware file firmware.bin by pressing the [Choose file] button. Hit the [Update] button
Read more about the updating the ExpressLRS firmware here: ExpressLRS – Complete Guide
Via UART (USB)
For flashing via the UART, you need to connect the TX module to the PC via USB-C cable.
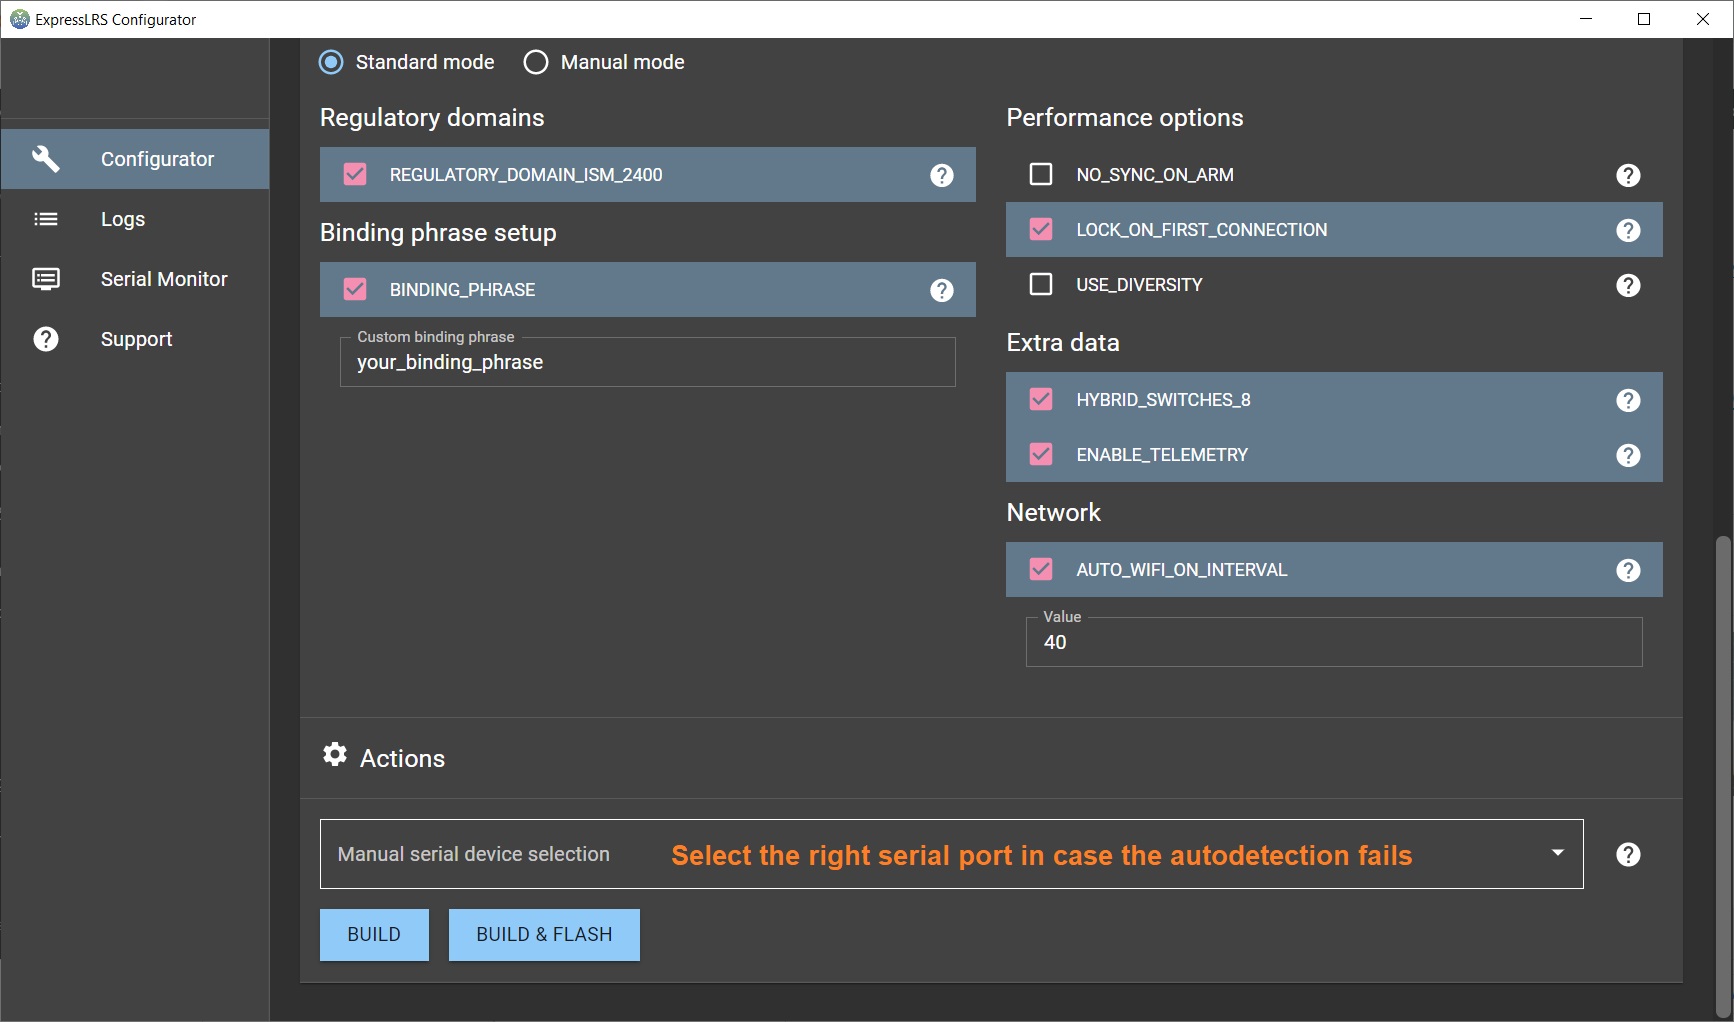
Select [Build & Flash] button when compiling the firmware in the ExpressLRS Configurator. The configurator will compile and try to upload to the detected serial port. If ExpressLRS configurator somehow fails to detect the serial port, then you should set the port manually.
Read more about the updating the ExpressLRS firmware here: ExpressLRS – Complete Guide
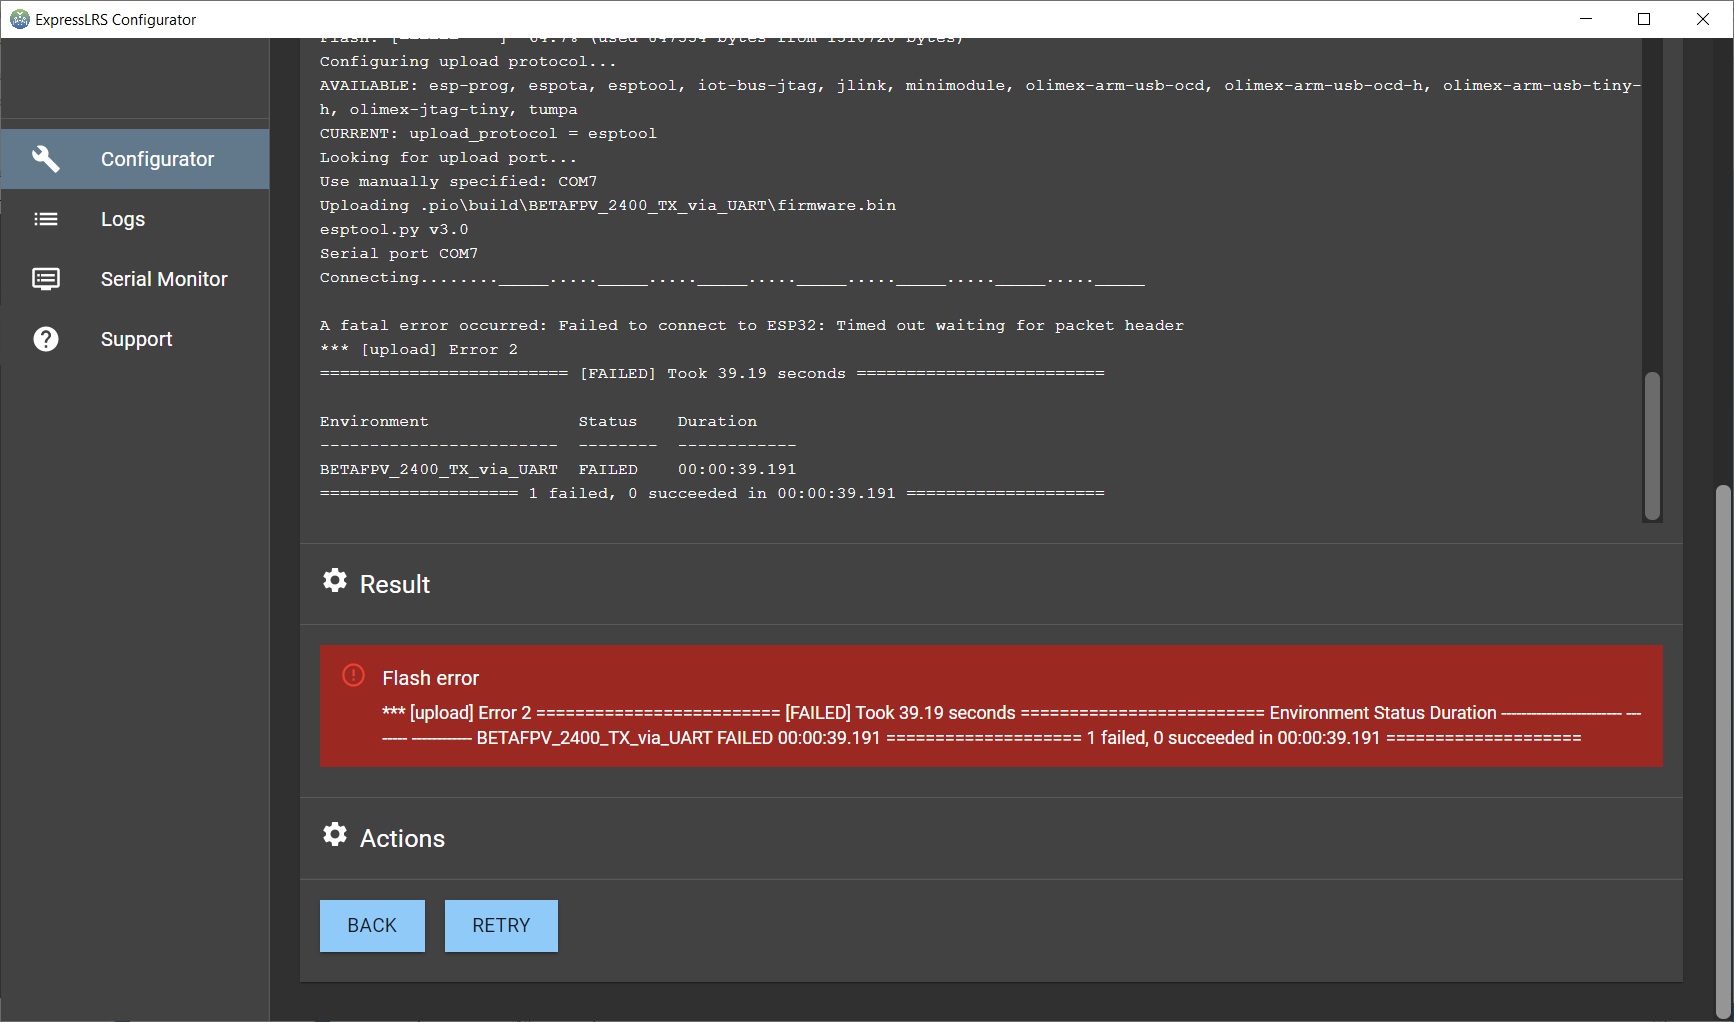
BetaFPV TX update via UART problem
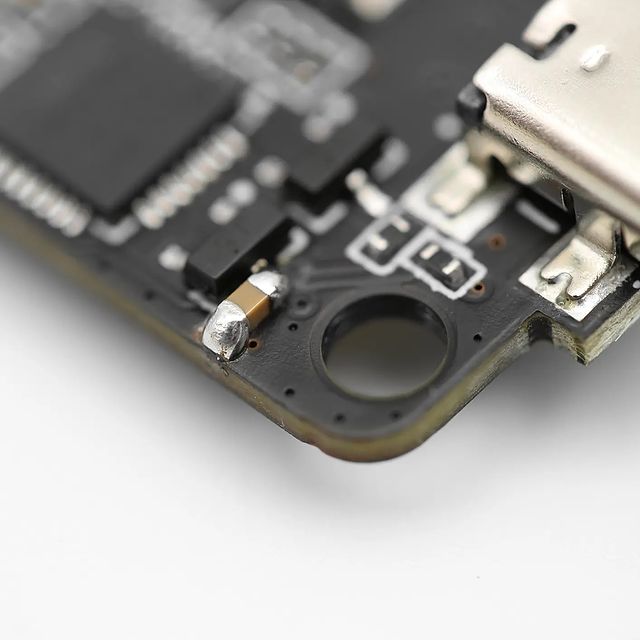
The first batch of the BetaFPV ExpressLRS TX modules have hardware issue, which prevents the module to automatically go into UART firmware update mode. BetaFPV forgot to add a capacitor on the EN pin of the ESP32, so it doesn’t reset properly. You might get the “Failed to connect to ESP32: Tined out waiting for packet header” error.
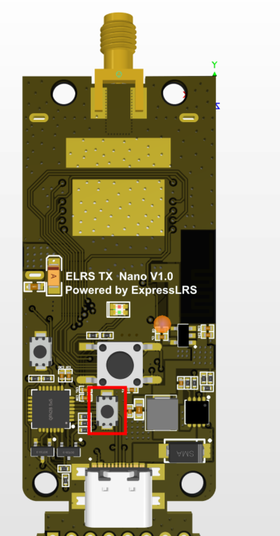
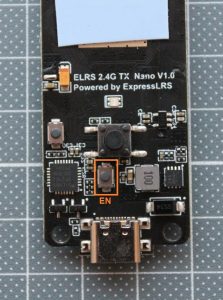
If you have this issue, the you can still use flashing by WIFI option or you can open the TX module and press the EN button while uploading the firmware via UART (USB), pictured below.
 |
 |
This can be fixed by adding small SMD capacitor to the circuit.
Nice job done fixing the BetaFPV ExpressLRS TX module by QUADMOVR.
UART update fix by QUADMOVR
BetaFPV Receiver firmware upgrade
There are three ways how to upgrade the receiver firmware – via WIFI, via Betaflight Passthrough or via UART. For UART mode you need to connect the USB to TTL dongle to the ExpressLRS receiver. So you should use WIFI or Betaflight Passthrough, for the first one you only need to power the ExpressLRS receiver ad for the second one you need it to connect to the Flight controller, running Betaflight firmware.
Compiling the firmware
First you need to compile the firmware with the ExpressLRS Configurator. Select the firmware version, device type and flashing method.
Set the device options.
And press the [Build] button. The compiling result should be thefirmware.bin file that can be uploaded via WIFI or
Via WIFI
Power on the receiver, but keep your radio turned off. Receiver will enter into the WIFI mode after the AUTO_WIFI_ON_INTERVAL timeout and the led on the receiver should start blinking fast. Then you have to connect your PC to the WIFI Hotspot the RX module created. It will show up in your network as ExpressLRS RX Module, and the password is expresslrs. Then open the browser and go to a specific IP Address http://10.0.0.1/. In the web page, select the the compiled firmware file firmware.bin by pressing the [Choose file] button. Hit the [Update] button
Read more about the updating the ExpressLRS firmware here: ExpressLRS – Complete Guide
Via Betaflight Passthrough
Connect the Flight Controller to the PC via USB cable. Select [Build & Flash] button when compiling the firmware in the ExpressLRS Configurator. The configurator will compile and try to upload to the detected serial port. If ExpressLRS configurator somehow fails to detect the serial port, then you should set the port manually.
OpenTX configuration
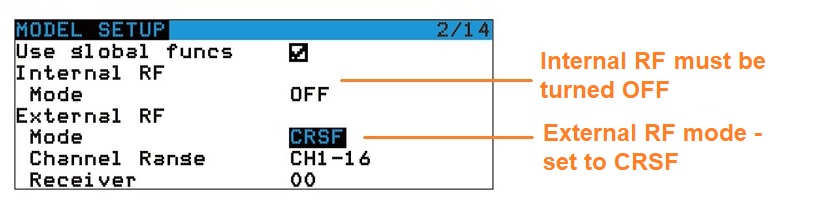
Open “MODEL SETUP” in the OpenTX radio, turn OFF the “Internal RF“, enable “External RF” and select “CRSF” as the protocol.
Download and install ExpressLRS LUA script (ELRS.lua file) in to the OpenTX radio.
Read more about the ExpressLRS LUA script here: ExpressLRS – Open Source Long Range radio control system- Complete Guide
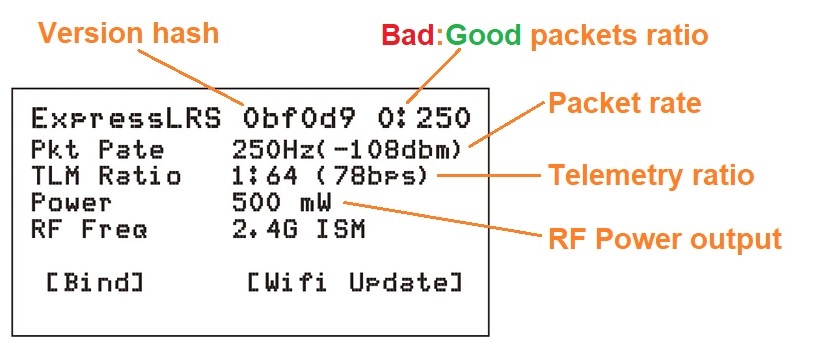
Run the ELRS Lua script. You should see the similar options setup window:
ExpressLRS Binding
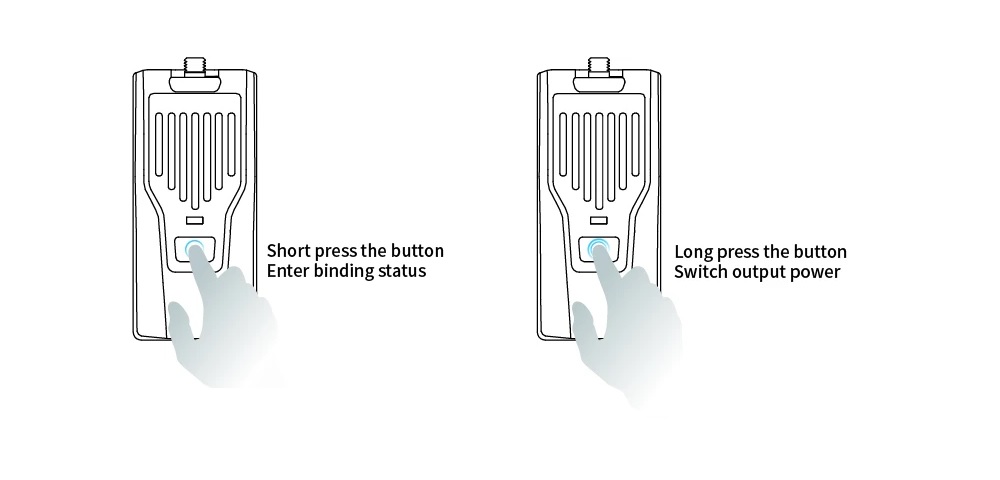
BetaFPV Nano TX module could enter into binding mode via ELRS.Lua script. Alternatively you can short press button on the module to enter the binding mode. Note, that TX module LED does not indicate the binding mode. TX module will automatically stop biding after 5 seconds, so you need to set the binding mode in receiver first.
Power output
You can change the power output level by using ERLS.lua script or by long pressing the power/bind button on the TX module. Power output level cycles between 100-250-500mW and the led color changes accordingly.
The RF TX module output power and LED indication as shown below.
| LED Color | RF output power |
| Blue | 100mW |
| Purple | 250mW |
| Red | 500mW |
Links
BetaFPV ExpressLRS TX on BetaFPV: https://betafpv.com/collections/expresslrs-series/products/elrs-nano-tx-module
BetaFPV ExpressLRS RX on BetaFPV: https://betafpv.com/collections/expresslrs-series/products/elrs-nano-receiver
BetaFPV ExpressLRS on Banggood: https://www.banggood.com/search/betafpv-expresslrs.html
BetaFPV Nano TX user manual: https://support.betafpv.com/hc/en-us/article_attachments/4403878641433/Manual_for_Nano_RF_TX_Module.pdf
BetaFPV Nano receiver user manual: https://support.betafpv.com/hc/en-us/article_attachments/4403870819737/Manual_for_Nano_Receiver.pdf
ExpressLRS guide: ExpressLRS – Open Source Long Range radio control system – Complete Guide
Disclaimer: This item was supplied by BetaFPV for a fair and unbiased review. BetaFPV never asked for a positive review and never influenced my opinion in any way. I’m trying my best to stay uninfluenced and give only my own, honest and as much as possible unbiased opinion. All affiliate links, if there are any, help me purchase items for future reviews and tests.
-
 Review: MEPS Space SZ F7 Mini FC
MEPS (Mepsking) is a new, but emerging manufacturer, making its mark in the RC
Review: MEPS Space SZ F7 Mini FC
MEPS (Mepsking) is a new, but emerging manufacturer, making its mark in the RC -
 HGLRC Thor Pro parallel charging board
HGLRC Thor Pro charger board is battery parallel charging board with protection fuses and
HGLRC Thor Pro parallel charging board
HGLRC Thor Pro charger board is battery parallel charging board with protection fuses and
Hi Montis,
I have the new BetaFPV Meteor85 with ELRS2.4 integrated in AIO board but I receive same error “Failed to connect to ESP8266”. There’s no button on board to flash.
Have you a solution or idea for this?
Hi, If you are trying to update the AIO FC with integrated ELRS receiver, then it is most probably you have the AIO FC with the ELRS receiver connected via SPI interface. This means the ELRS firmware is built into the Betaflight firmware. So you need to update the Betaflight firmware of your AIO FC in order to update the ELRS.