KingKong Tiny6 – build it yourself
KingKong Tiny6 is a nice Tiny Whoop style quadcopter. It is sold preassembled, all you need to do is plug the battery, bind and you can fly. But where is the fun of building something unique? Lets make our own version of Tiny6!
All the necessary parts.
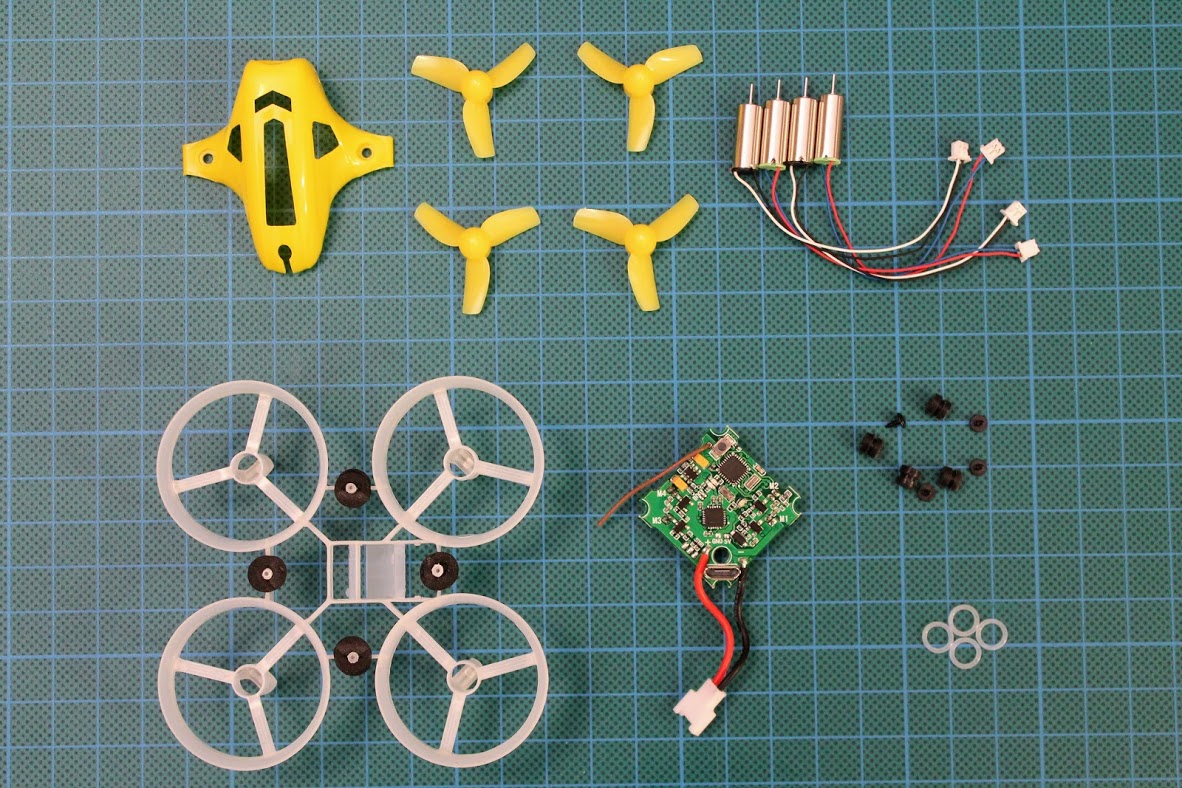
Shopping list:
Tiny6 frame @ Gearbest: KingKong Tiny 6 65mm Micro Plastic Frame Kit – $6.99
Tiny6 frame @ Banggood: 65mm Frame Kit Sets For KINGKONG/LDARC Tiny6 Inductrix Tiny Whoop Racing Quadcopter -$7.99
Motors
Racerstar Black edition 4X Racerstar 615 6x15mm 59000RPM Coreless Motor with (1.25mm plugs) – $9.99
Racerstar Red edition 4X Racerstar 615 6x15mm 59000RPM Coreless Motor (with 1.25mm) – $11.99
Racerstar Purple edition 4X Racerstar 615 6x15mm 67000RPM Coreless Motor (with 1.25mm) – $16.99
Kados Insane edition 6MM CHAOLI (KADOS INSANE) 65000RPM 6X15MM – $9.99
Flight controller
@ Gearbest: FuriBee F3 32-bit Brushed Flight Controller – $17.99
@ Banggood: Eachine Beecore F3_EVO_Brushed ACRO Flight Control Board For Inductrix Tiny Whoop – $23.99
Upgraded Beecore with OSD: Eachine Beecore Upgraded V2.0 Brushed F3+OSD Flight Control Board For Tiny Whoop – $26.99
Total cost: from $34.97
First of all we will use original Tiny6 frame. It comes with white flexible frame base, canopy, damping rubber pads, screws, rubber bands and 4 pcs of 3 blade props.
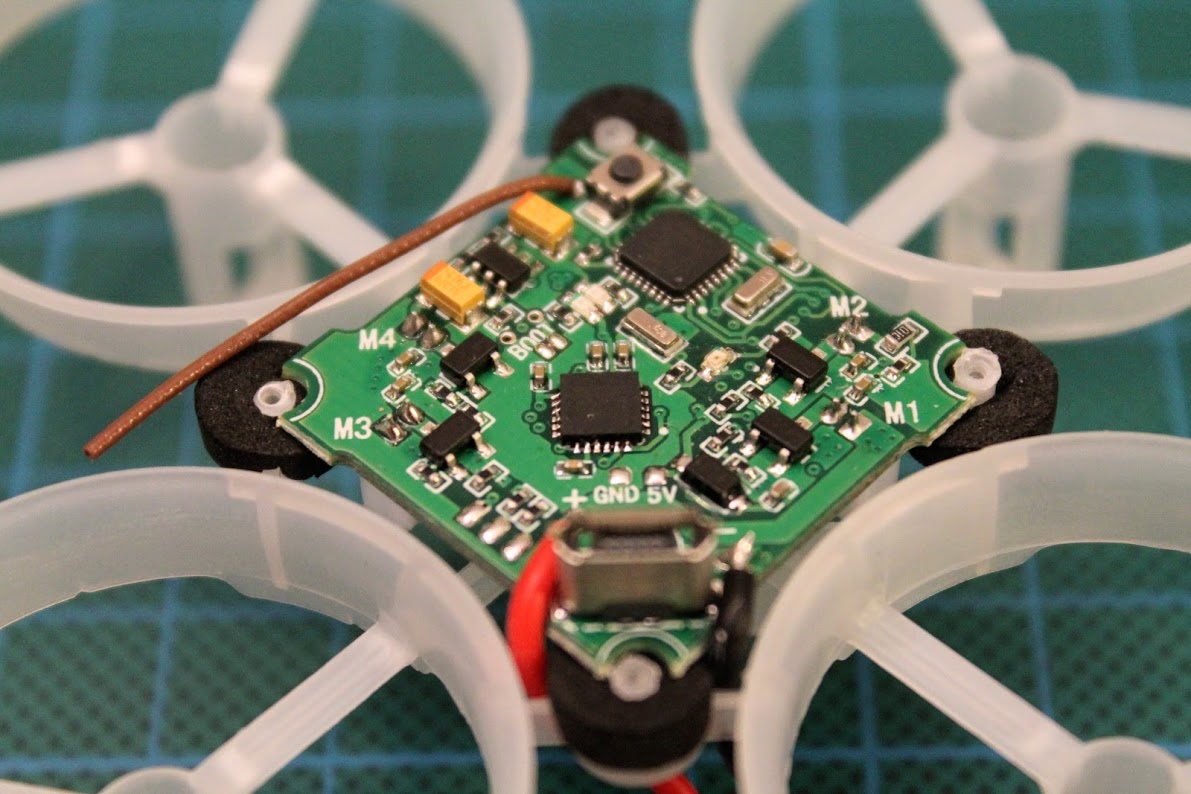
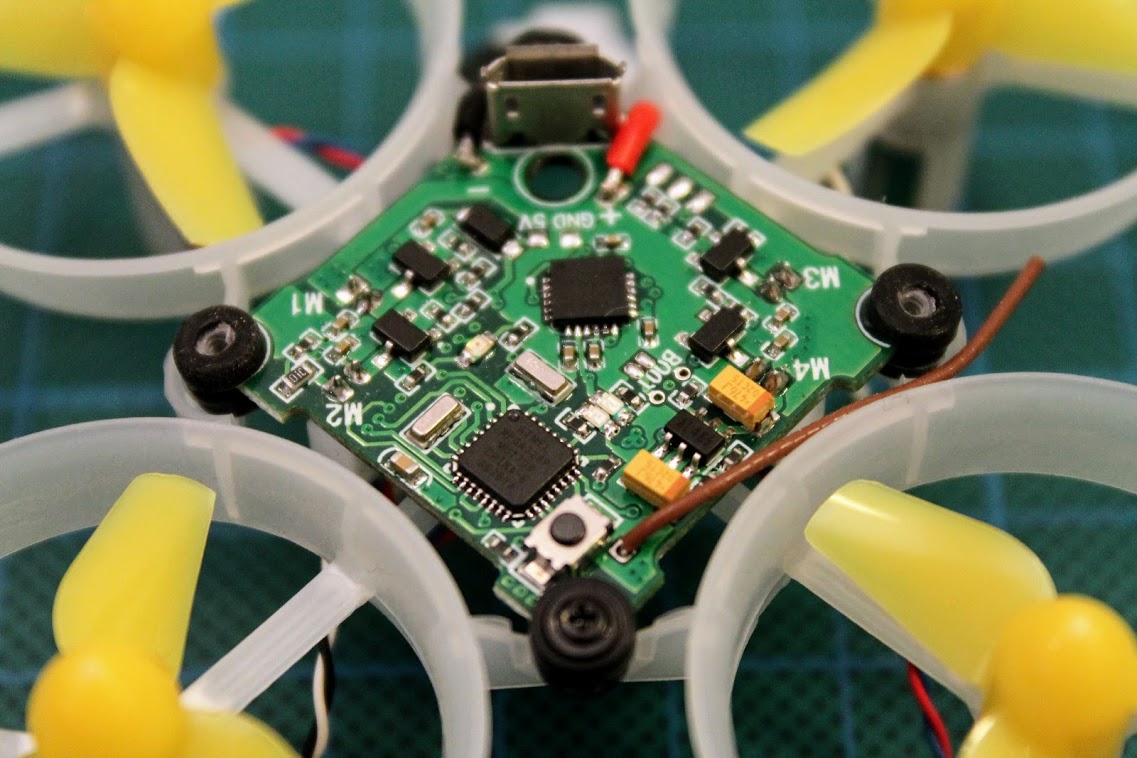
Put the BeeCore F3 flight controller on the foam pads.
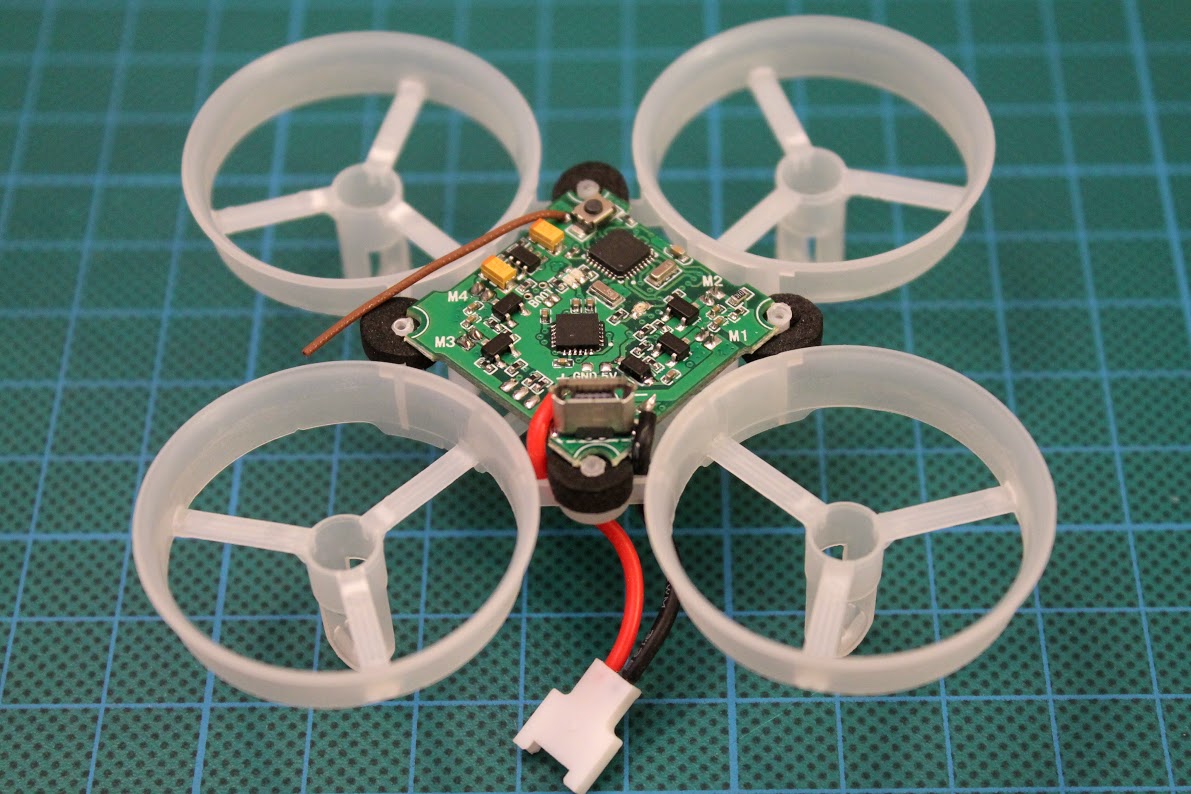
FC orientation: Battery connector and micro USB port should be located on the back side of the quad.
Fixate the flight controller with two screws – one on the from and one on the back. Left and right screws will be used to hold the canopy.
We have two options for FC mounting. One is use dampening foam pads that come with flight controller:
Another option is to use rubber dampers that cam with the Tiny6 frame kit. It’s a matter of the preference – foam dampeners make more softer fication and ruber dampeners are more stiff, but I went for rubber ones.
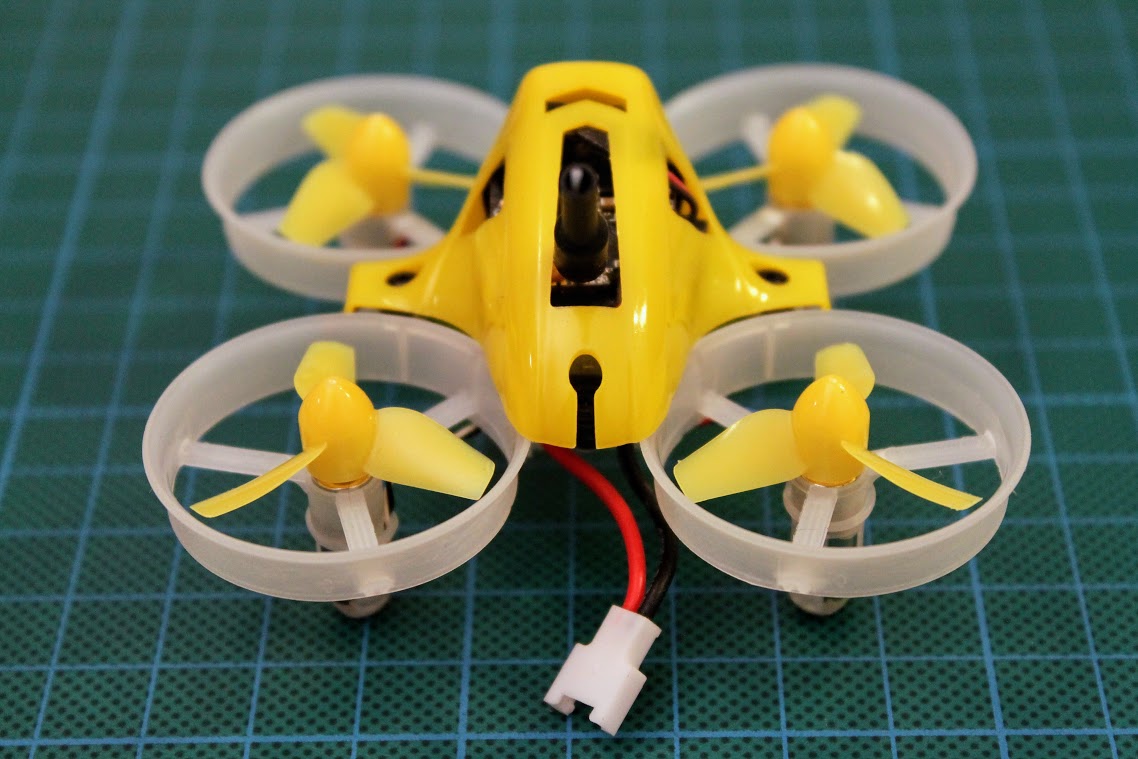
Rubber bands are for used to hold the motor wires close to the frame.
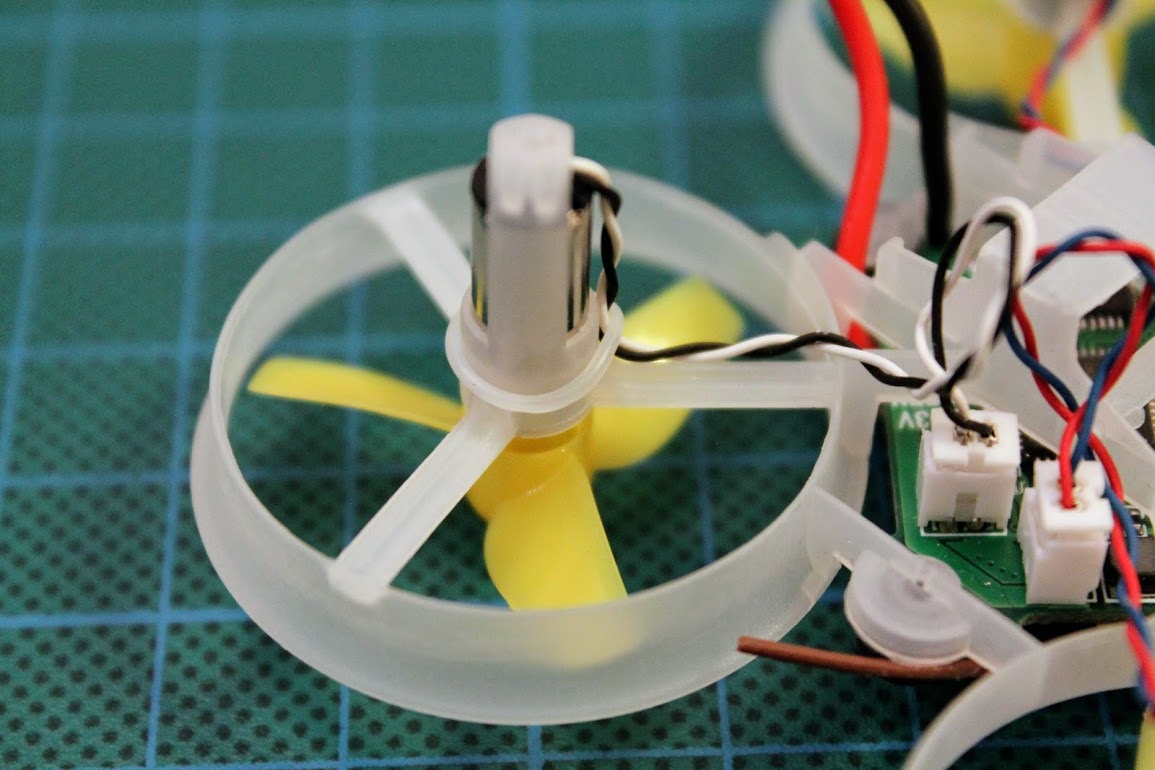
Thats how motors connected and wires fixed with rubberbands look like.
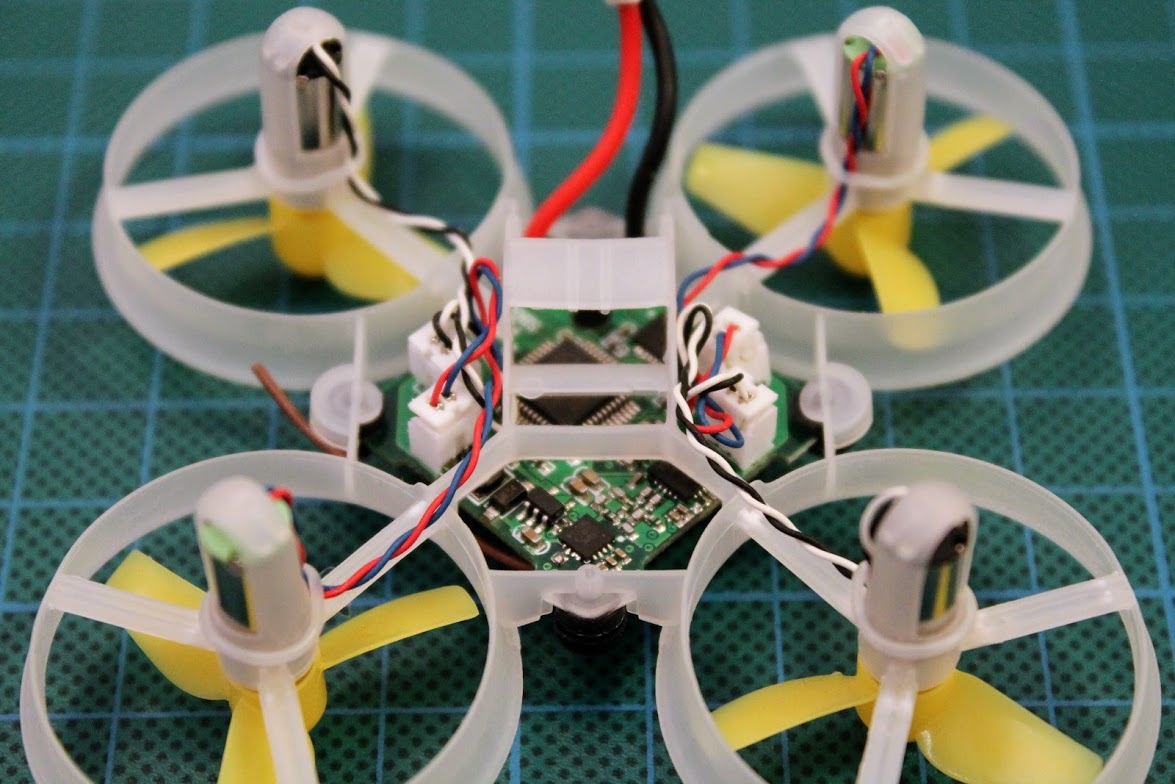
We have already made a flyable Tiny6. We can plug the battery, bind the transmitter and check how this little whoop flies. If it flys ok LOS (line of sight), we can now convert it to the FPV whoop. For this we need to add camera and VTX combo.
Camera and video transmitter shopping list:
From Gearbest
Camera: Turbowing TWC25 Micro 700TVL NTSC FPV Camera – $8.94
VTX: Turbowing 5.8G 48CH 25mW NTSC FPV Transmitter – $8.94
Or combo camera + VTX: Turbowing TX25 Split Micro 700TVL FPV Camera – $17.06
From Banggood:
Camera: 600TVL 1/4 1.8mm CMOS FPV 170 Degree Wide Angle Lens Camera PAL/NTSC 3.7-5V – $6.99
VTX: Eachine VTX01 Super Mini 5.8G 40CH 25mW FPV Transmitter – $9.99
Combo camera: Eachine TX01S NTSC 40CH 25MW VTX 600TVL Cmos FPV Camera for Tiny Whoop – $18.99
Total for camera & VTX: from $17.06
I have chosen the Eachine TX01S camera and VTX combo.
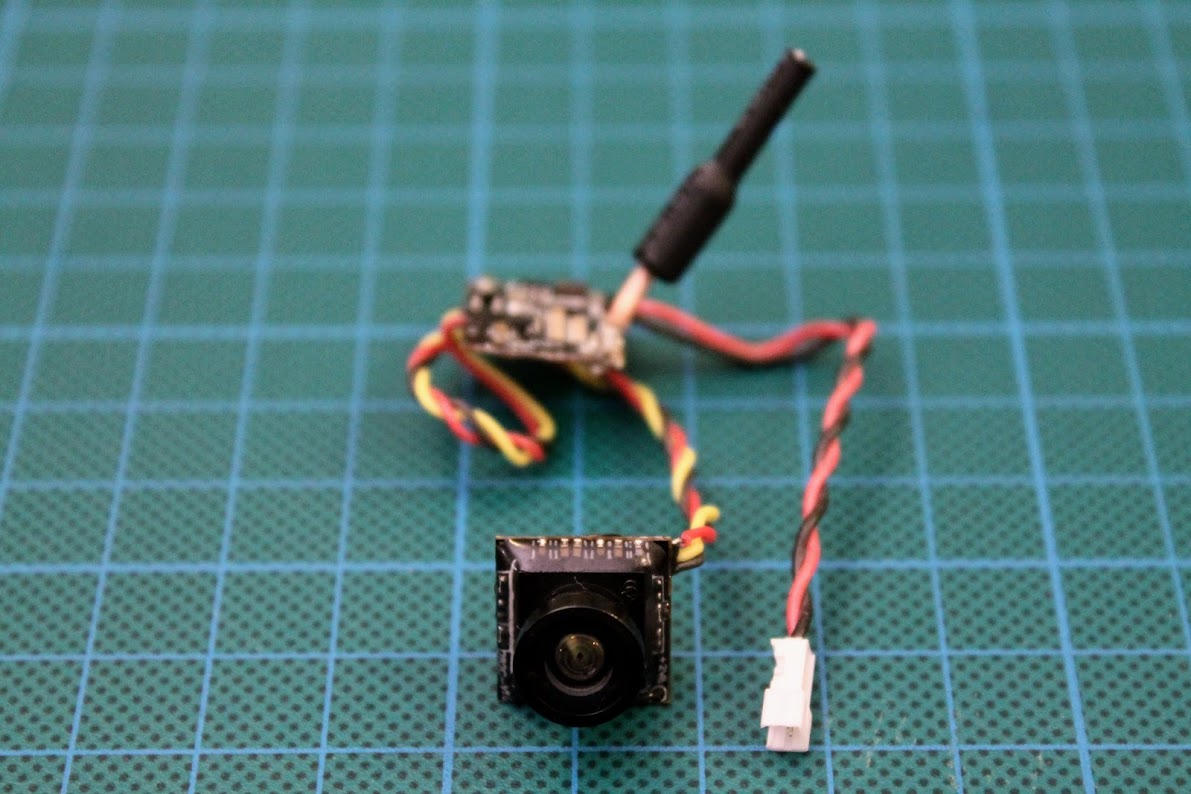
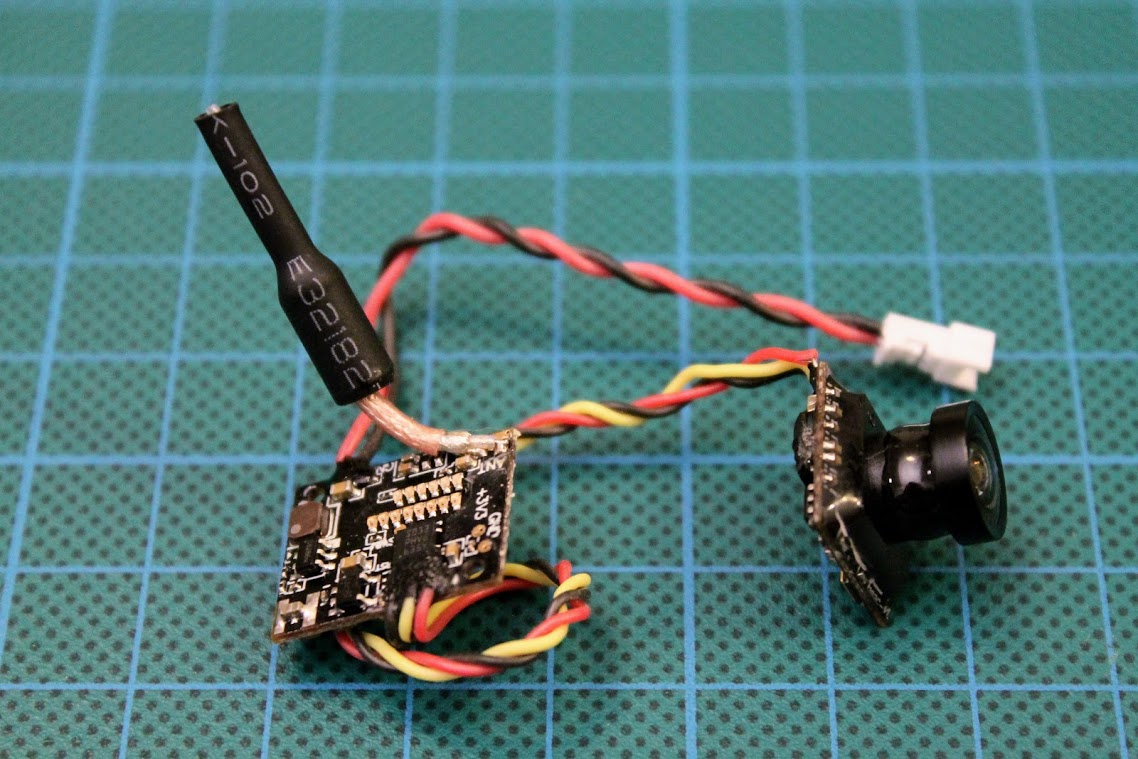
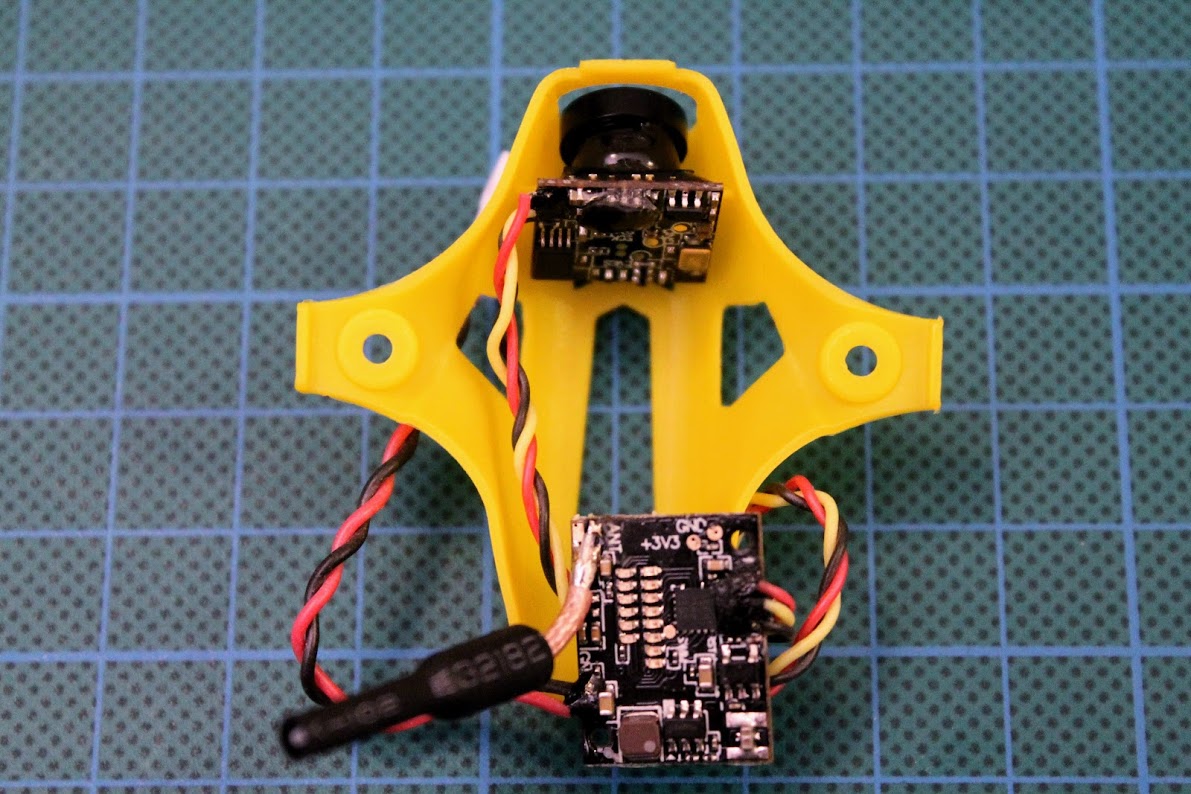
The Eachine TX01S camera fits the canopy nicely.
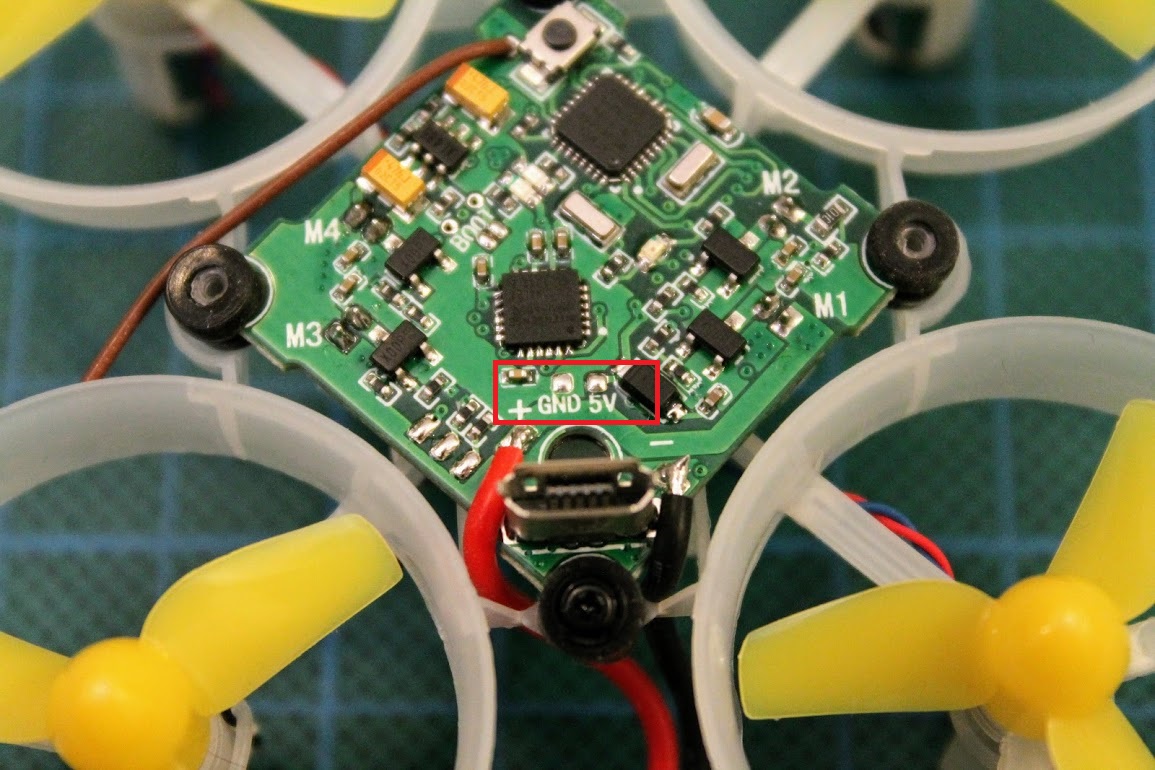
The only soldering you will need to do in this build is solder the VTX power lines. For this you trim the power leads and solder them to the marked pads.
I have attached the camera to the canopy with a help of double sided adhesive tape.
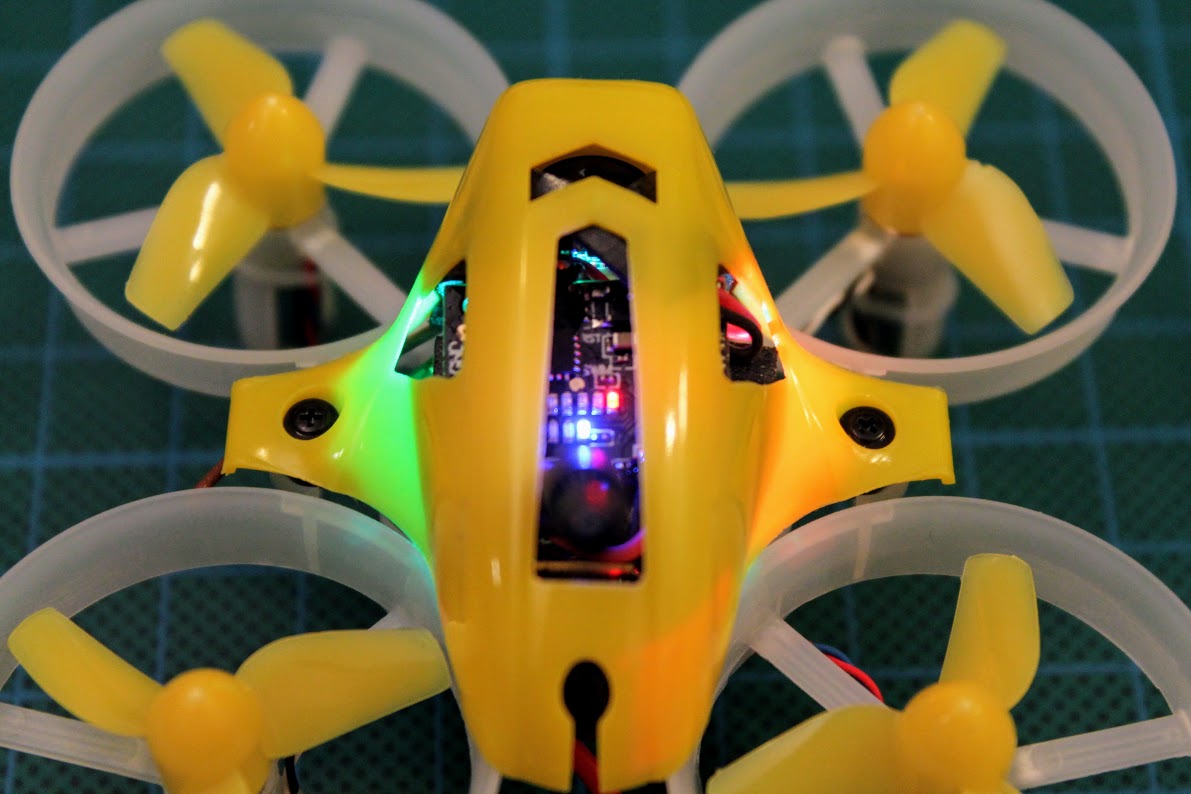
You see the all the FC status and the VTX channel and band LEDs through the holes in the canopy. Unfotunately you cannot change them withou removing the canopy.
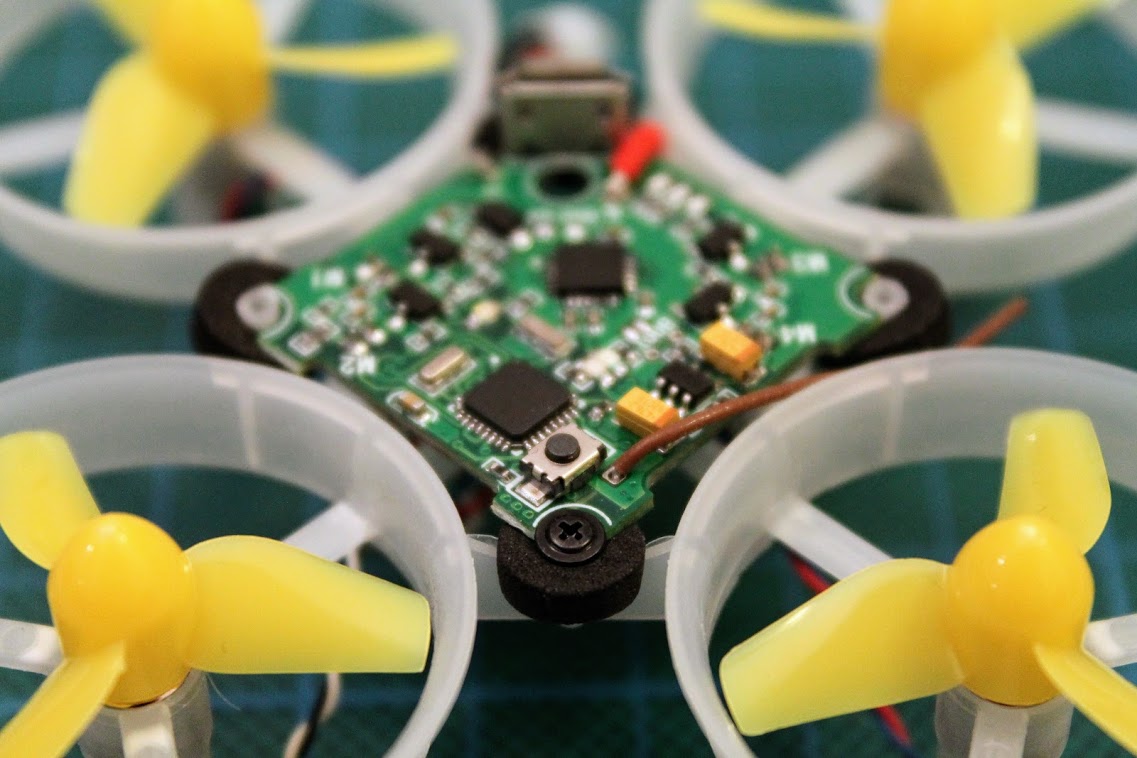
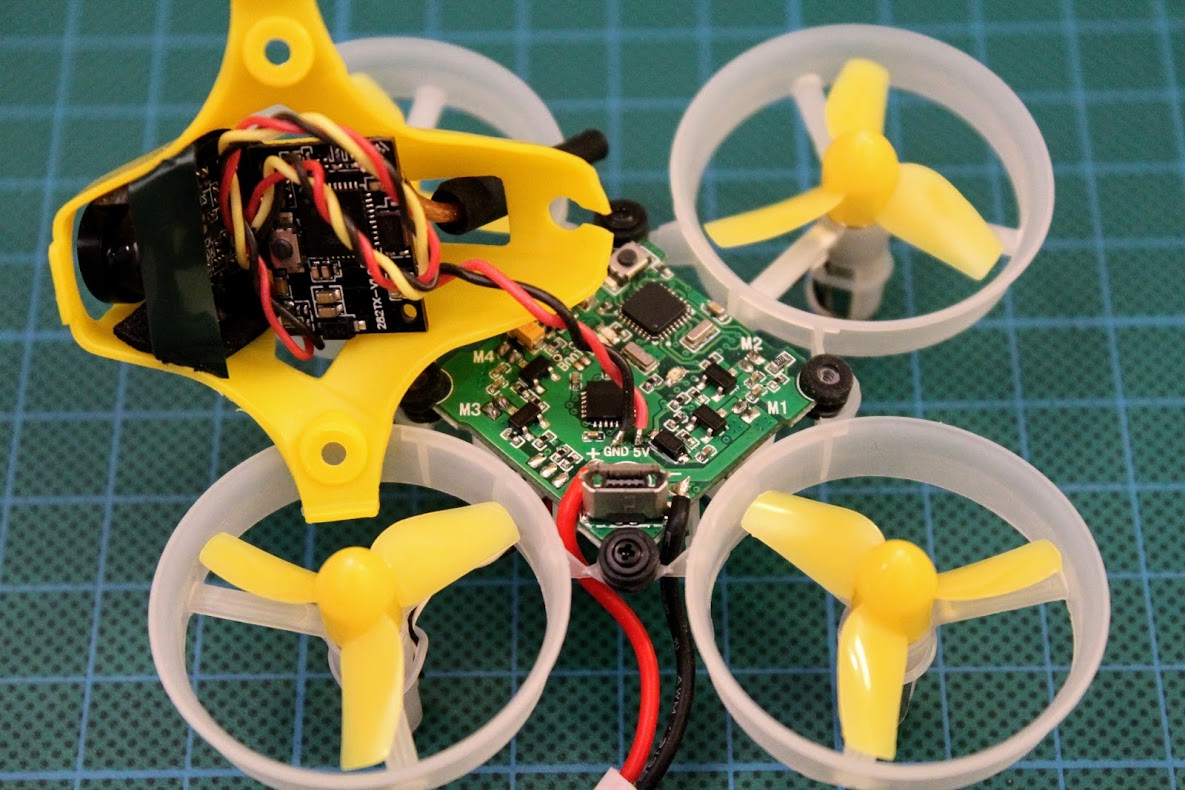
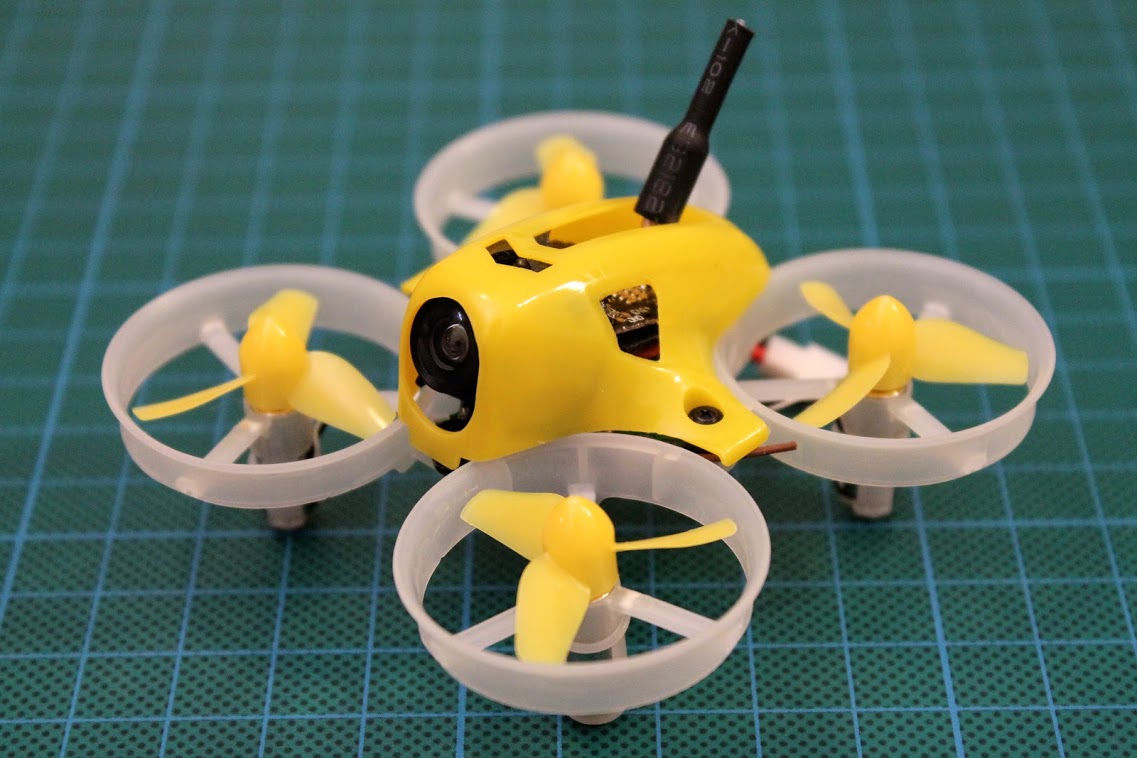
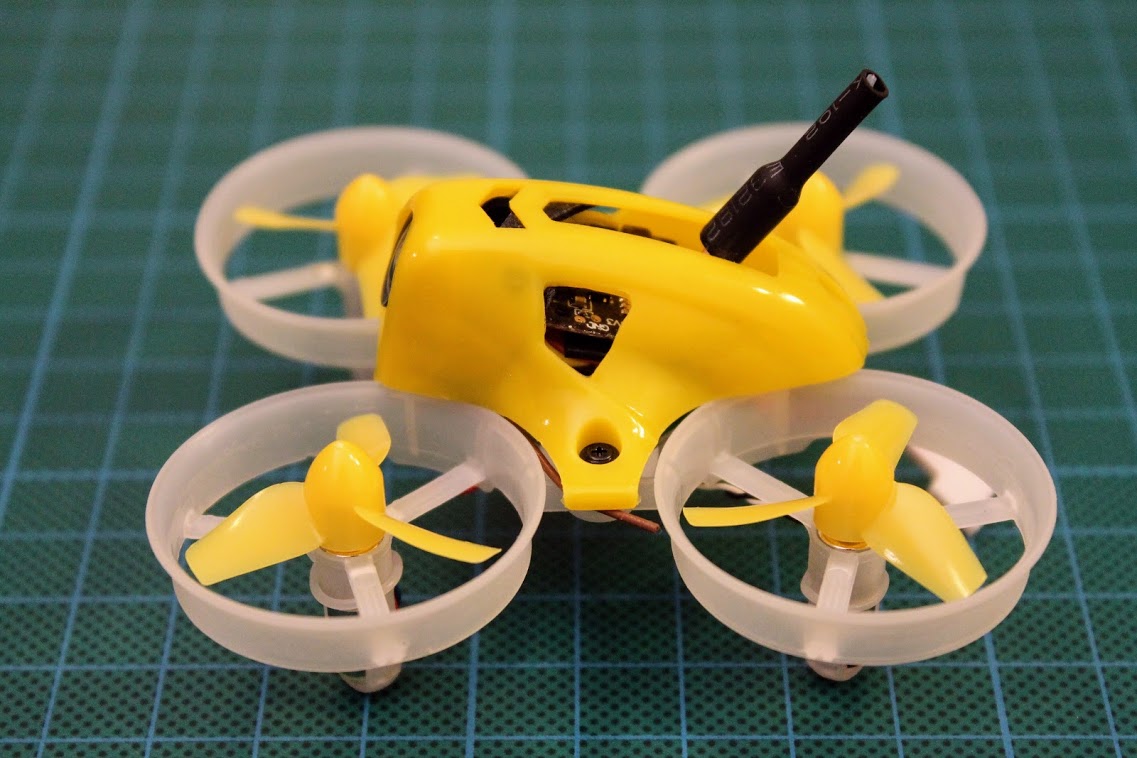
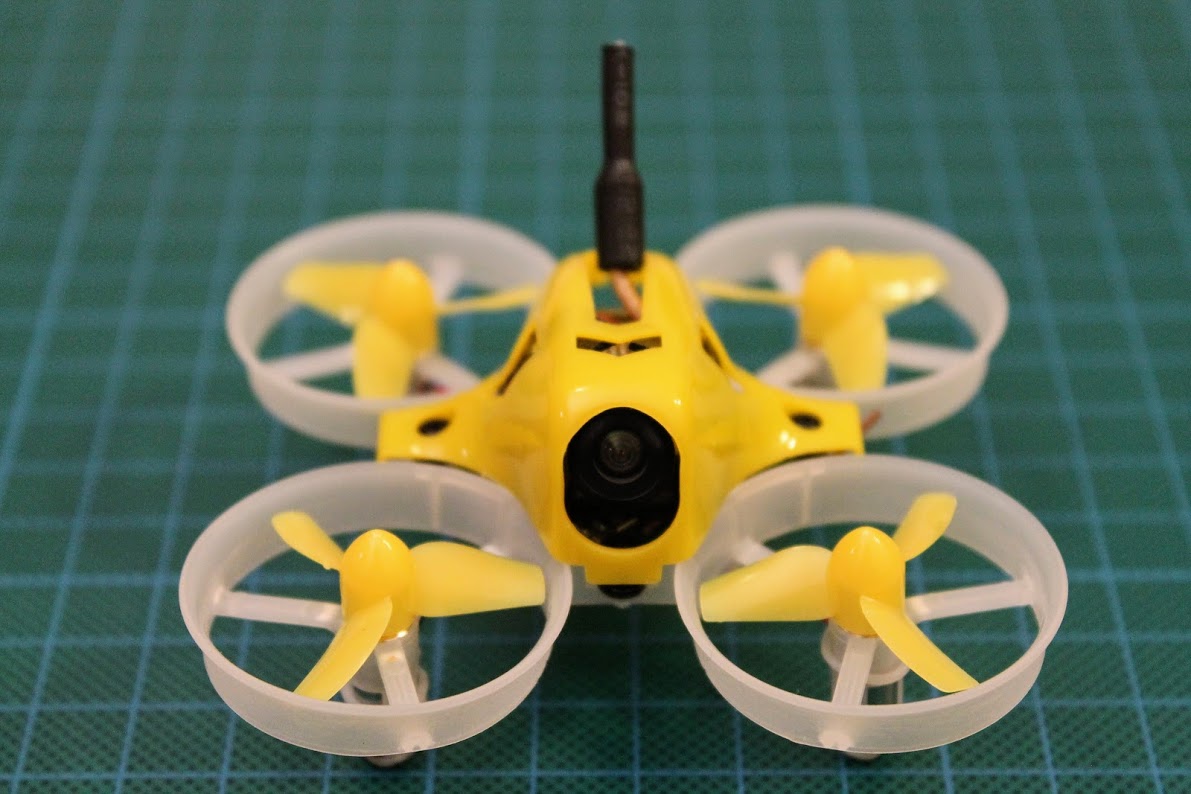
Thats it, we have completed the Do-It-Yourself Tiny6 brushed tiny whoop. This was the easiest quad buid I’ve made so far. Almost no soldering required. You can complete this build easy and quickly.
Some photos of the completed Tiny6 whoop.
-
 DIY ExpressLRS Transmitter and Receiver
ExpressLRS is gaining the popularity rapidly. There is a number of well known brands
DIY ExpressLRS Transmitter and Receiver
ExpressLRS is gaining the popularity rapidly. There is a number of well known brands -
 Diatone GTB229/239 quadcopter DIY build review
I felt in love with the Diatone GTB frame design the first time I saw
Diatone GTB229/239 quadcopter DIY build review
I felt in love with the Diatone GTB frame design the first time I saw
How can we get OSD on this build?
Yes, shure. Just choose any brushed Flight Controller with OSD. It will have separate pads for the camera and for the VTX.