Guide: How to Arm, PreArm and start your quad
What is Arm and why do we need it?
All modern quadcopters (or any other multirotors) have Arm feature. In order to safely plug in the battery, carry or handle powered multirotor it has to be deactivated (aka Disarmed) and it is the default state of the powered quadcopter. In the deactivated state motors will not spin the propellers regardless A quadcopter has to be activated (aka Armed) only when a pilot is ready to control it.
What is PreArm and why should we use it?
PreArm feature is used for preventing of the accidental arming your quadcopter. You can easily arm the quadcopter by unintentionally hitting the arm switch. Especially if your radio transmitter is hanging on your neck by lanyard. And this happens. I’m not an exemption, I also had unexpected unintentional arming of the quadcopter, happily it ended well. Arming the modern powerful quadcopter with the motor power of several Kilowatts is dangerous thing and can lead to serious injuries.
So unless you are flying whoops with ducted fans or small toothpicks it is advised to set the PREARM mode for your quadcopter.
How to setup Arm and PreArm modes to the radio switches?
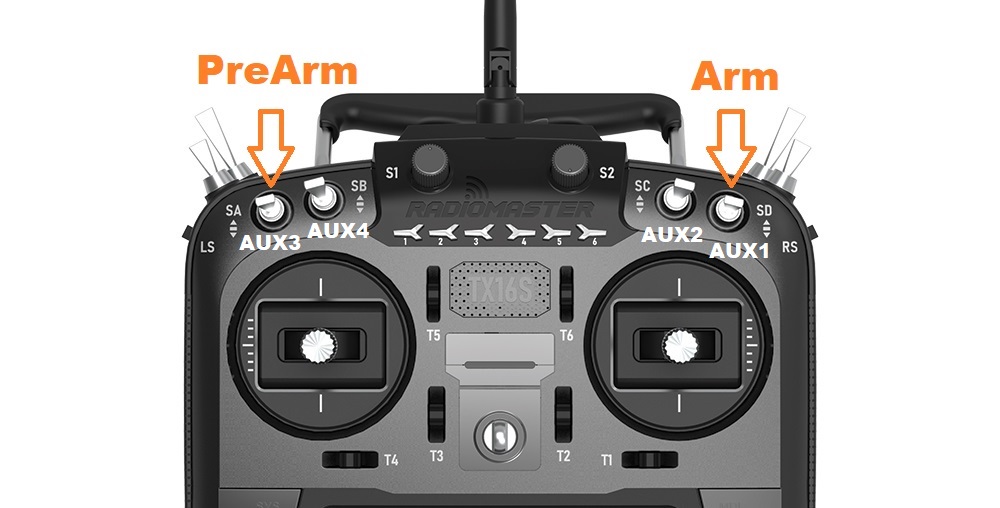
First you have to set the Inputs and Mixes on your radio transmitter, Model settings. My preferred switch settings are the following and the setup example is based on this configuration. You can customize the Arm and PreArm switches to your preferences.
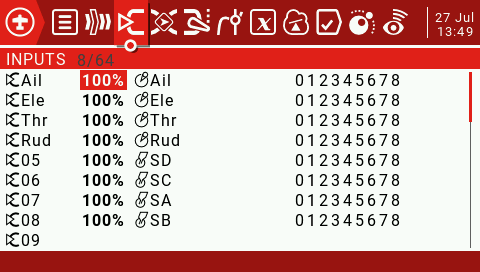
These are the INPUTS ant MIXES configuration on my OpenTX Radio.
 |
 |
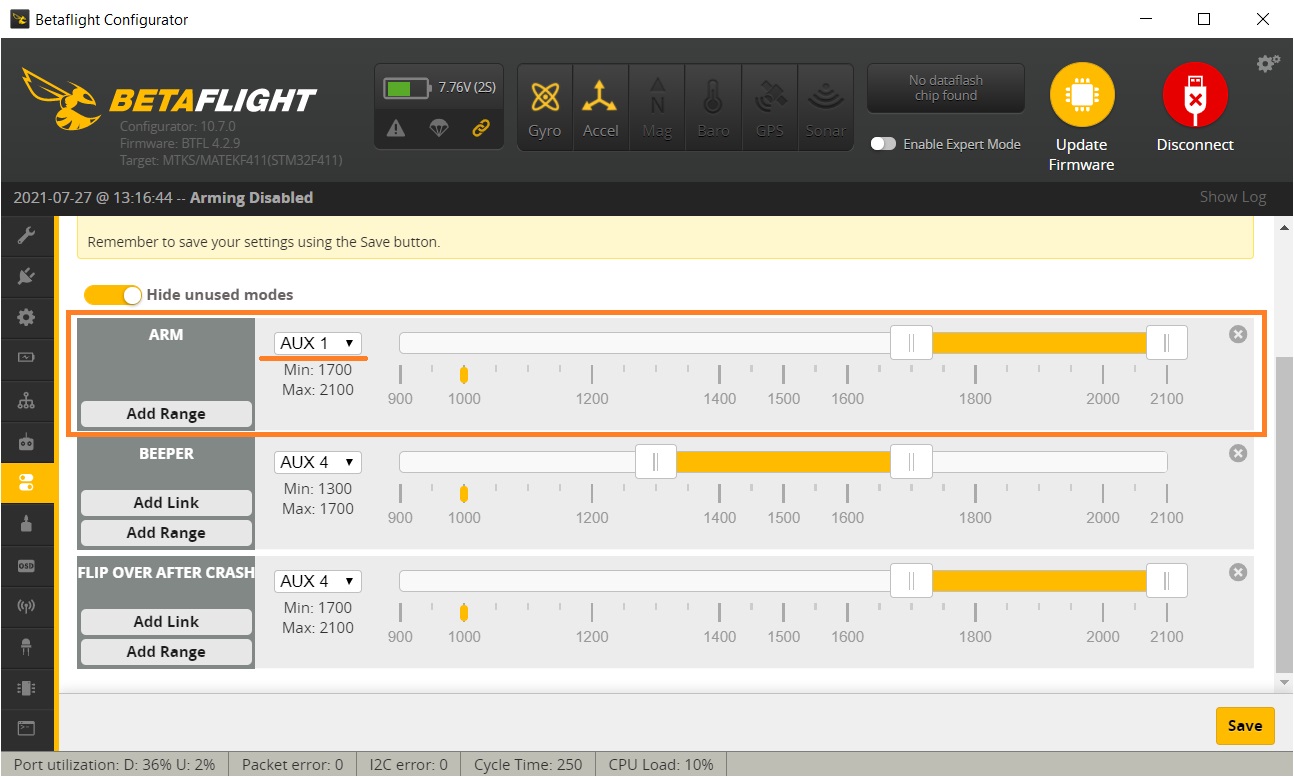
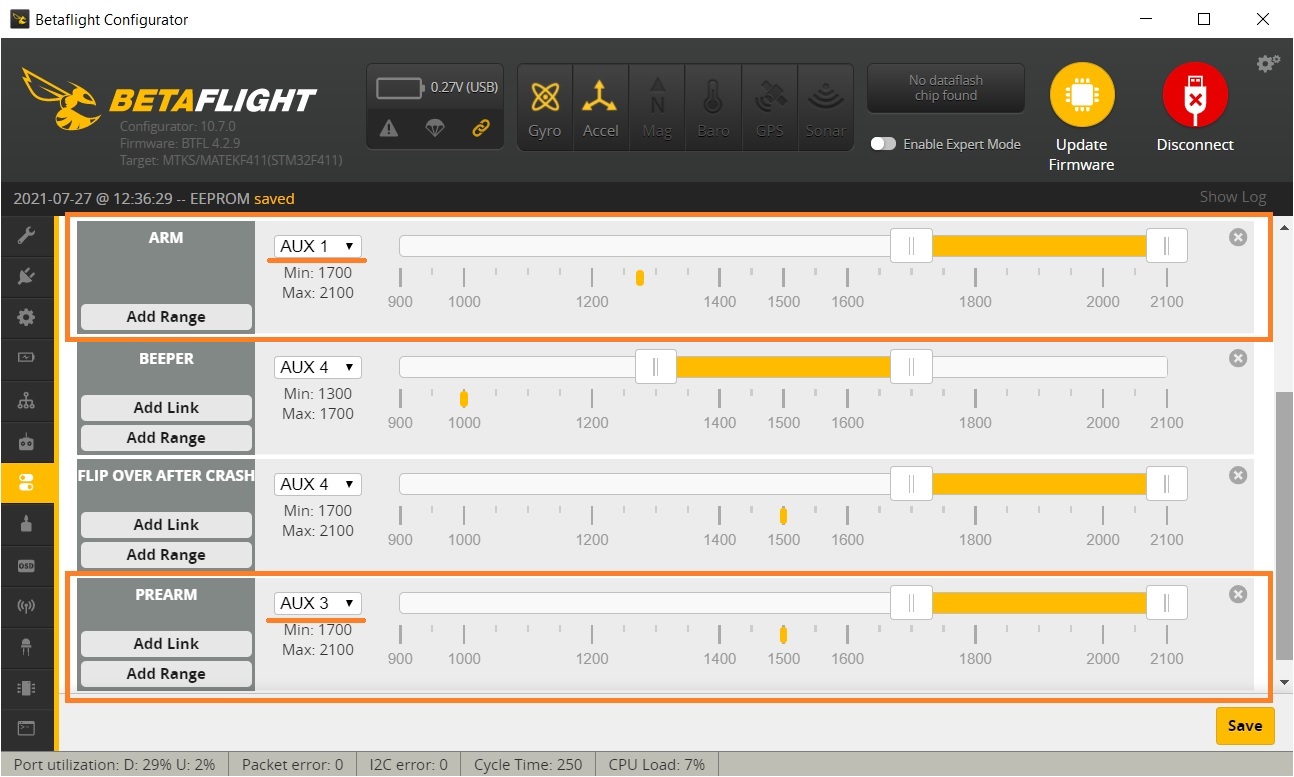
Connect your quadcopter to the Betaflight Configurator. Go to the Modes tab.
Press Add Range button on the ARM mode selector. Select the AUX channel that corresponds your preferred ARM switch or set it to AUTO and turn On-Off the preferred switch. Configurator will auto detect the switch you are toggling. Slide the sliders to the value range you want the ARM position to be active.
The following example of the configuration has ARM mode on the upper range of the AUX1 channel.
The same procedure is for PREARM mode.
Usually the PREARM switch should be the switch on the opposite side of the radio to minimize the chance of accidental switching on if you bump one side of the radio or you unintentionally hit the switch while the radio is on.
Press Add Range button on the PREARM mode selector. Select the AUX channel that corresponds your preferred PREARM switch or set it to AUTO and turn On-Off the preferred switch. Configurator will auto detect the switch you are toggling. Slide the sliders to the value range you want the PREARM position to be active.
The following example of the configuration has ARM mode on the upper range of the AUX1 channel and PREARM on the AUX3.
Notes
If you turn the ARM mode switch on and your quadcopter does not activate, your props are not spinning and your quadcoper cannot be ARMED, then look at this tutorial on how to troubleshoot the arming problems: Guide: Troubleshooting arming issues
-
 ESC Firmware Guide
In this concise overview, we’ll explore the evolution of ESC (Electronic Speed Controller) firmware,
ESC Firmware Guide
In this concise overview, we’ll explore the evolution of ESC (Electronic Speed Controller) firmware, -
 List of brushless whoop/toothpick flight controllers
This is the list of brushless tiny whoop/toothpick style flight controllers with brief description
List of brushless whoop/toothpick flight controllers
This is the list of brushless tiny whoop/toothpick style flight controllers with brief description
Dude, you were the only person who provided me the fix to my issue. Trust me, I tried everything possible EXCEPT the PRE-ARM switch and that along with ARM got me back in business.
Thank you!!!!
You are welcome! I’m really glad it helped.