Guide: Splash screen, background and model images in OpenTX radio
OpenTX radios like Jumper T16 or Radiomaster TX16S have big color LCD screens, capable of displaying images. OpenTX has splash screen, background and model images that can be easily customized.
All the images are stored in the SD card, so you must connect the radio to the PC via USB cable or remove the SD card from the radio to access the images.
The following instructions are suitable for the following radios: Jumper T16, Jumper T18, RadioMaster TX16S and Frsky Horus X10S radios that have color LCD screen with 480x272px resolution.
How to change the Splash Screen in the radio?
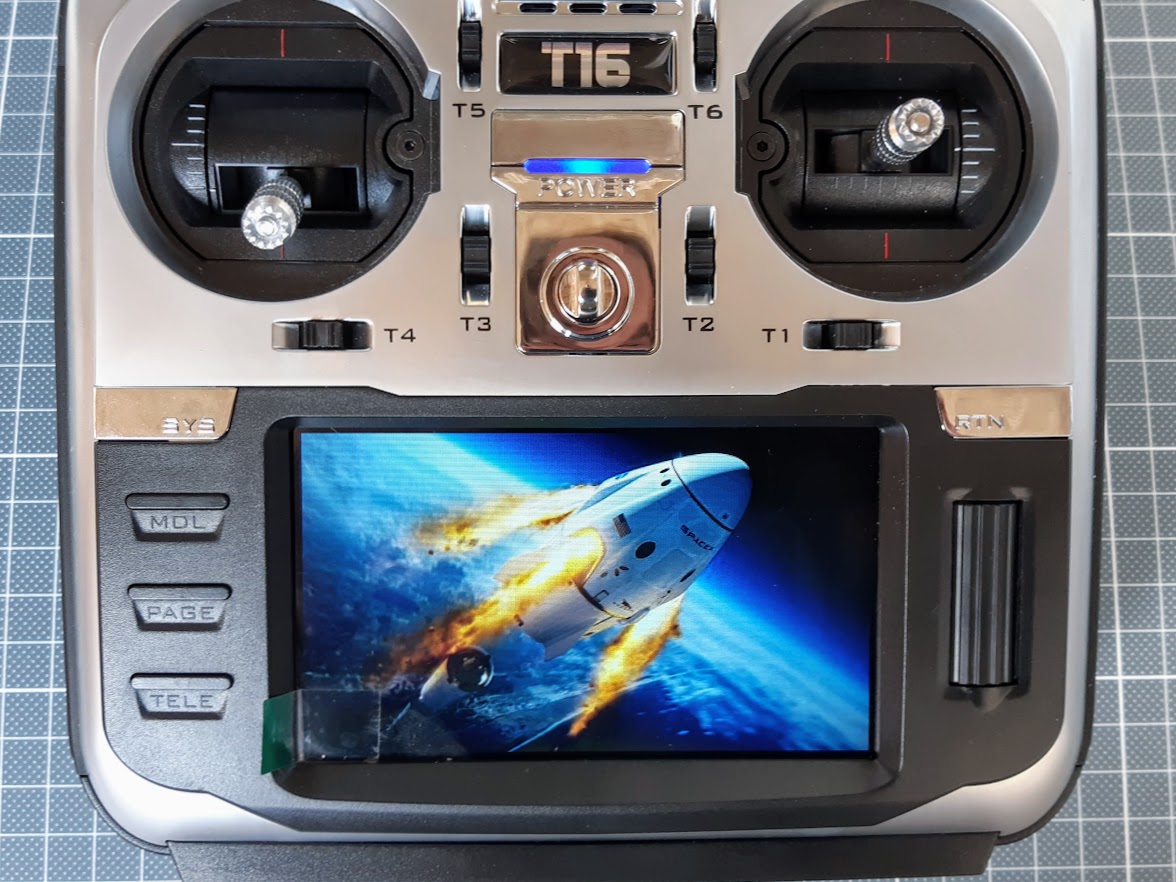
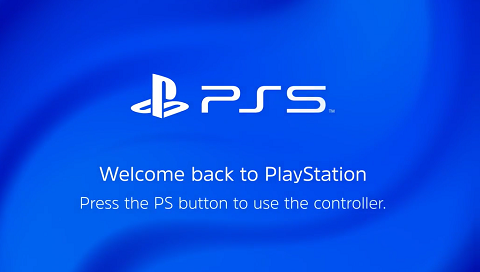
Splash screen is PNG type image with a filename of splash.png. If you want to make your custom splash screen image you need to crop/resize the picture to the 480×272 px resolution
Image path: /IMAGES/splash.png
Image dimensions: 480×272 px
Here are the a few splash screen images I have made ready to use for you:


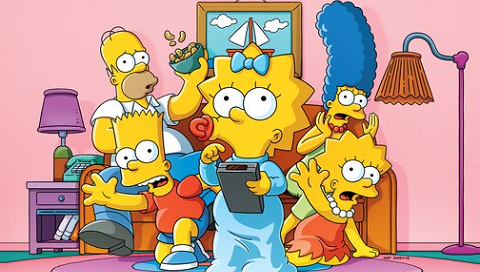


If you want to use install one of these splash screens, just right click and select save image, rename it to splash.png and copy to the /IMAGES/ folder on your radio SD card.
Tip: Any splash screen picture can be used as background picture and vice versa.
How to change the Background Image in the radio?
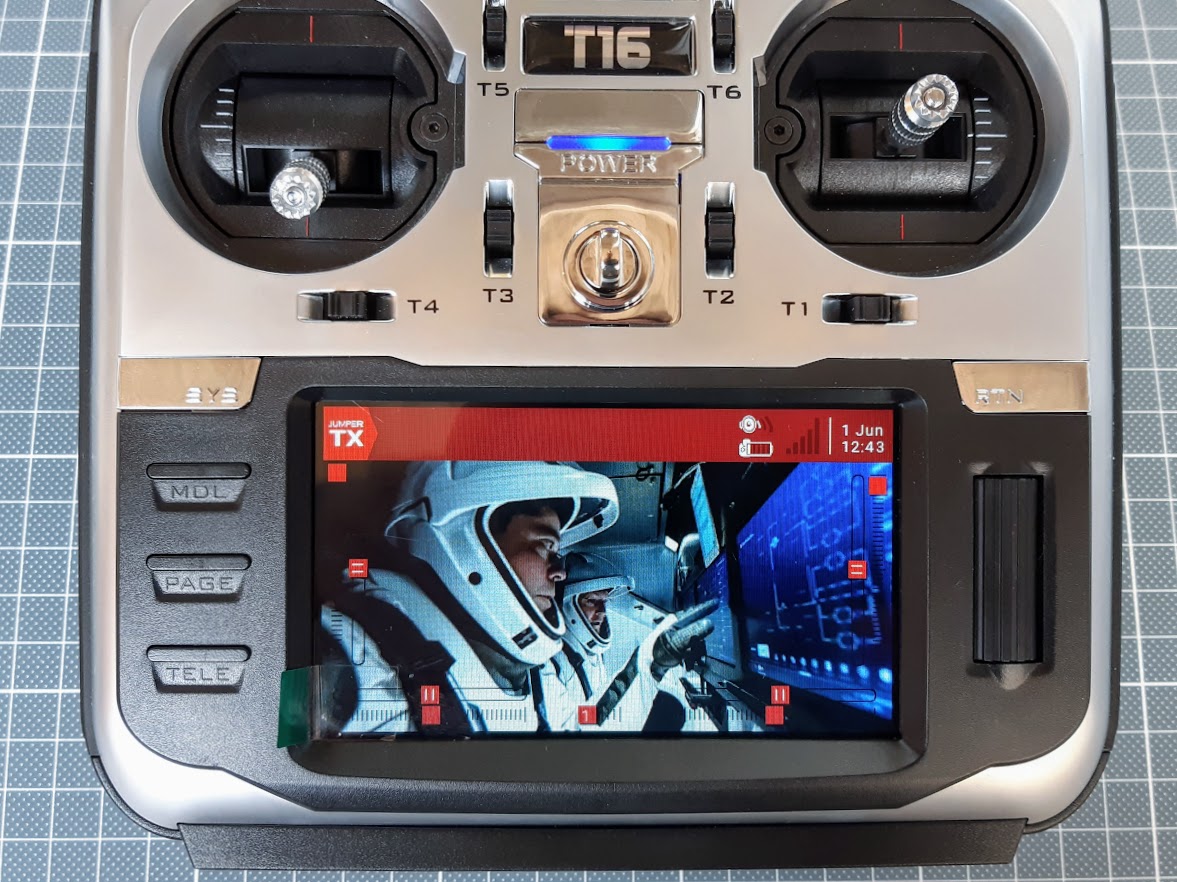
Background is PNG type image with a filename of background.png. If you want to make your custom background image you need to crop/resize the picture to the 480×272 px resolution.
Image path: /THEMES/DEFAULT/background.png
Image dimensions: 480×272 px
Here are some of my background images ready to use:


If you want to install one of these backgrounds, just right click and select save image, rename it to background.png and copy to the /THEMES/DEFAULT/ folder on your radio SD card.
Tip: Any background picture can be used as splash screen picture and vice versa.
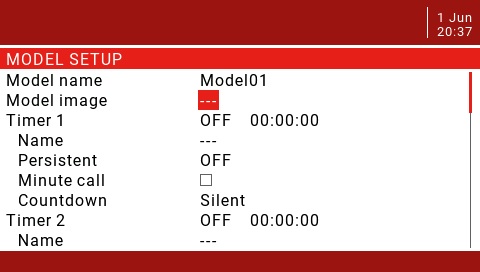
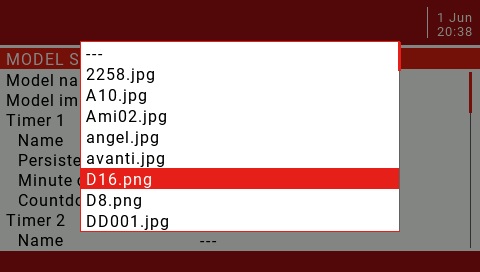
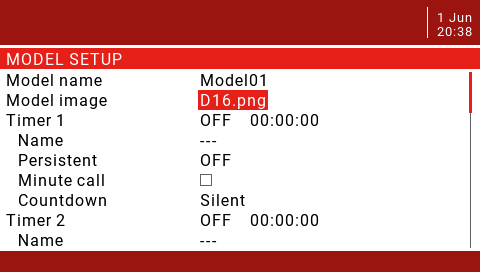
How to set the custom Model Images in the radio?
Image path: /IMAGES/******.png (image name is 6 characters maximum!)
Image dimensions: 192×114 px


If you want to install one or any number of these model images, just right click and select save image as…, keep the same image name or rename it (max 6 characters in the filename), save it to the disk and/or copy it to the /IMAGES/ folder on your radio SD card. Then in the radio model settings select the Model Image setting.
Choose the image file
History:
2020-06-01 – article created
2021-02-03 – splash screens updated
2021-06-17 – ExpressLRS, Flysky, Redpine added
-
 ESC Firmware Guide
In this concise overview, we’ll explore the evolution of ESC (Electronic Speed Controller) firmware,
ESC Firmware Guide
In this concise overview, we’ll explore the evolution of ESC (Electronic Speed Controller) firmware, -
 List of brushless whoop/toothpick flight controllers
This is the list of brushless tiny whoop/toothpick style flight controllers with brief description
List of brushless whoop/toothpick flight controllers
This is the list of brushless tiny whoop/toothpick style flight controllers with brief description
Thats so cool thanx i love the pictures
You are welcome. I appreciate your feedback.
Great stuff, do you know if you can have a shut down picture?
I have tried shutdown.png and bye.png but they dont work.
NOTE: If you play a longer bye.wav then the screen just goes blank until its finished
Hi, unfortunately there is no known method to replace the shutdown picture. Only the shutdown voice/sound file can be changed. There is also white/blank screen issue reported on the gitHUB: https://github.com/opentx/opentx/issues/8041
Hi, i changed my background screen a while back, the image did not have the correct dimensions but it still worked, i am trying to change it back, whenever i try to do this, i replace the file with a new one, however when my radio turns on, the old image is still there, what should i do?
Background image is located in the folder /THEMES/DEFAULT/background.png on your SD card. Notice that there can be other THEME name if you are not using the DEFAULT theme.
Hi, thankyou for this information, how i can retrieve the original splash image?, because my is missing, thanks in advance.
What radio transmitter you are using? I could search for original splash if I could know the radio you use.
Thx for this tutorial ,you made it simple..I am guessing the welcome voice is pretty simple as well ? A .ogg file or .wav file ?
Welcome voice file is hello.wav in the SOUNDS/EN/SYSTEM/ folder on your SD card. The sound files should be in WAV format. General mono Wav file works. All the actual file requirements are:
Audio File Format
File Name: 123456.wav (up to 6 characters plus .wav)
Sample Rate: 32 kHz (or 16 Khz, 8Khz)
Bits / Sample: 16 (or 8)
Tracks: 1, mono
Compression Codec: PCM (or u-law, a-law)
How do I resize my model images to 192x 114? And why so many formats in the SD card to plant our images?
All my images are in google photos.
I can cut and crop them then I am stuck.
I am 70 so the tech is all new to me but I am intrigued to learn.
Just love my new T16s.
Fixed wing models only for now.
Thanks for all your help
I almost understood it all but need to practice it.
Peter
I crop the pictures to the fragment I need and then resize them to the exactly needed size. I use Microsoft Paint for this task as it is very simple. Select “Resize” (CTRL+W) then choose “Pixels” and then input the needed picture size. Untick the “Maintain aspect ratio” to fix the picture width and height ratio.
Hi there Peter.
It is quite easy when using the free software GIMP. Take a look on my post in this forum. I had the exact same question for my Radiomaster TX16S.
https://www.gimp-forum.net/Thread-Making-tiny-images-for-a-RC-transmitter
You can find a lot of aircraft pictures on these sites.
https://www.air-rc.com
https://www.skyraccoon.com
Not same web layout but roughly same content.
Skyraccoon is dedicated to FRSKY radios
AIR-RC has much more choice in term of radios
Not work, all added pic into themes folder will auto delete
Hi, what firmware are you using? OpenTX or EdgeTX? Are you sure you are copying background.png to the /THEMES/DEFAULT/ folder on your radio SD card?