Review: Flysky FS-iA8X receiver
Flysky FS-iA8X is a single antenna bidirectional micro receiver using the AFHDS 2A (Second Generation Automatic Frequency Hopping Digital System) protocol. It can output up to 8 channels with PPM or iBUS signals.

Specifications
Brand name: Flysky iA8X Receiver
Channels: 8
Model Type: Multi Rotor
Data Output: PPM/i-Bus
Frequency Range: 2.408-2.475GHz
Brandwidth: 500KHz
Number of Bands: 135
Transmission Power: <20dBm
Receiver Sensitivity: -92dBm
2.4GHz Protocol: AFHDS 2A
Modulation: GFSK
Transmission Method: FHSS
Channel Latency: <15ms
Antenna: Single Antenna
Input Power: 4.0-8.4V
Display: LED Indicator
Online Update: None
Range without interference 1m from the ground: more than 200m
Channel Data: 1500us , Range: 1000~2000us
Dimensions: 15x13x3mm
Weight: <2g
Certification: CE , FCC
Compatible transmitters: Flysky Nirvana,Flysky FS-I6,Flysky I6S,Flysky I8,Flysky I10.
Overview
Flysky FS-iA8X receiver comes without any user manual, just with a piece of clear heat shrink tube.
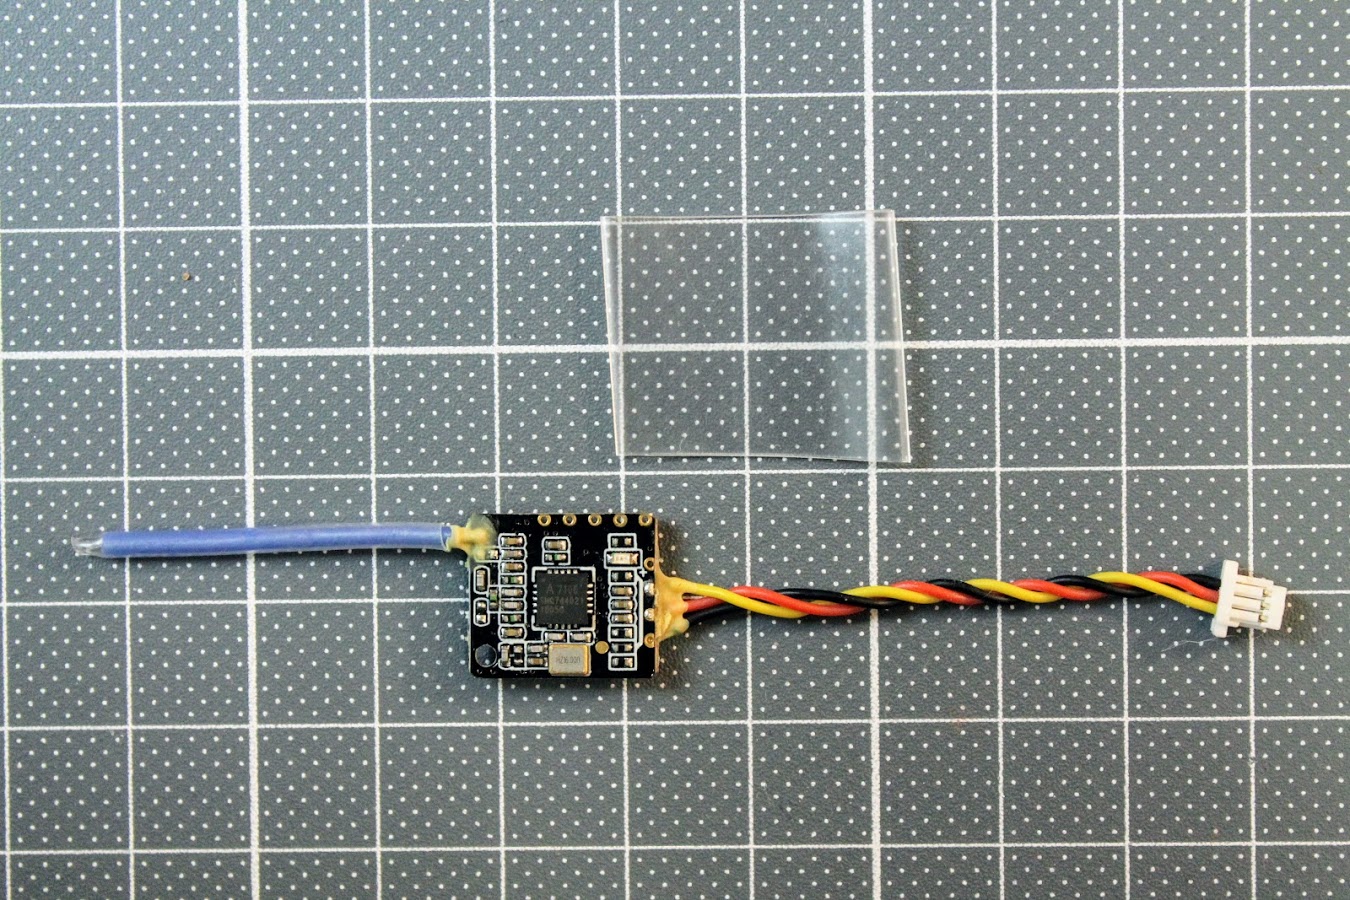
Receiver has simple wire antenna. Three silicone wires are presoldered to iBUS, + and GND. All wires and antenna are glued to the board.
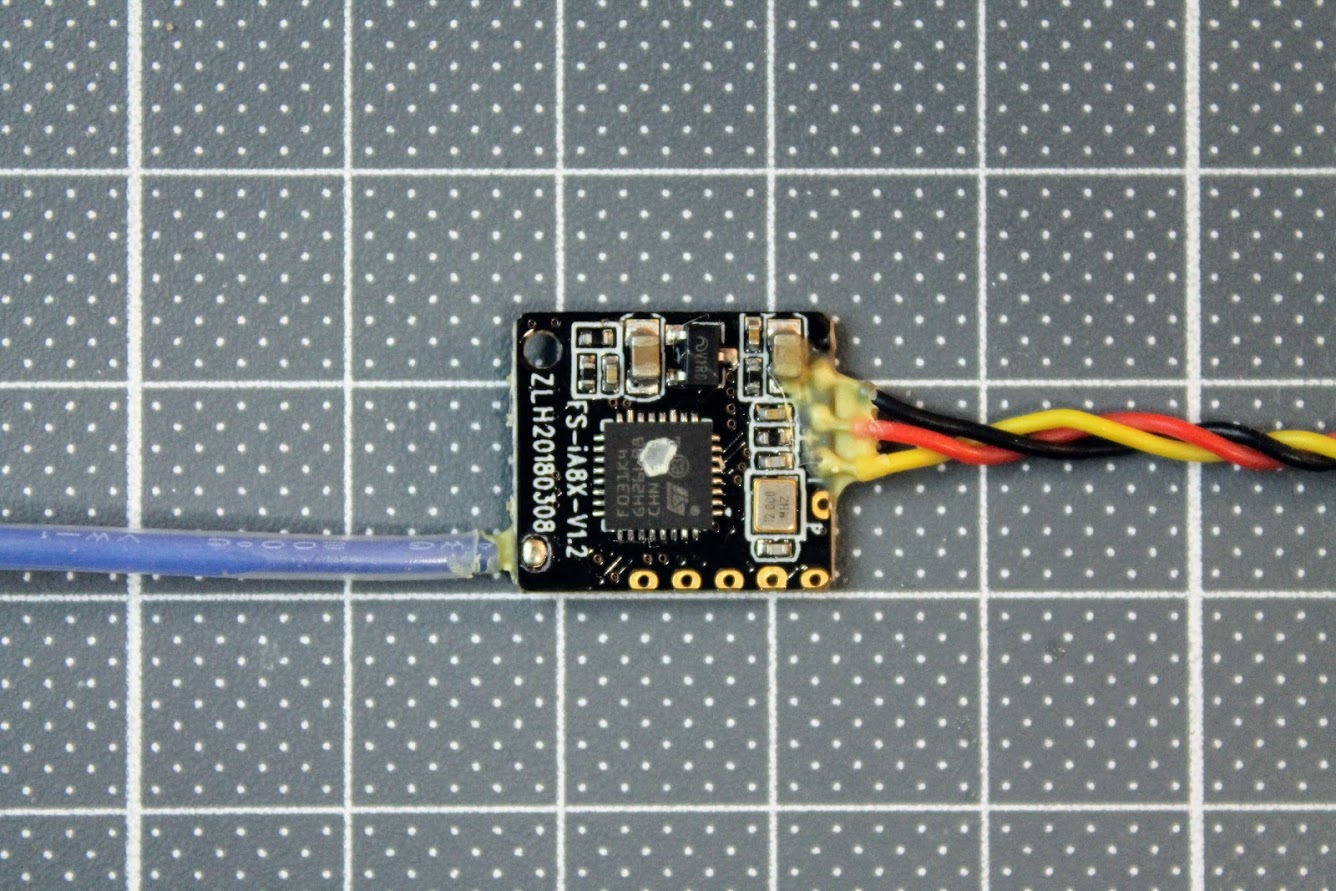
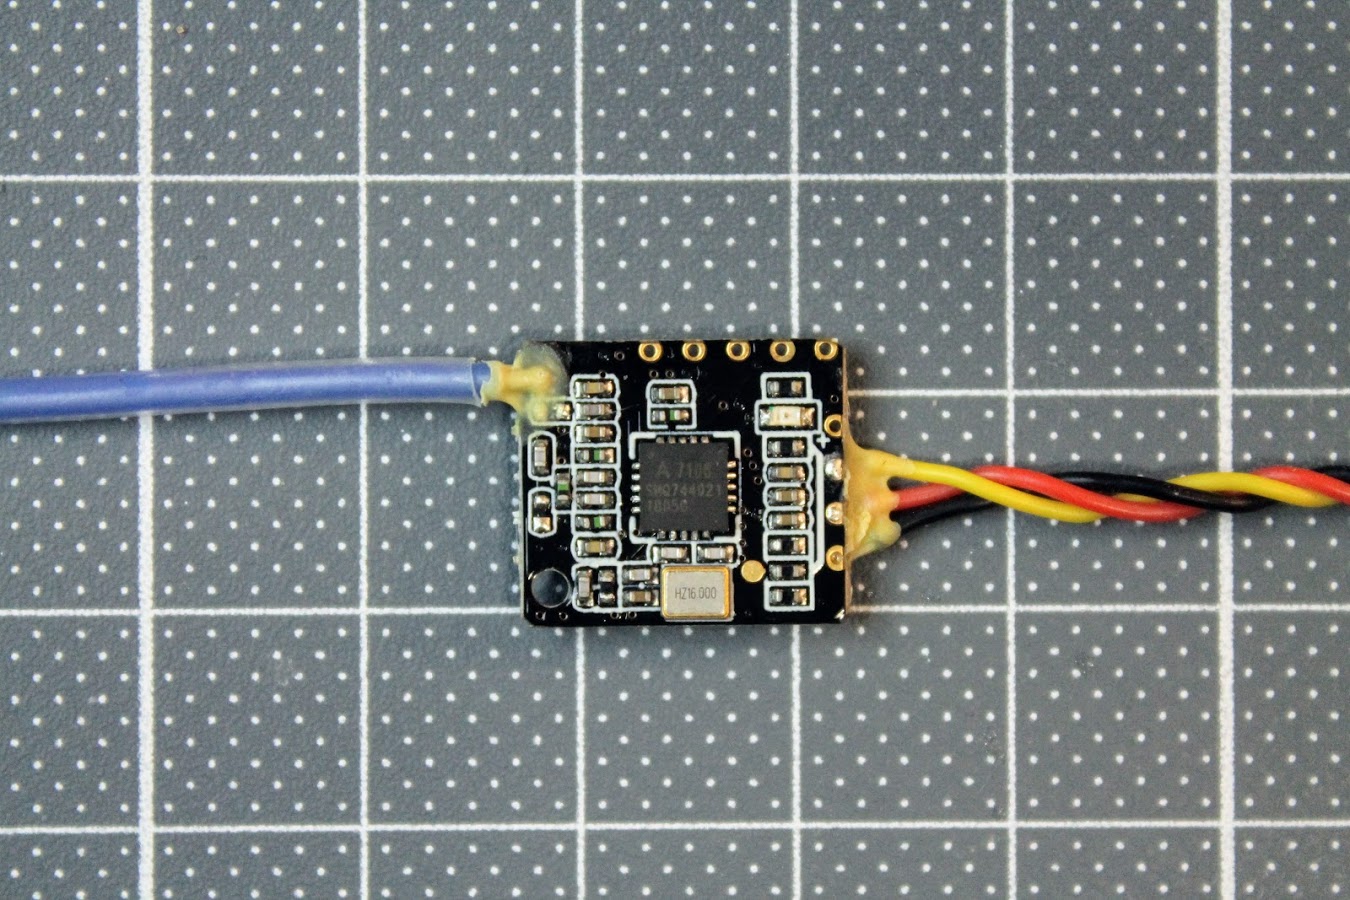
Receiver is based on A7106 chip, that is used in all new Flysky products. Receiver typical sensitivity is -95 dBm.
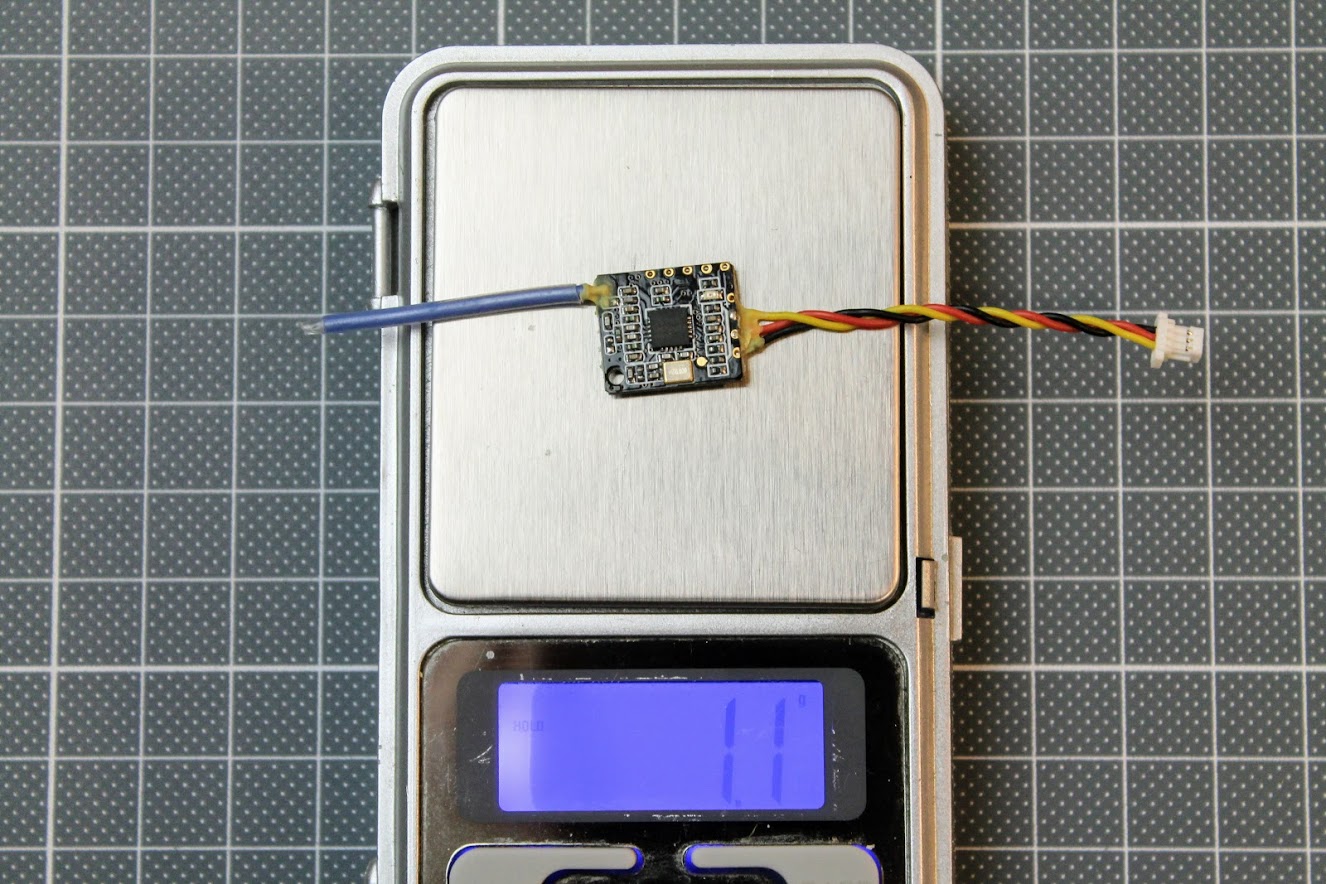
Receiver weight is about 1.1 grams. You can make it even lighter if you strip the 3 pin JST-SH connector, which is useless anyway.
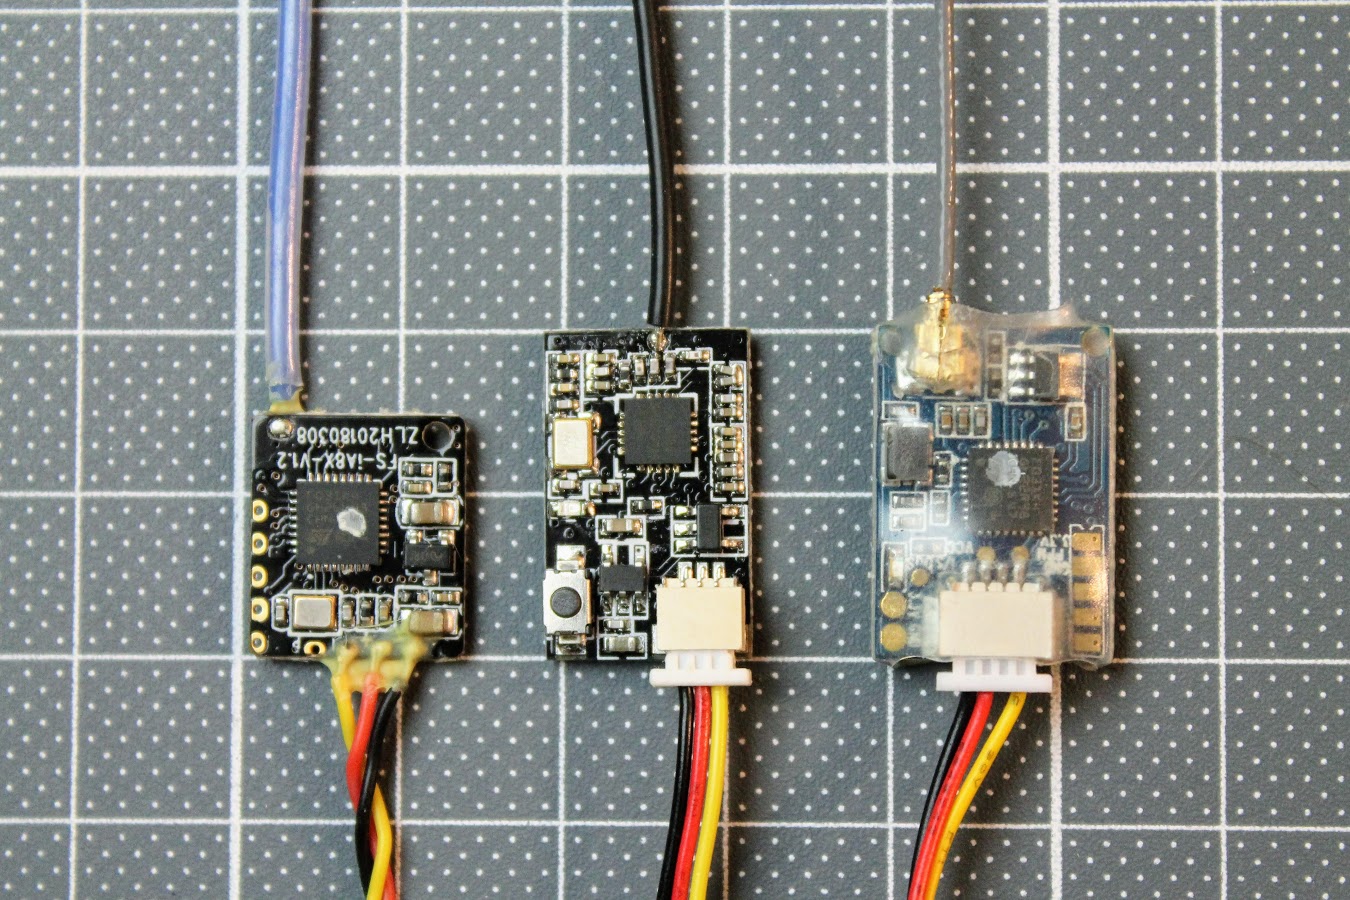
The FS-iA8X receiver is tiny! Its dimensions are only 15 x 13 mm. Here is the size comparison to FS82 and FS-A8S receivers.
Binding
You will notice, that this receiver does not have bind button. Instead it has autobind function. The bind procedure is:
1. First set the transmitter to FLYSKY AFHDS 2A protocol, if this is available on your transmitter, and then put the transmitter into bind mode (see the transmitter’s user manual for instructions on how to activate bind mode.)
2. Connect the receiver to power, the receiver’s LED will start to flash indicating that it has entered bind mode.
3. When the receiver’s LED stops flashing and stays ON, the transmitter and receiver have successfully bound.
4. Check to make sure that the transmitter and receiver are working as expected, if there are any issues or unexpected operation follow the steps above to bind again.
After powering the receiver on, it checks for the transmitter signal on startup and switches into autobind mode if the transmitter signal is not detected.
Connecting to FC
This RX can be connected via serial iBUS or analog PPM signal. Receiver has connection wires presoldered to iBUS serial interface ant this is the recommended way of connection.
Pinout diagram of the FS-iA8X receiver:
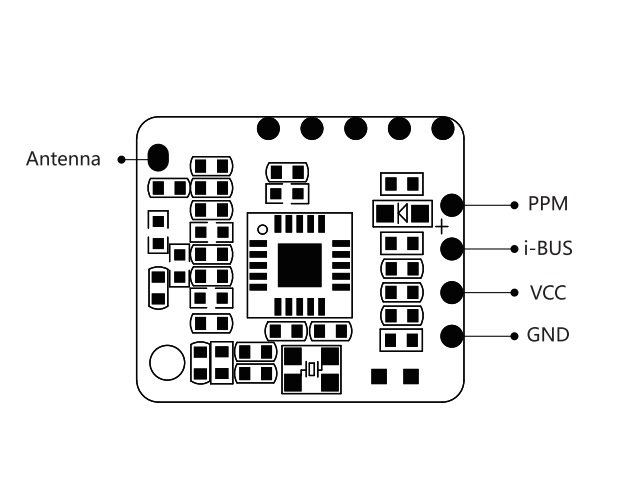
iBUS output should be connected to the RX input on the FC. SBUS or Receiver input may not work as it may be inverted input as SBUS requires. Flight controllers with F3 MCU can invert RX input, but F4 need hardware inversion. Have this in mind.
Here is an example how iA8X receiver iBUS wire is connected to the flight controller RX2 input.

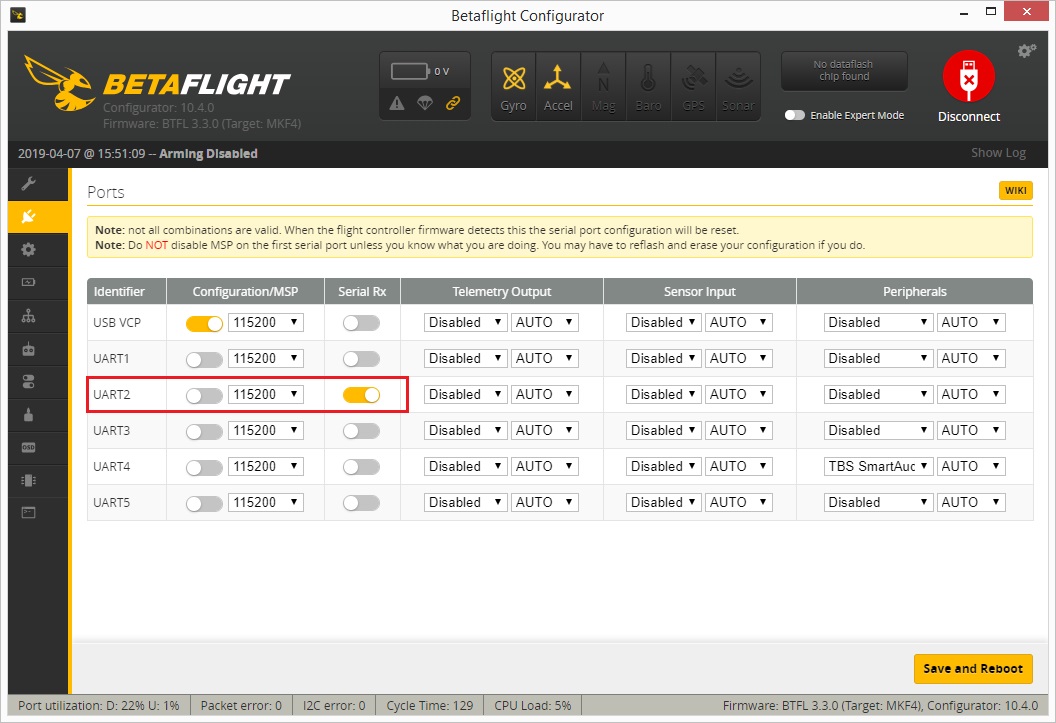
To set the flight controller with IBUS receiver input, you should turn on the “Serial RX” option in the appropriate UART (UART2 in our connection example)
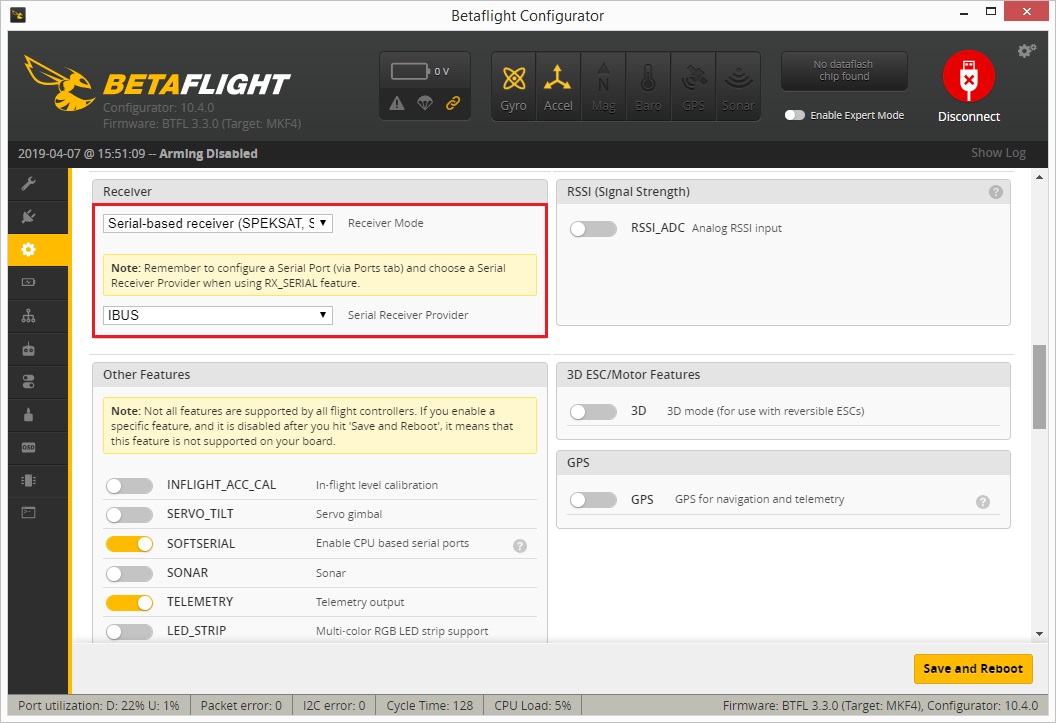
Then select the “Serial-based receiver” in the Receiver Mode drop down and select “IBUS” in the Serial Receiver Provider drop down.
iA8X receiver has also PPM output, but I recommend to connect this receiver to FC via iBUS. It is the faster and more accurate protocol than PPM. Use PPM only if necessary.
Unfortunately iA8X receiver does not output RSSI information, but you can flash it with the alternative firmware to enable RSSI on one of the channels. Read here: Flysky receivers RSSI mod – alternative firmware
Can be purchased from Banggood: https://www.banggood.com/Flysky-IA8X-2_4G-8CH-PPM-i-BUS-Mini-Receiver-for-AFHDS-2A-FS-NV14-RC-Drone-Radio-p-1395686.html
Flysky FS-iA8X user manual: Click here.
All Flysky receivers list is here: https://www.multirotorguide.com/guide/flysky-receivers-list-roundup/
-
 Review: MEPS Space SZ F7 Mini FC
MEPS (Mepsking) is a new, but emerging manufacturer, making its mark in the RC
Review: MEPS Space SZ F7 Mini FC
MEPS (Mepsking) is a new, but emerging manufacturer, making its mark in the RC -
 HGLRC Thor Pro parallel charging board
HGLRC Thor Pro charger board is battery parallel charging board with protection fuses and
HGLRC Thor Pro parallel charging board
HGLRC Thor Pro charger board is battery parallel charging board with protection fuses and