Diatone GTB229/239 quadcopter DIY build review
I felt in love with the Diatone GTB frame design the first time I saw it. As I like to build the quads more than buying the pre-build ones, I decided to make the GTB229/239 by myself. So I have purchased the following parts:
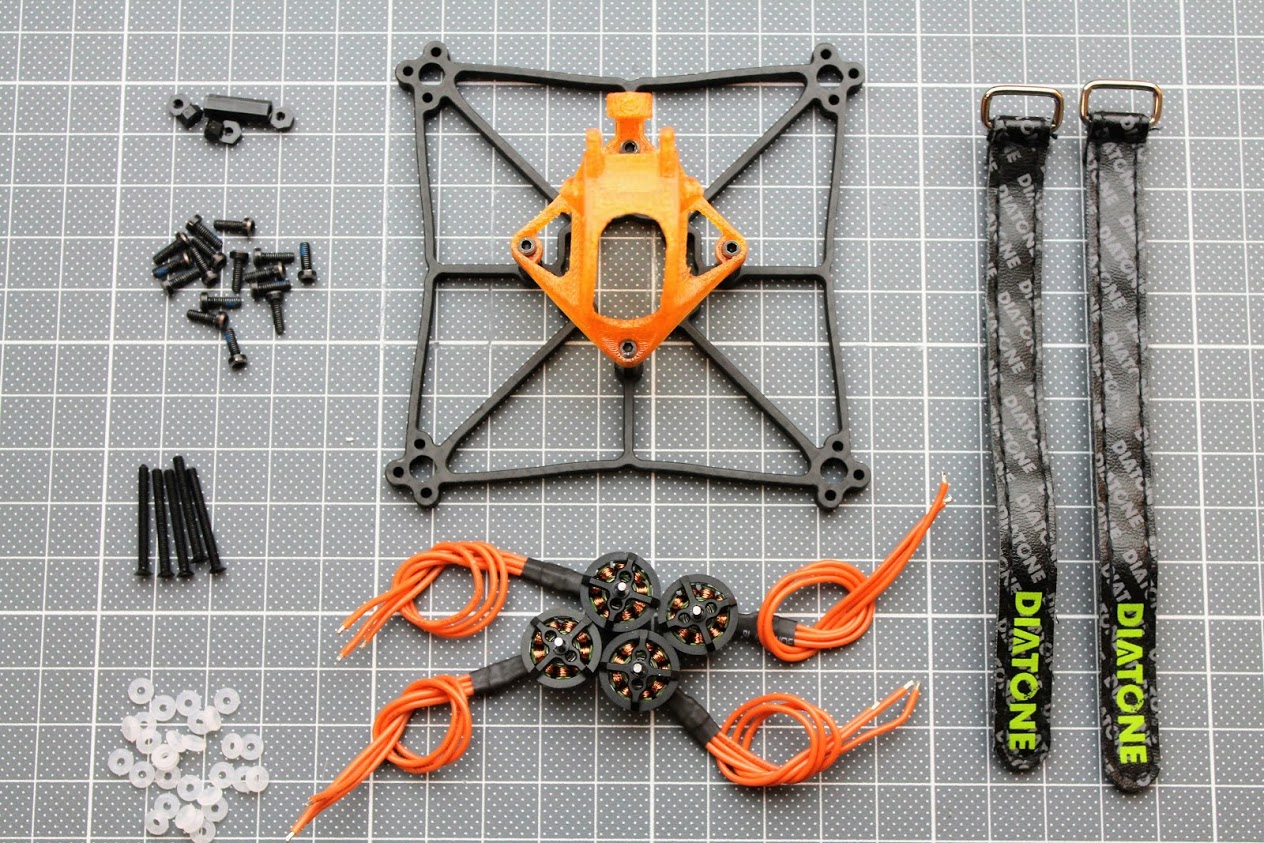
Parts list
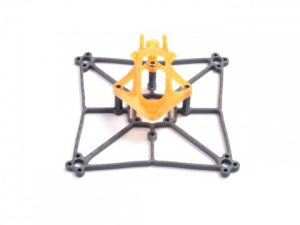
Diatone GTB239 frame kit – $16.58: https://www.banggood.com/DIATONE-GTB229-GTB239-Cube-2_5inch-Frame-Kit-FPV-Racing-Multi-Rotor-Parts-p-1552955.html
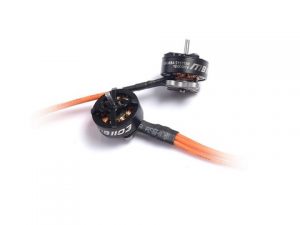
Diatone Mamba MB1103 10000kV motors – $10.99 x 4: https://www.banggood.com/MAMBA-1103-6500KV8500KV10000KV-2-3S-Motor-For-FPV-Racing-RC-Drone-p-1553986.html
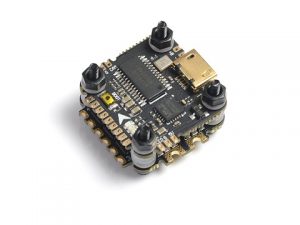
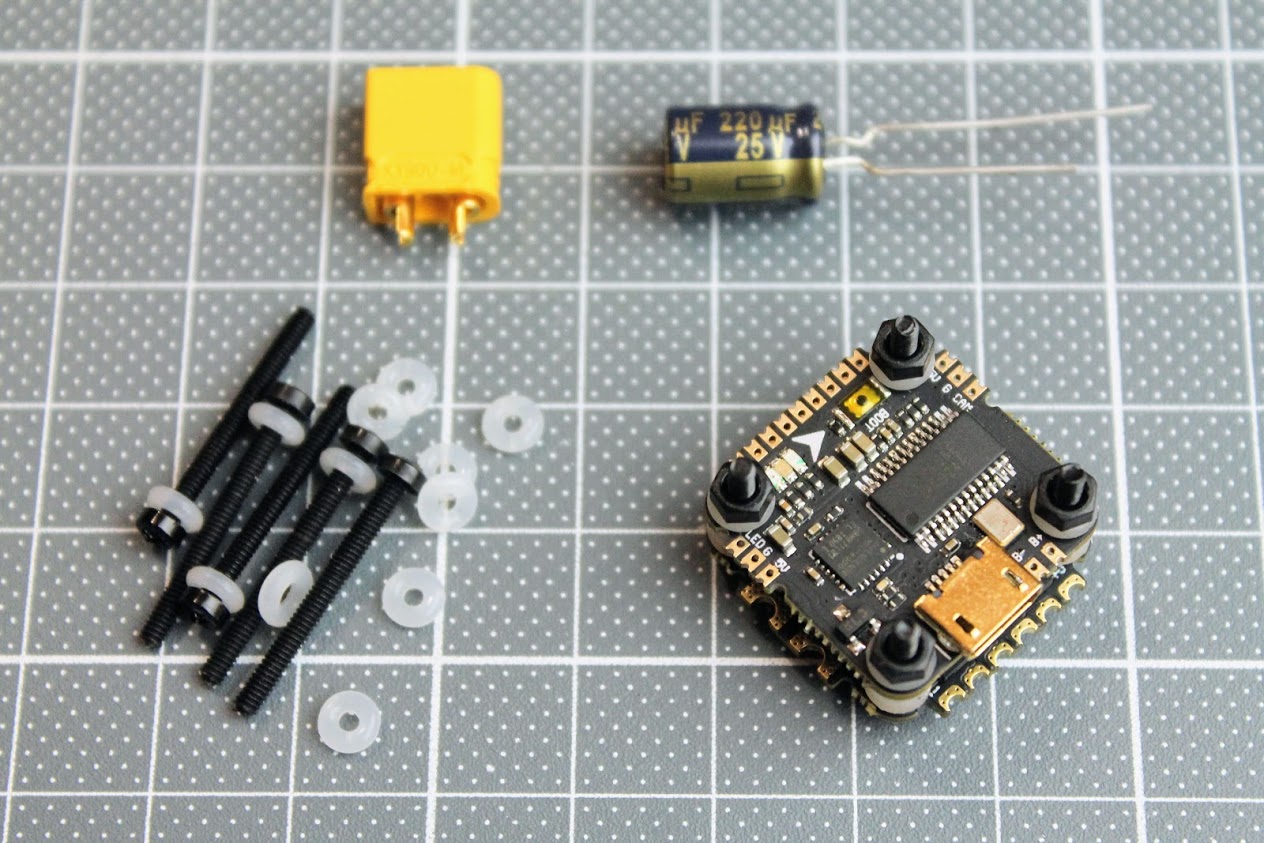
Diatone Nano Mamba stack – $42.84: https://www.banggood.com/Diatone-MAMBA-134-F411-Flight-Controller-MPU6000-Dshot6002-4S-STACK-BEC-5V1_5A-p-1530339.html
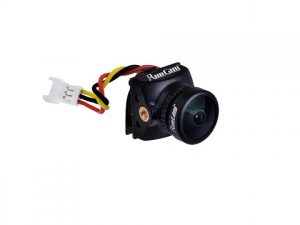
RunCam Nano 2 FPV camera – $20.50: https://www.banggood.com/RunCam-Nano-2-13-700TVL-1_8mm2_1mm-FOV-155170-Degree-CMOS-FPV-Camera-for-FPV-RC-Drone-p-1469656.html
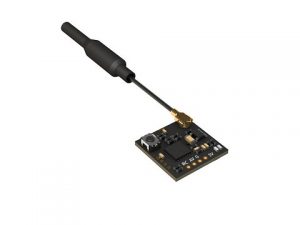
RunCam TX100 Nano VTX – $14.99: https://www.banggood.com/RunCam-TX100-Nano-5_8G-37CH-25mW100mW-VTX-Smart-Audio-IPX-IPEX-for-RC-Tiny-Drone-Mini-FPV-Camera-FC-p-1597688.html
Total parts: $138,87
Parts in detail
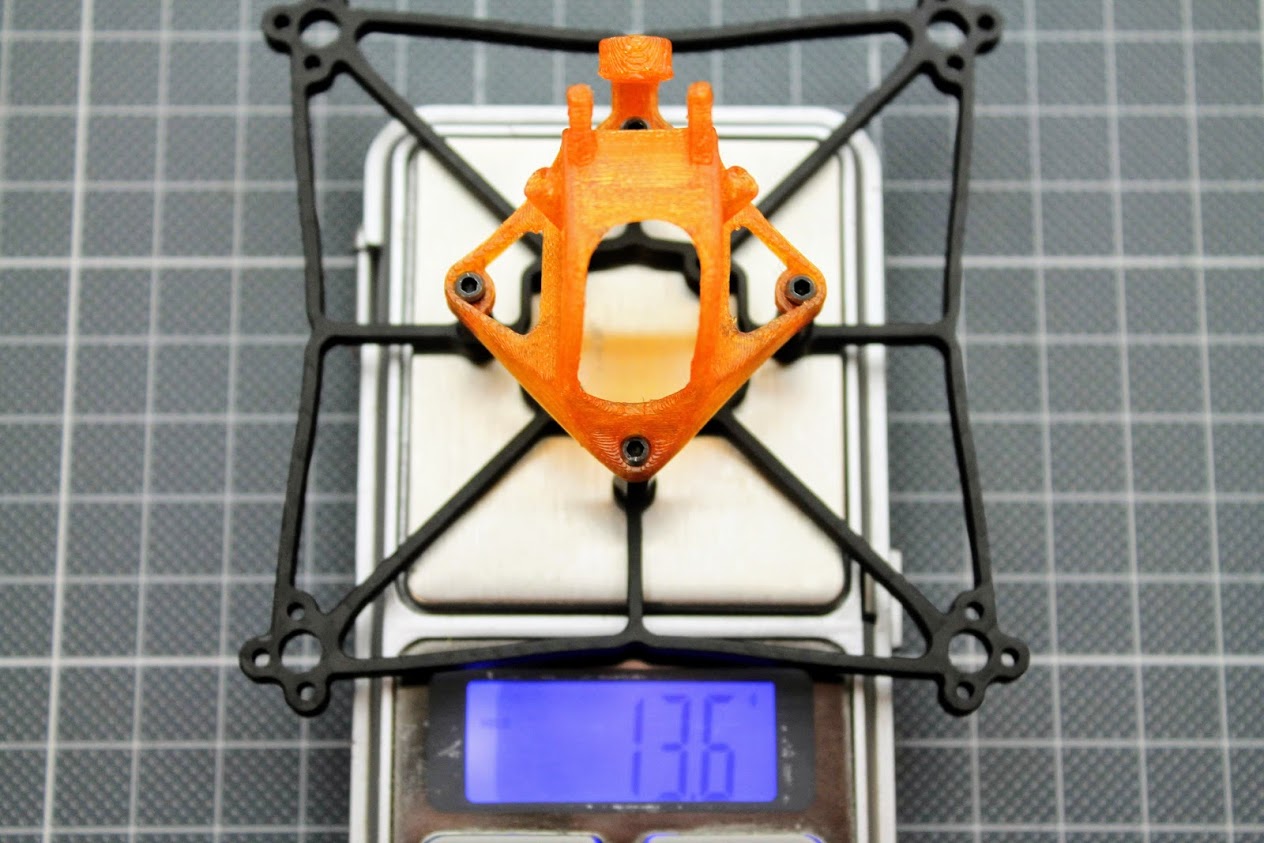
I have selected the GTB239 frame instead of the GTB229, despite the fact that I’ll be using it with 2S lipo batteries, because it is stronger and less likely to break in crashes. The additional 2 grams weight is not such a big penalty.
Frame kit comes with the frame, 3D printed canopy, two battery straps, a set of the M2 screws, plastic standoffs, plastic long M2 screws for mounting the FC and silicon rubber washers for vibration dampening.
Frame and canopy weights 13.6 grams total.
I have selected the Mamba 1103 motors with the higher 10000kV rating, hoping it will give me more speed on the 2S battery.
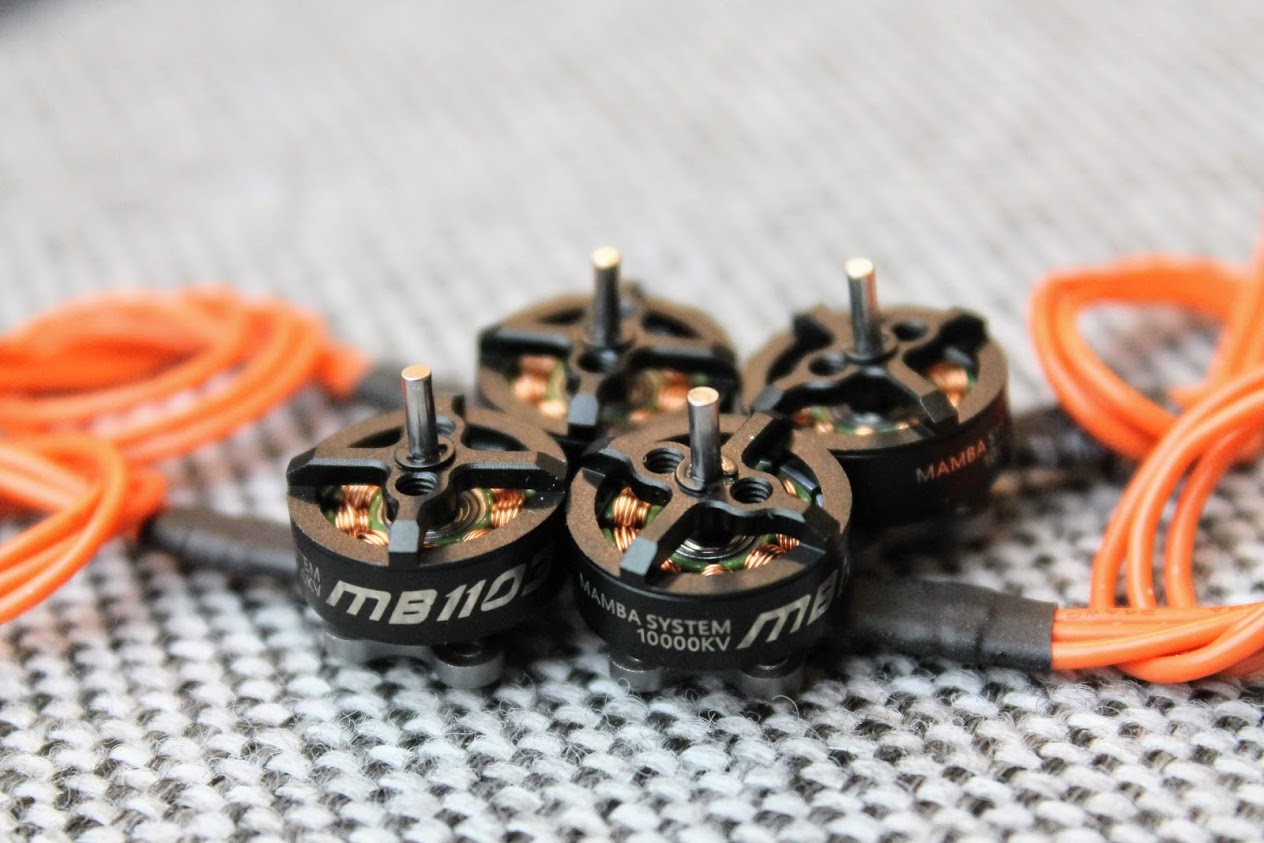
Motors weight 19.6/4=4.9 grams each.

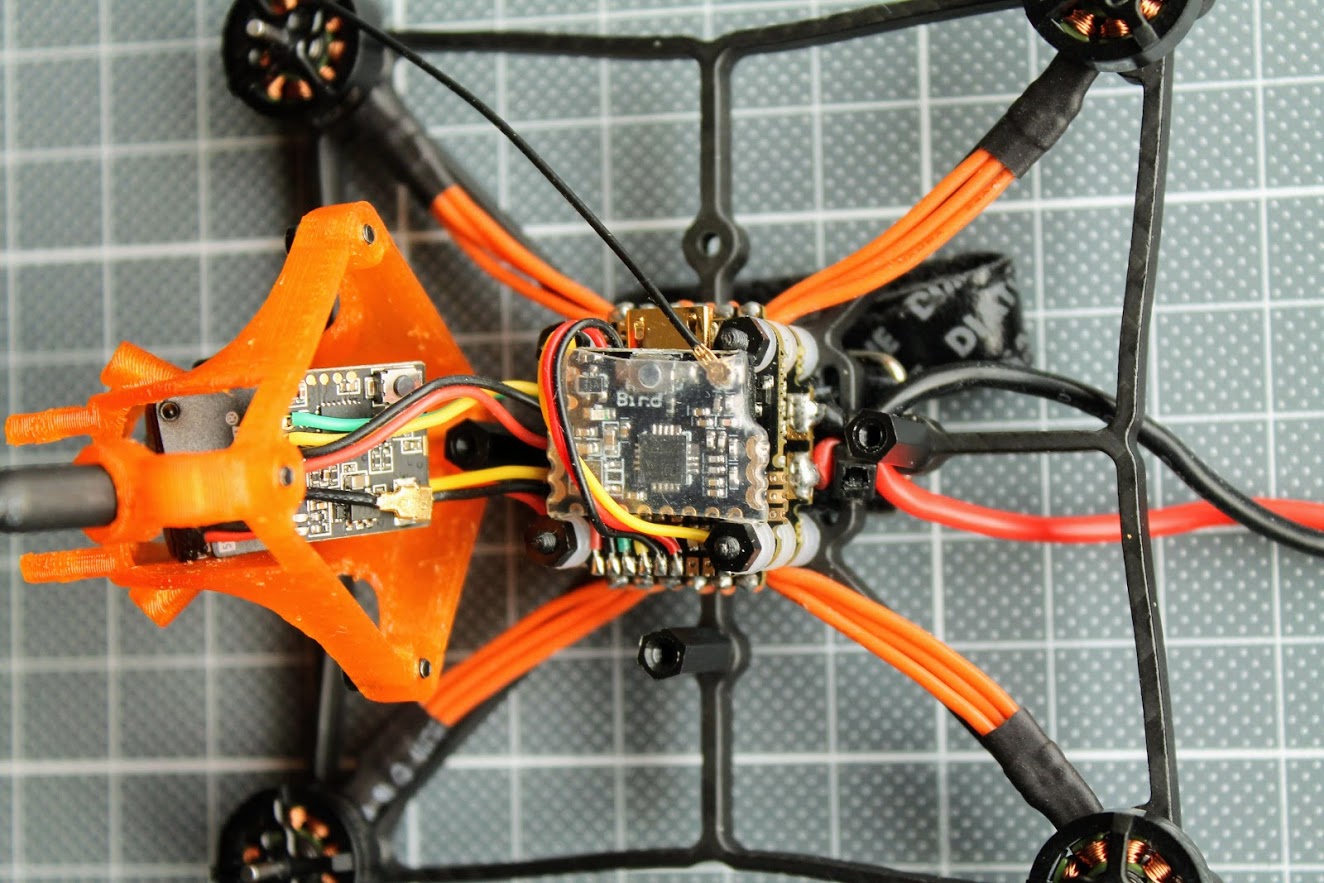
Diatone GT239 frame has mounts for 16×16 and 26x26mm size FC boards. I’ve decided to go with Diatone Mamba F411 Nano size stack.
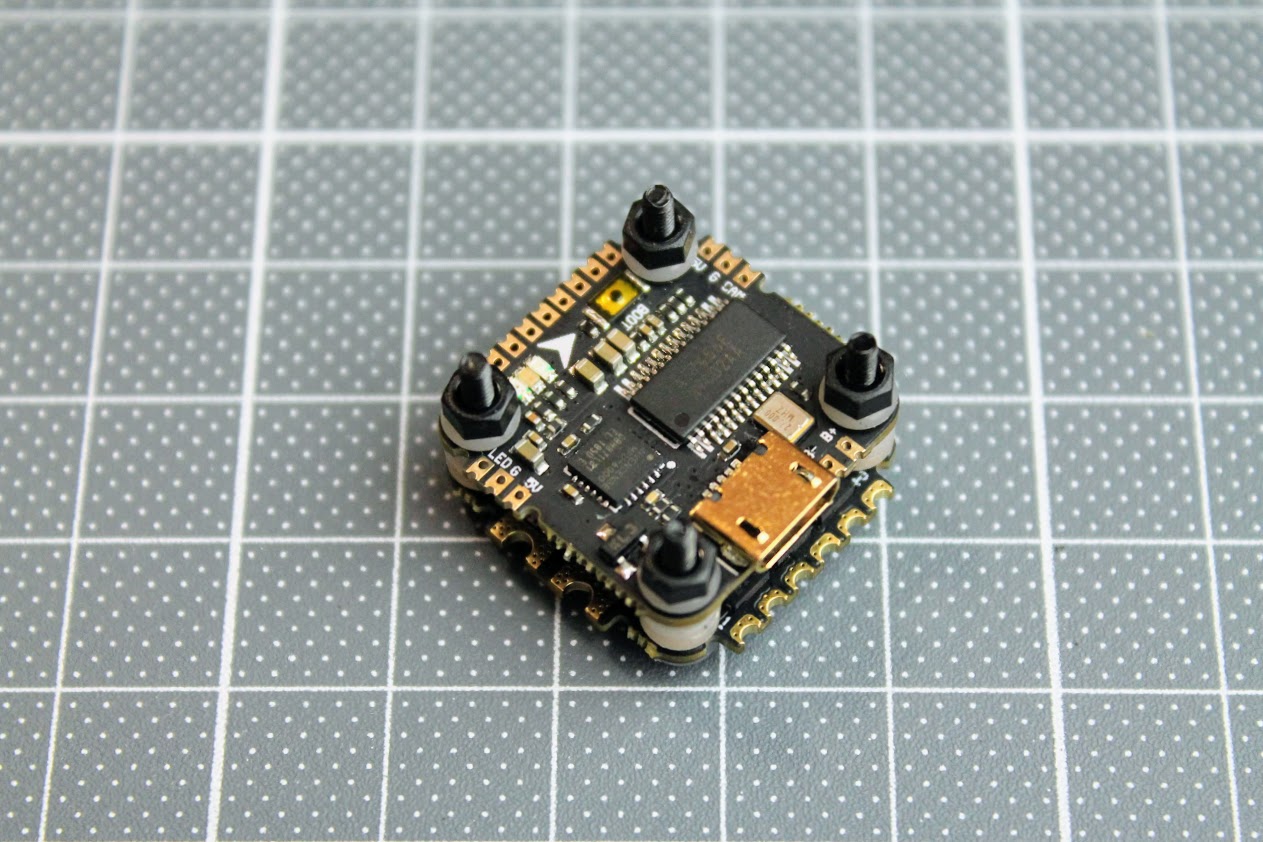
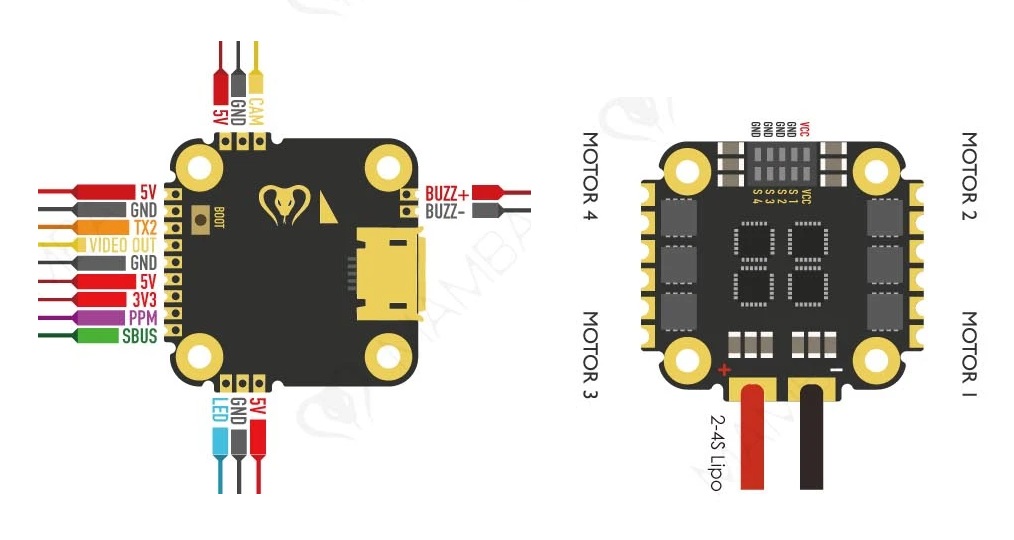
Diatone Mamba F411 Nano stack connection diagram (this is V1.0 stack):
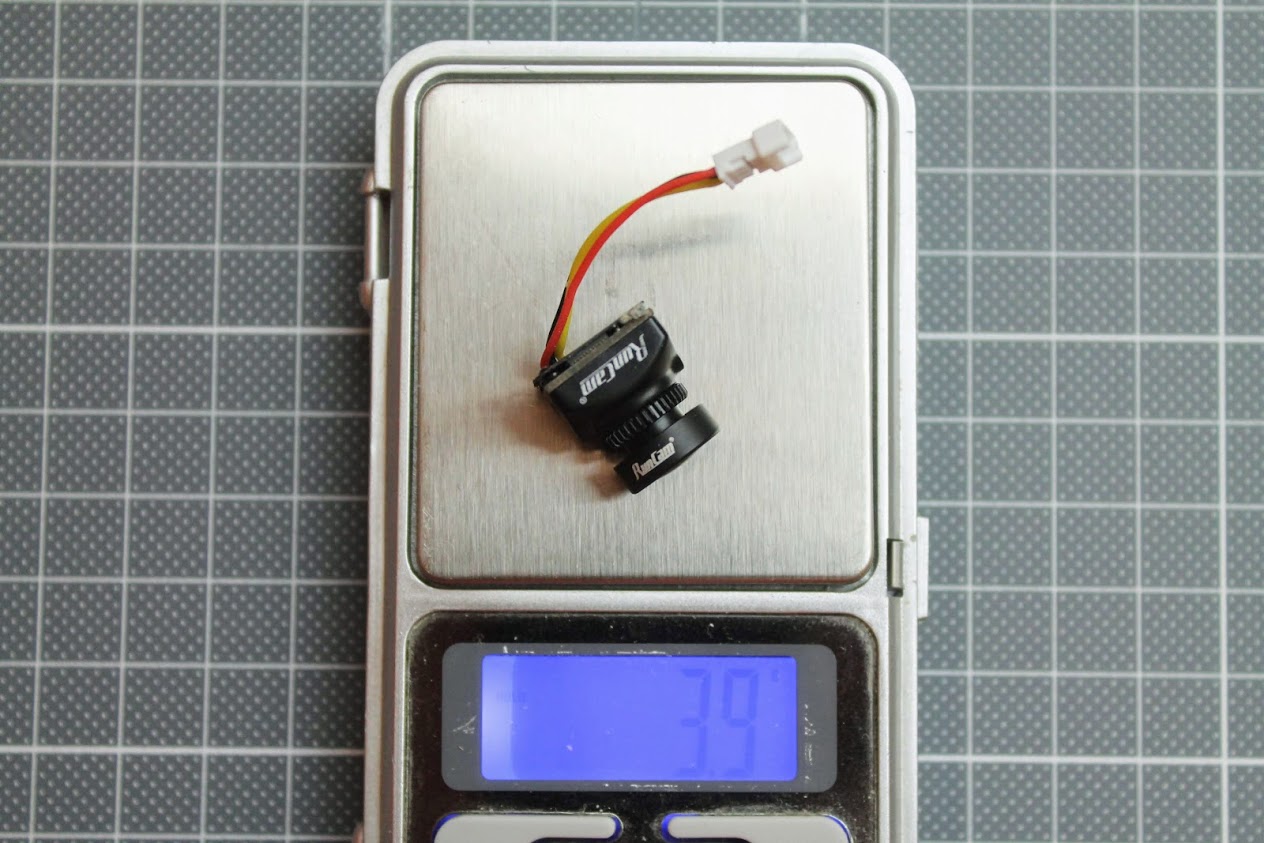
RunCam Nano 2 camera was selected because this is the camera in the original Diatone GTB229/239 and because I wanted to try it out. I have purchased the camera with 1.8mm lens and NTSC format. My preferred video system format is PAL, but there were only NTSC option at the moment.
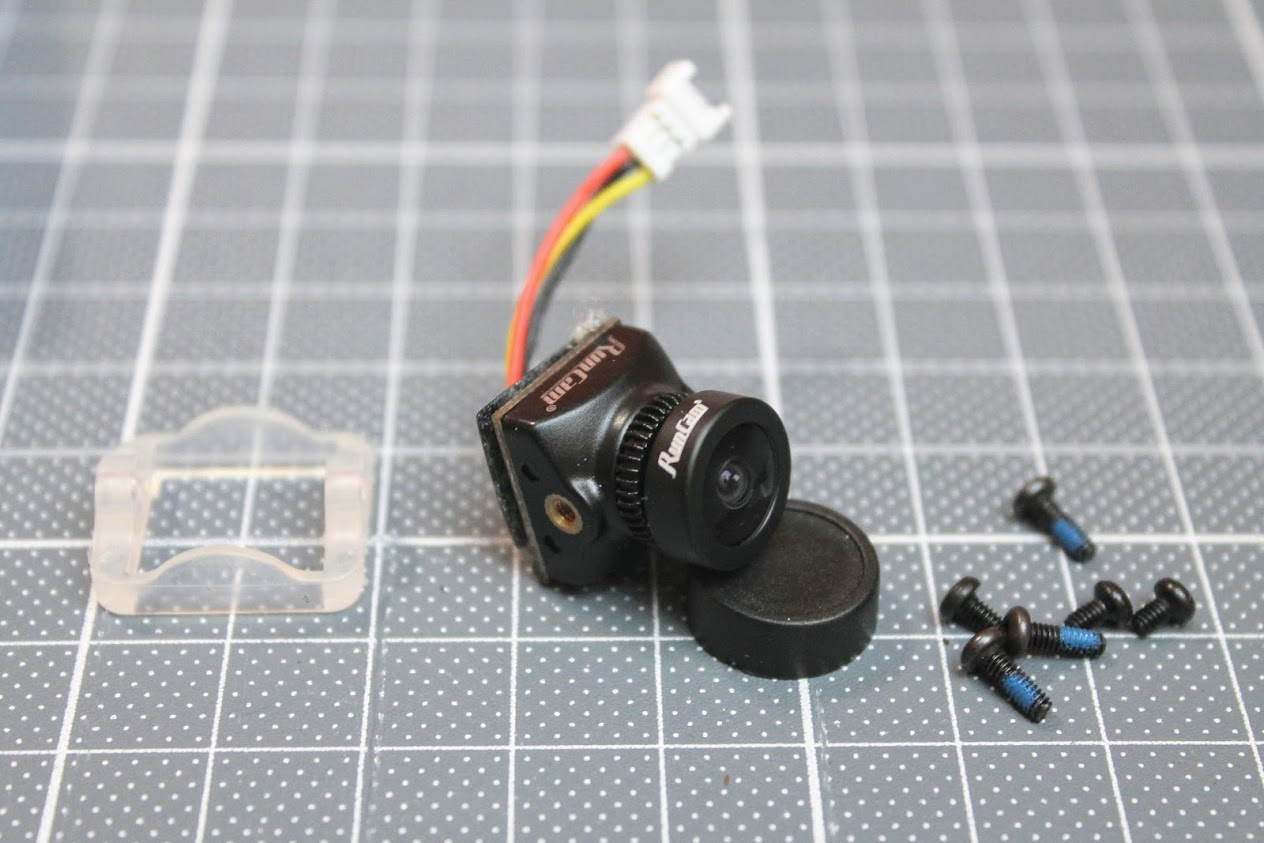
Camera weights 3.9 grams.
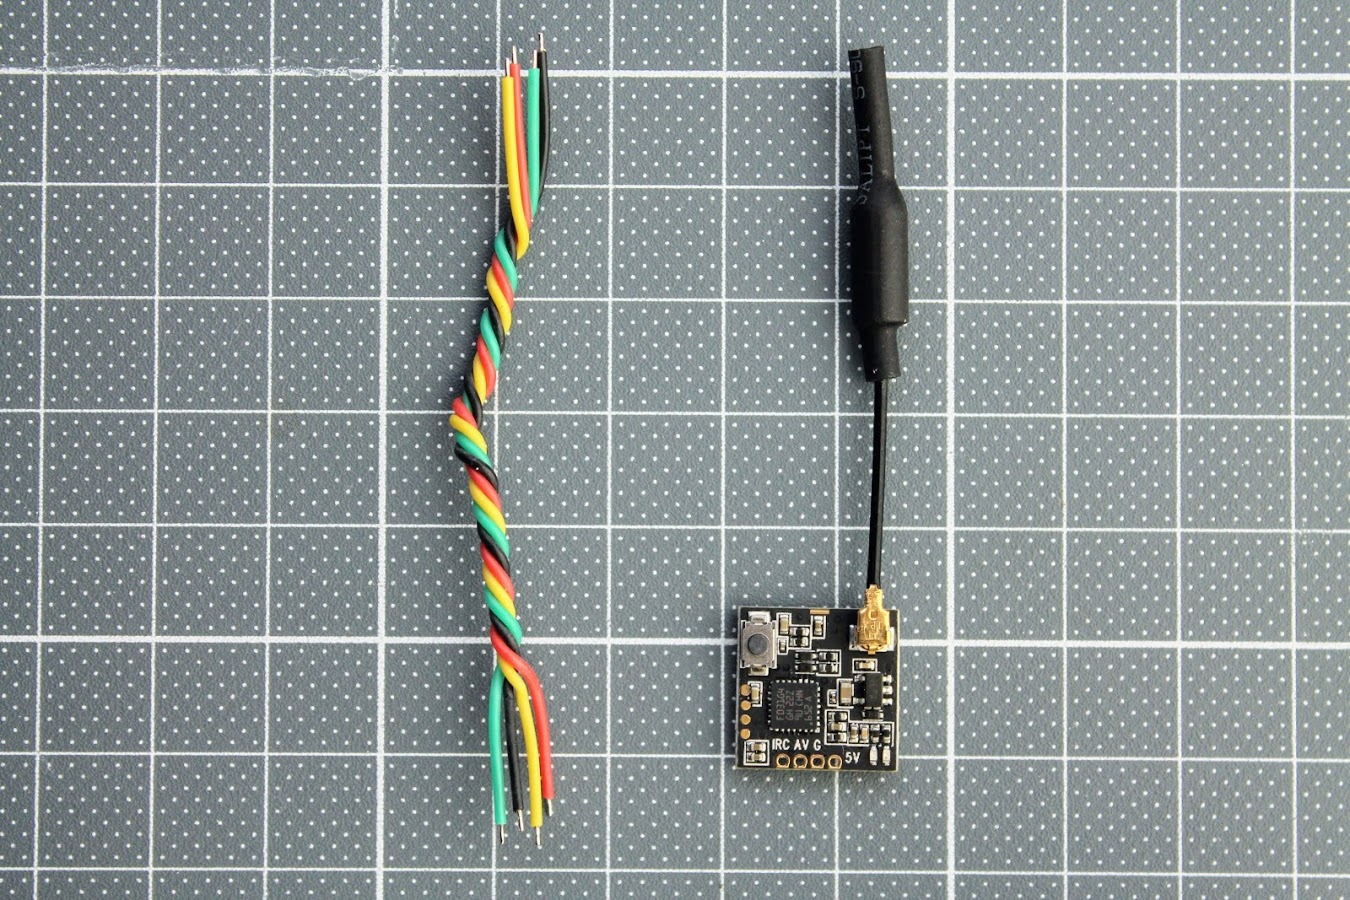
RunCam TX100 was selected as it is very small, fits right behind the Nano camera as its dimensions are the same (14x14mm). Read more about this VTX here: Review: RunCam TX100 Nano VTX.
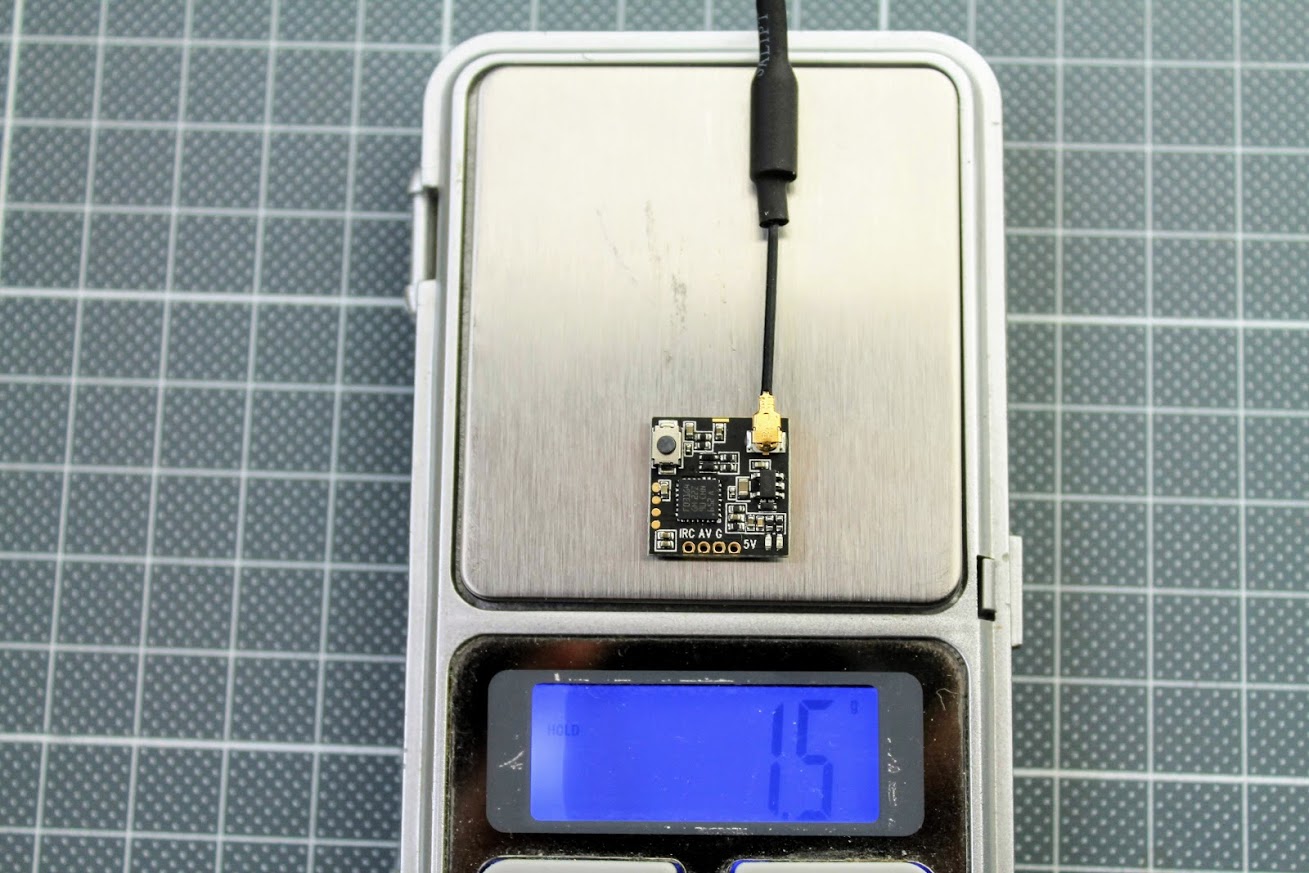
RunCam TX100 weights only 1.5 gram with the dipole antenna.
Build process
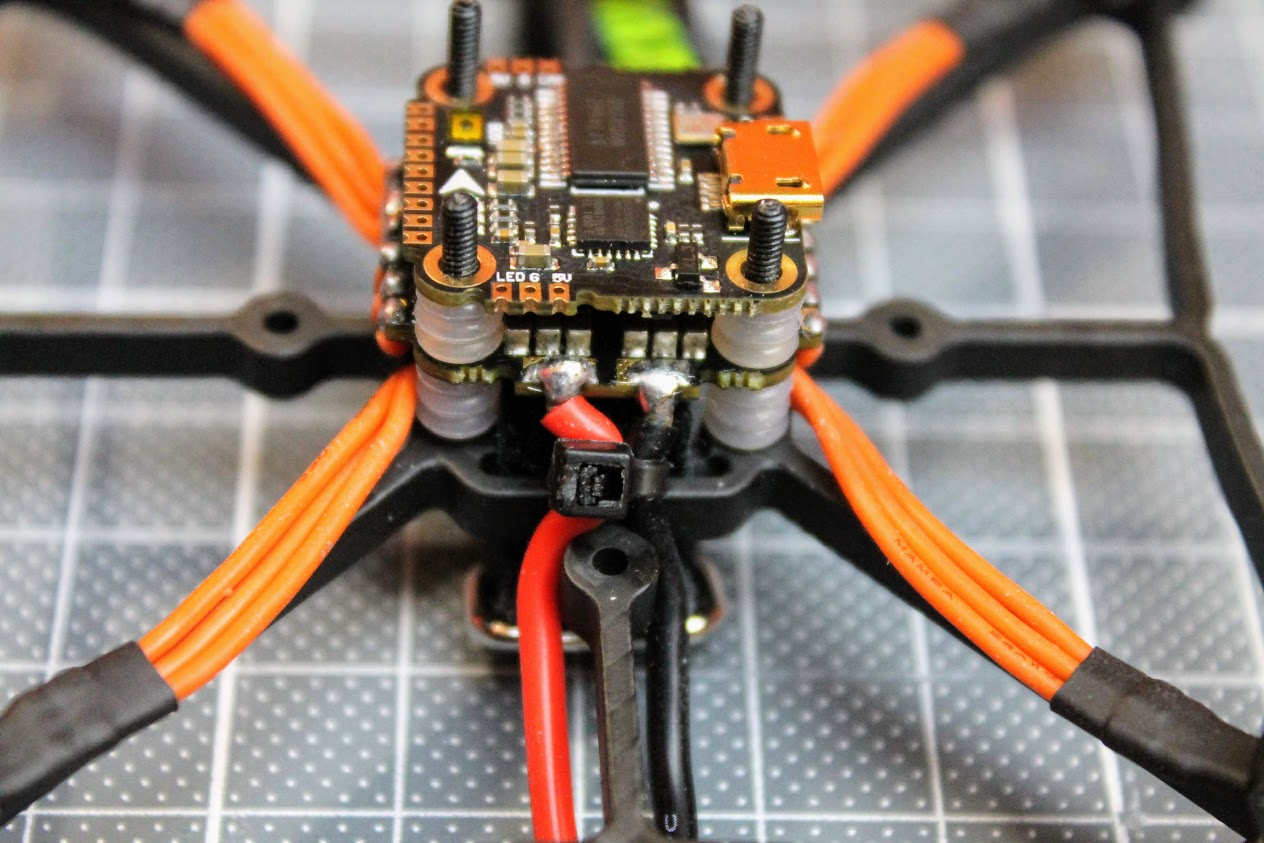
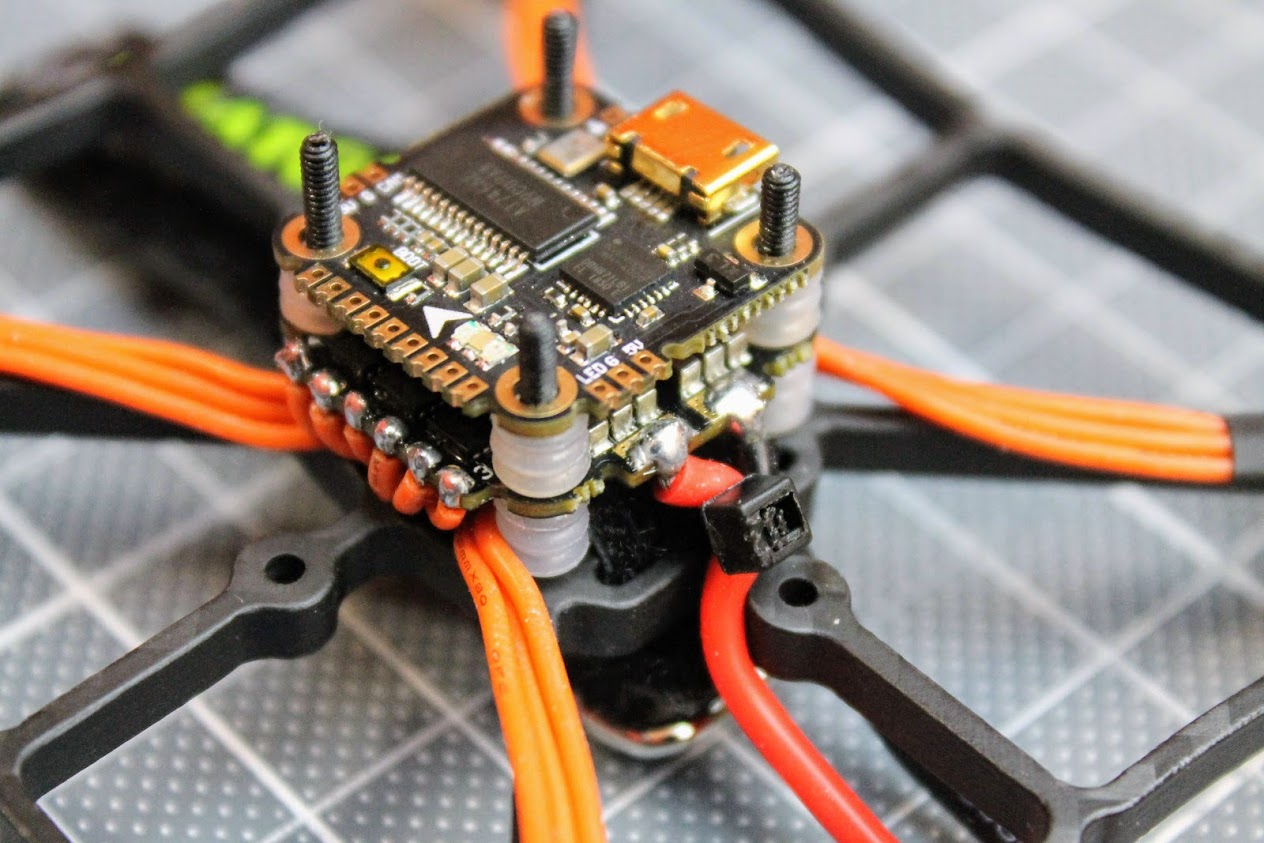
I have mounted the Mamba 4in1 ESC with the 4 plastic long M2 screws with the countersunk head. It would be better if the screw was made from metal, but these screws were supplied with the frame kit and I didn’t have the metal M2 countersunk screws. We will see how they will hold in the crashes.
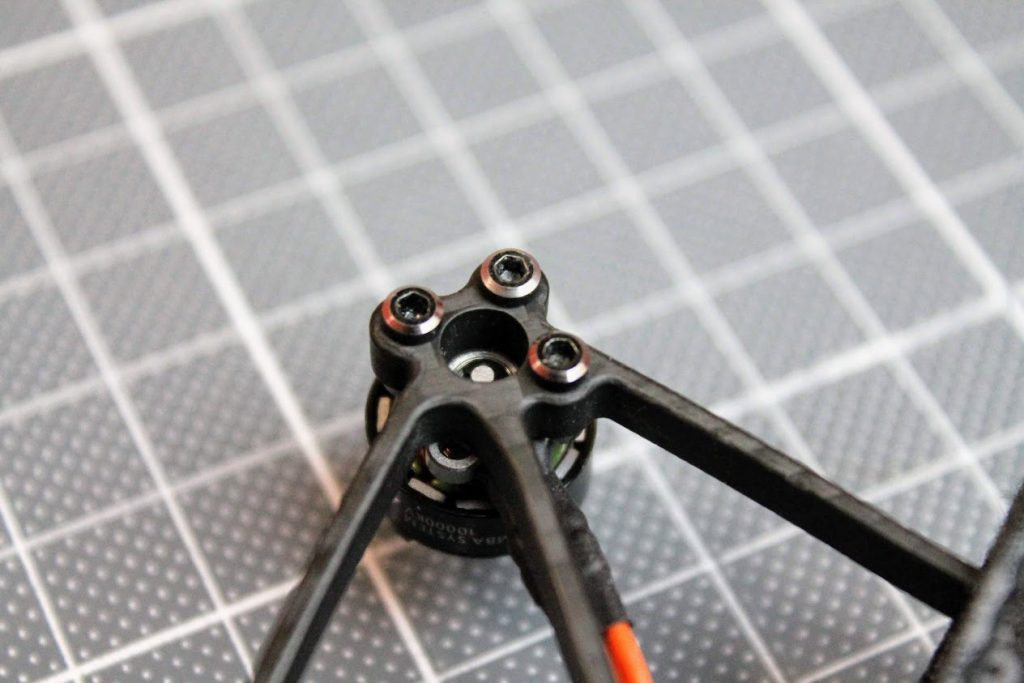
Then screwed the each motor with 3 supplied M2 screws.
Routed the wires with some reserve
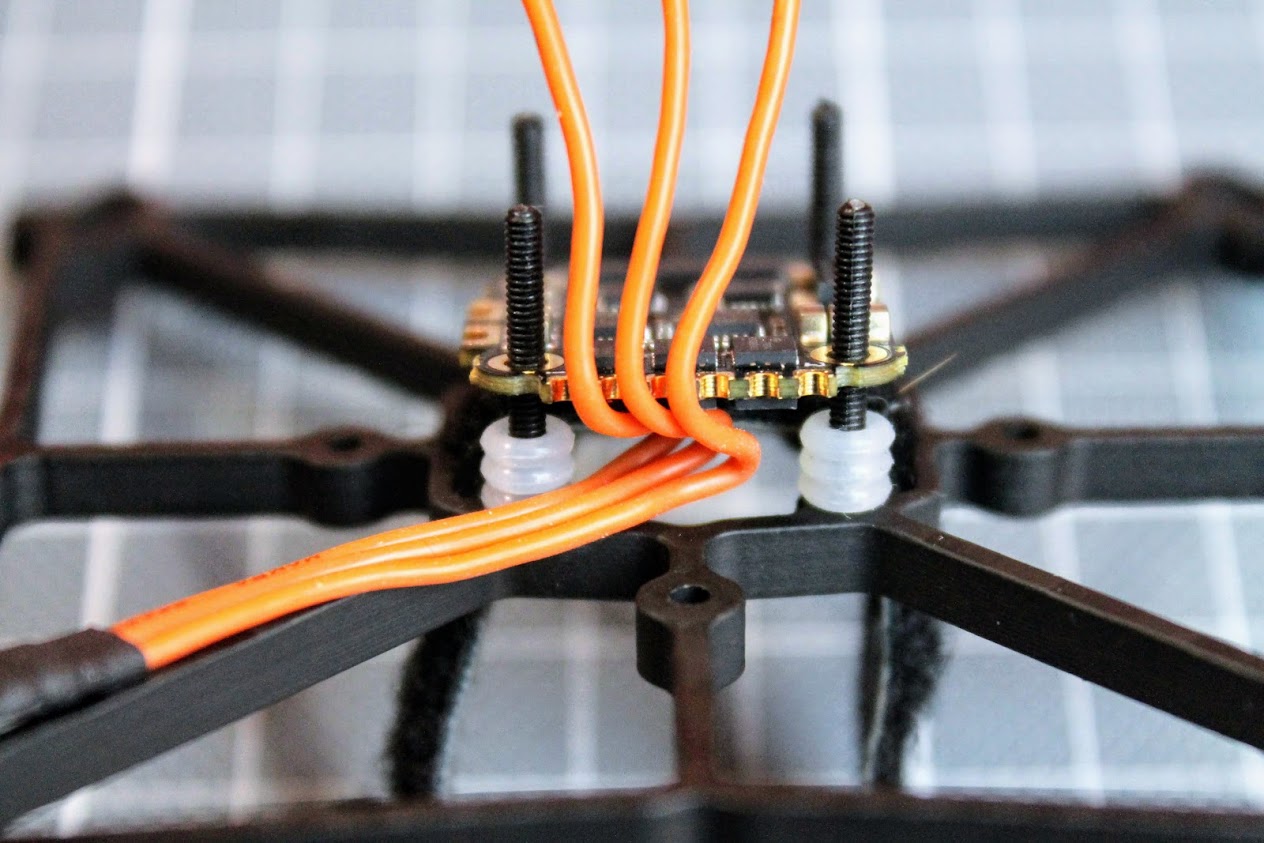
Cut the wires and soldered them to the 4in1 ESC motor pads. The exact order of the soldered motor wires does not matter much as we can change the rotation of the each motor in the ESC BLHeli_S settings.
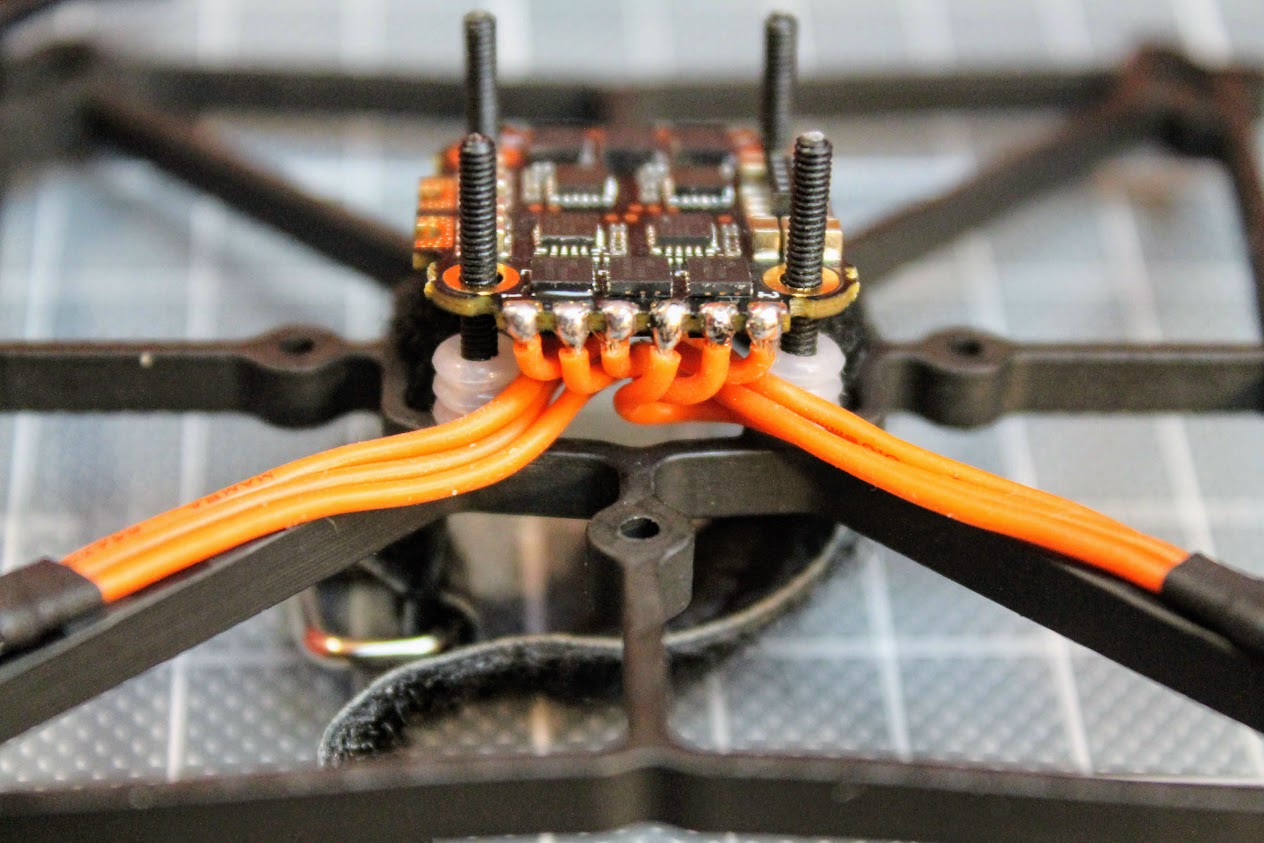
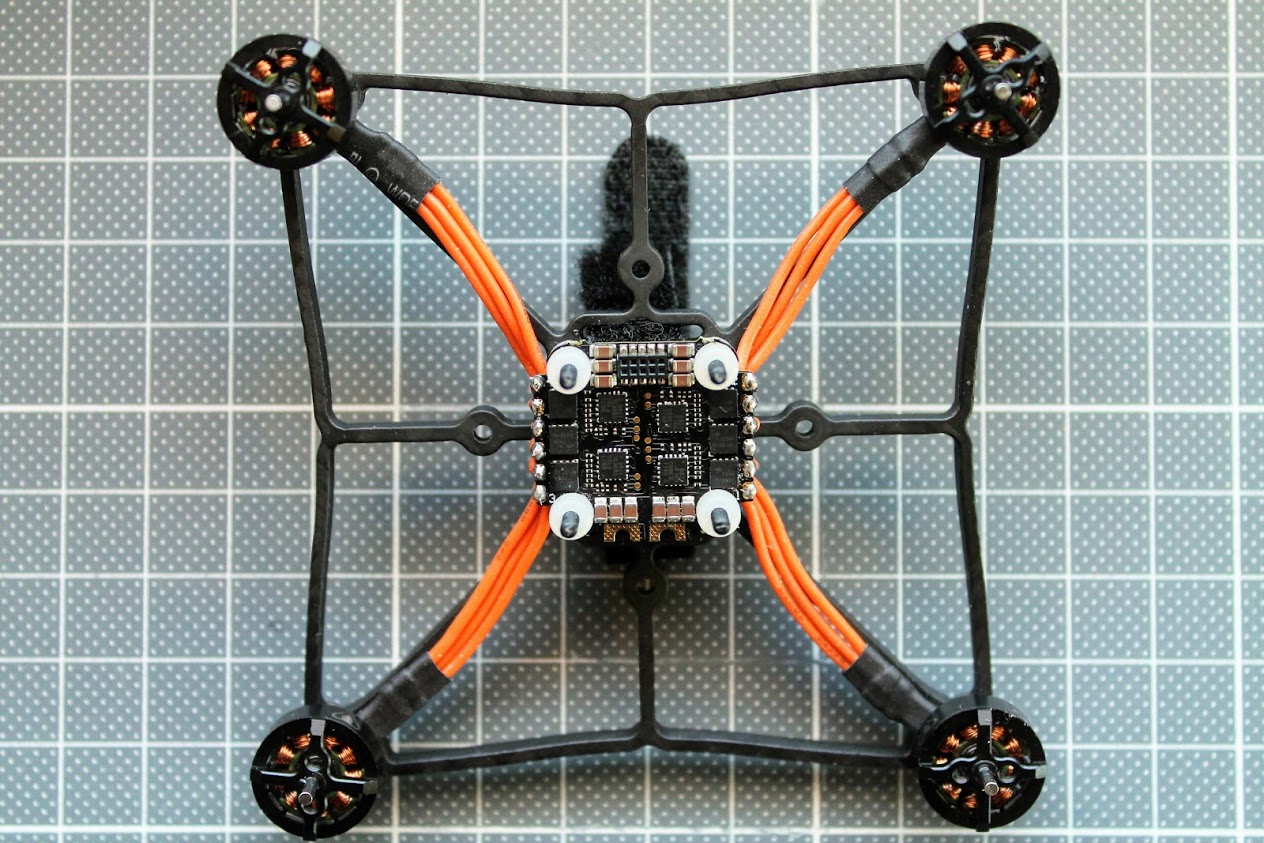
Motors and 4in1 ESC mounted and motor wires soldered.
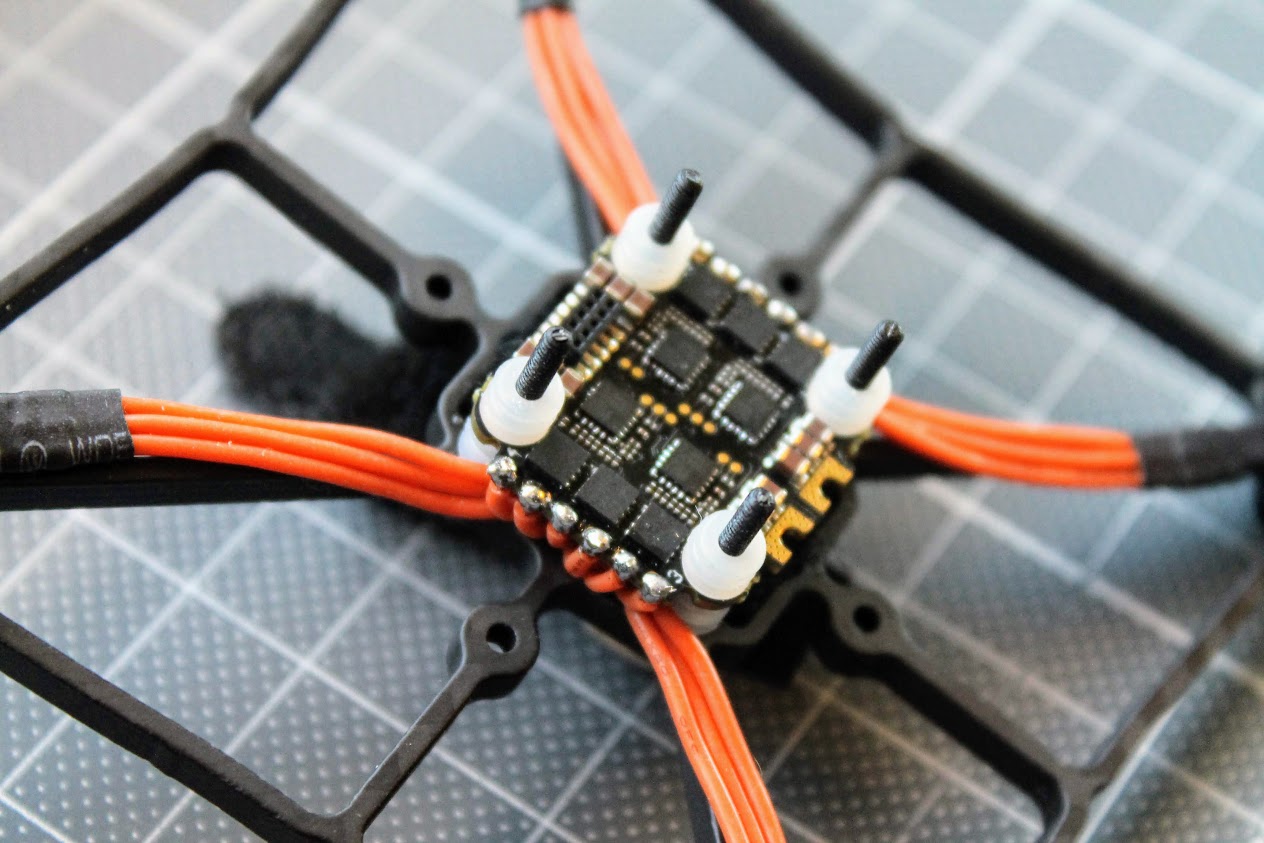
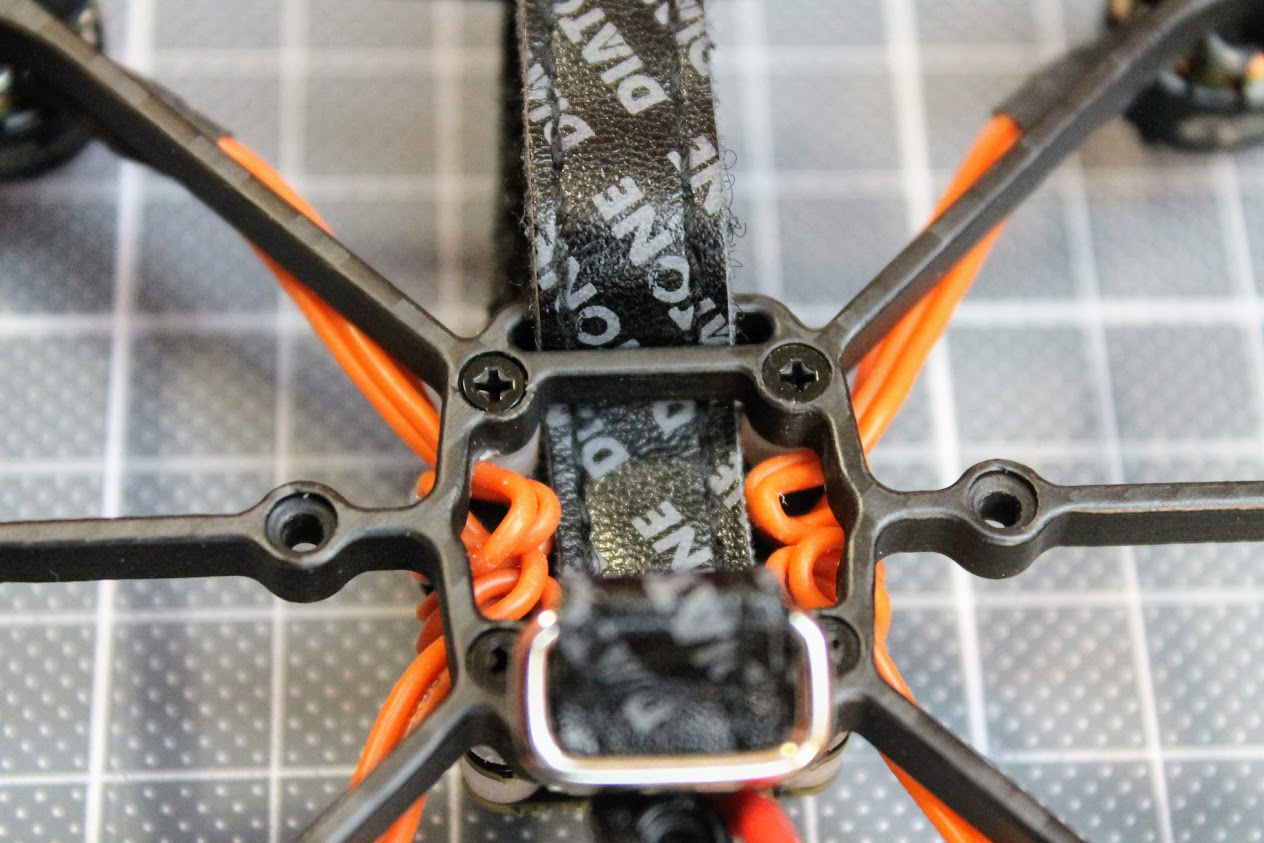
Soldered the silicone 18AWG power wires with the XT30 connector. Zip tied power wires before the frame arm to make sure the wires will not be torn out with the solder pads in the case of the severe crash.
Soldered the RunCam Nano 2, RunCam TX100 VTX and FrSky D8 receiver.
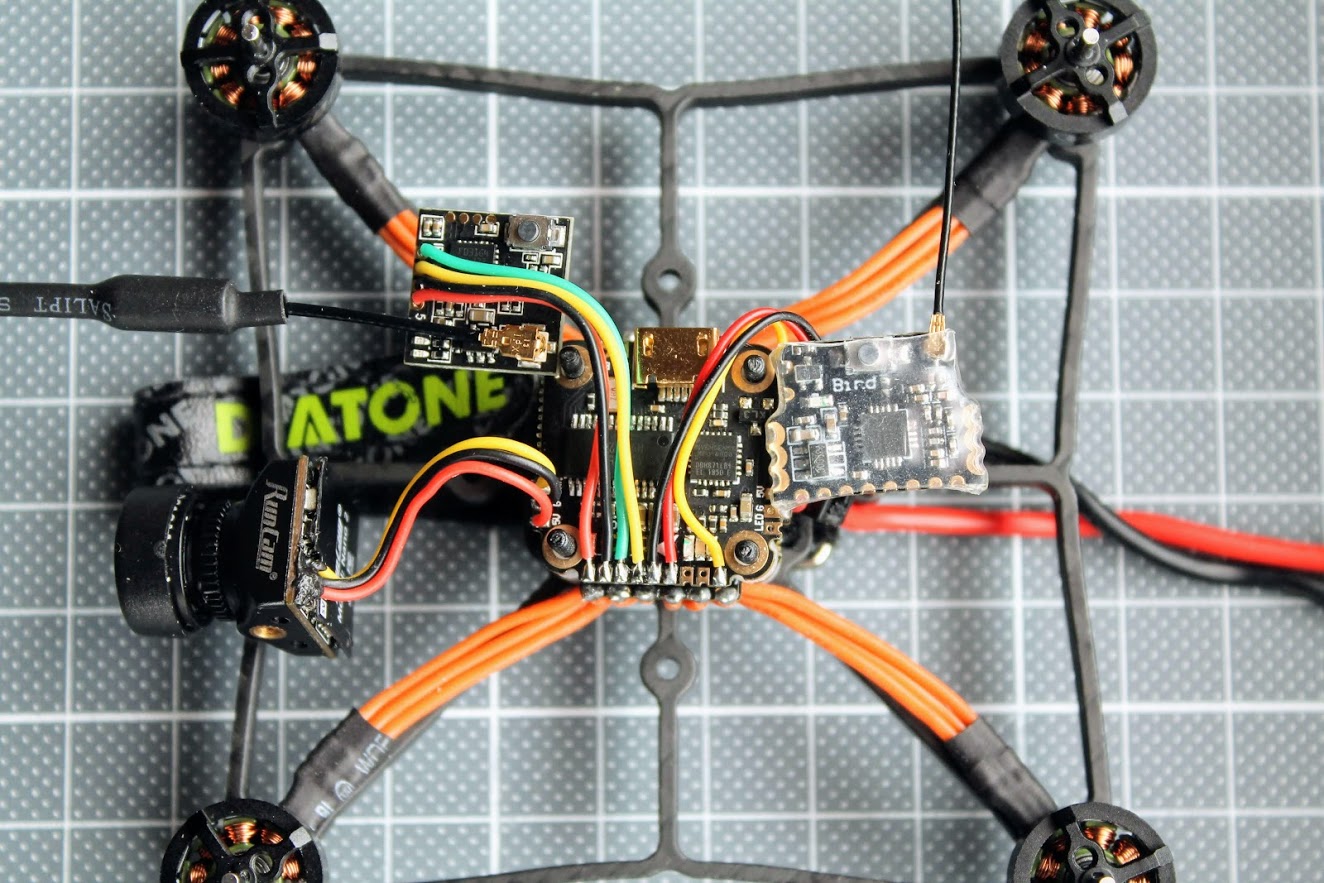
Camera and VTX fitted into the canopy and Frsky D8 receiver taped with double sided tape to the top of the stack
Runcam TX100 Nano VTX and Frsky D8 receiver fits inside the canopy with ease.

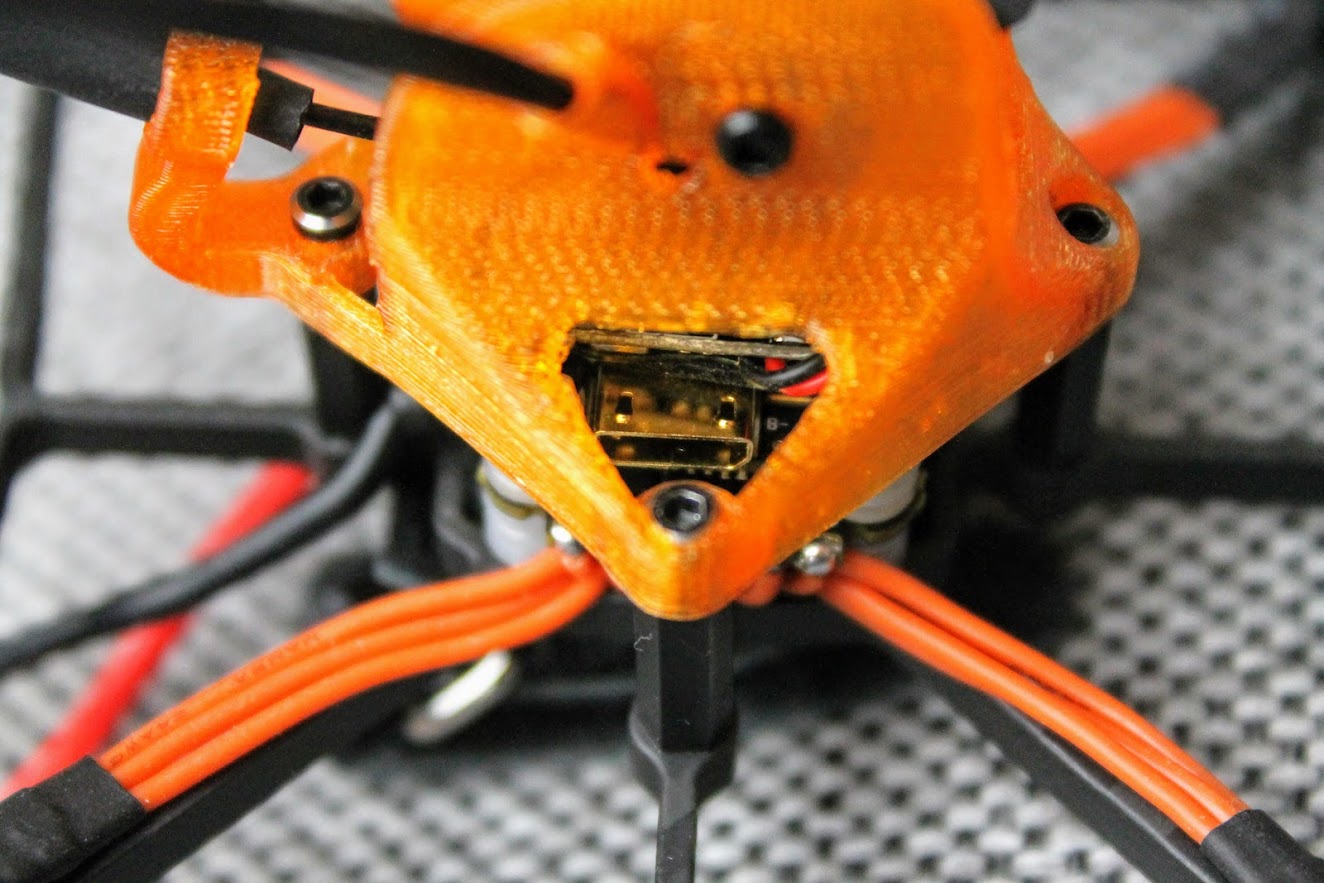
One downside is the vertical canopy standoff is in the way of the USB connector. You will need to unscrew and remove (temporarily) this standoff in order to access the USB port.
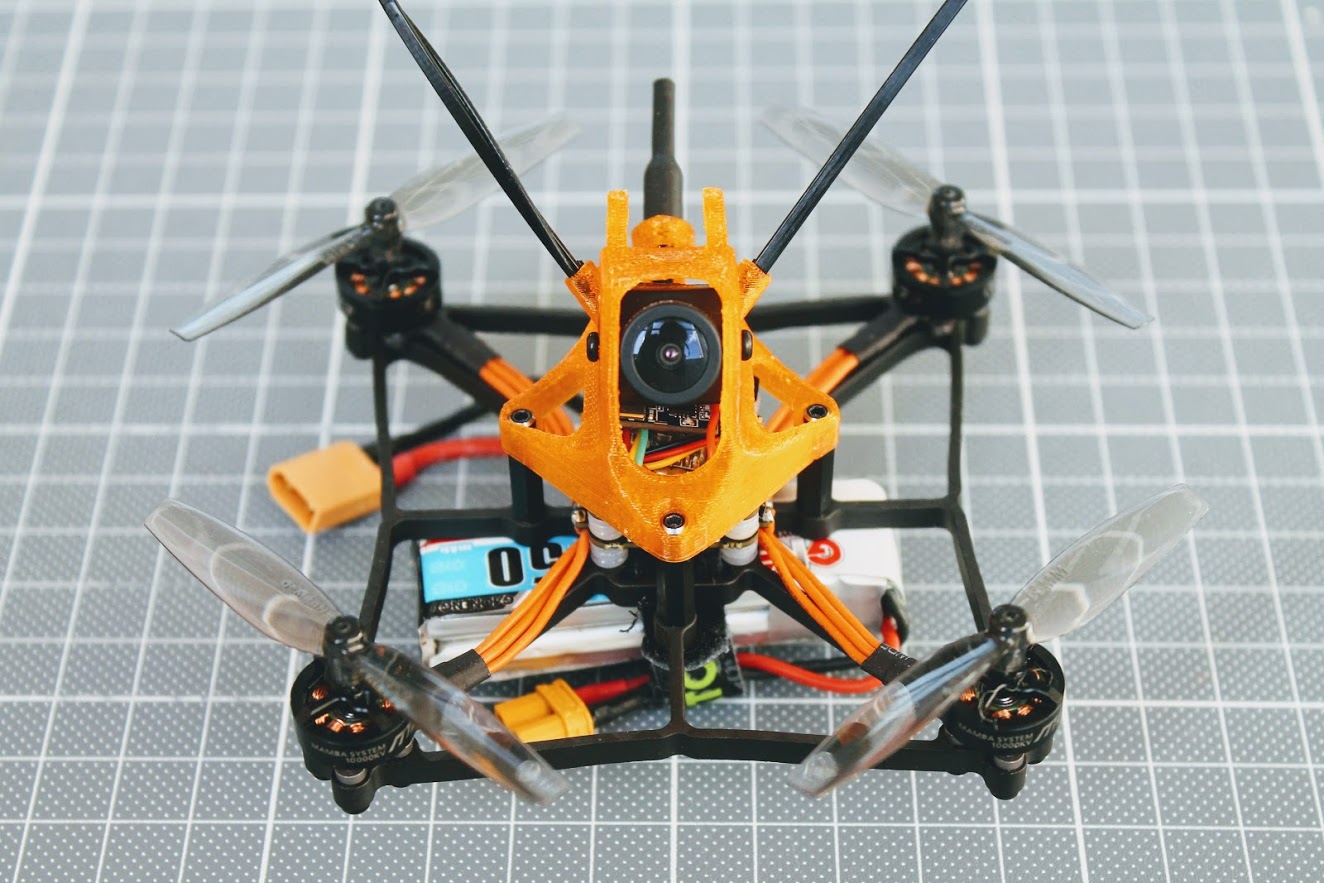
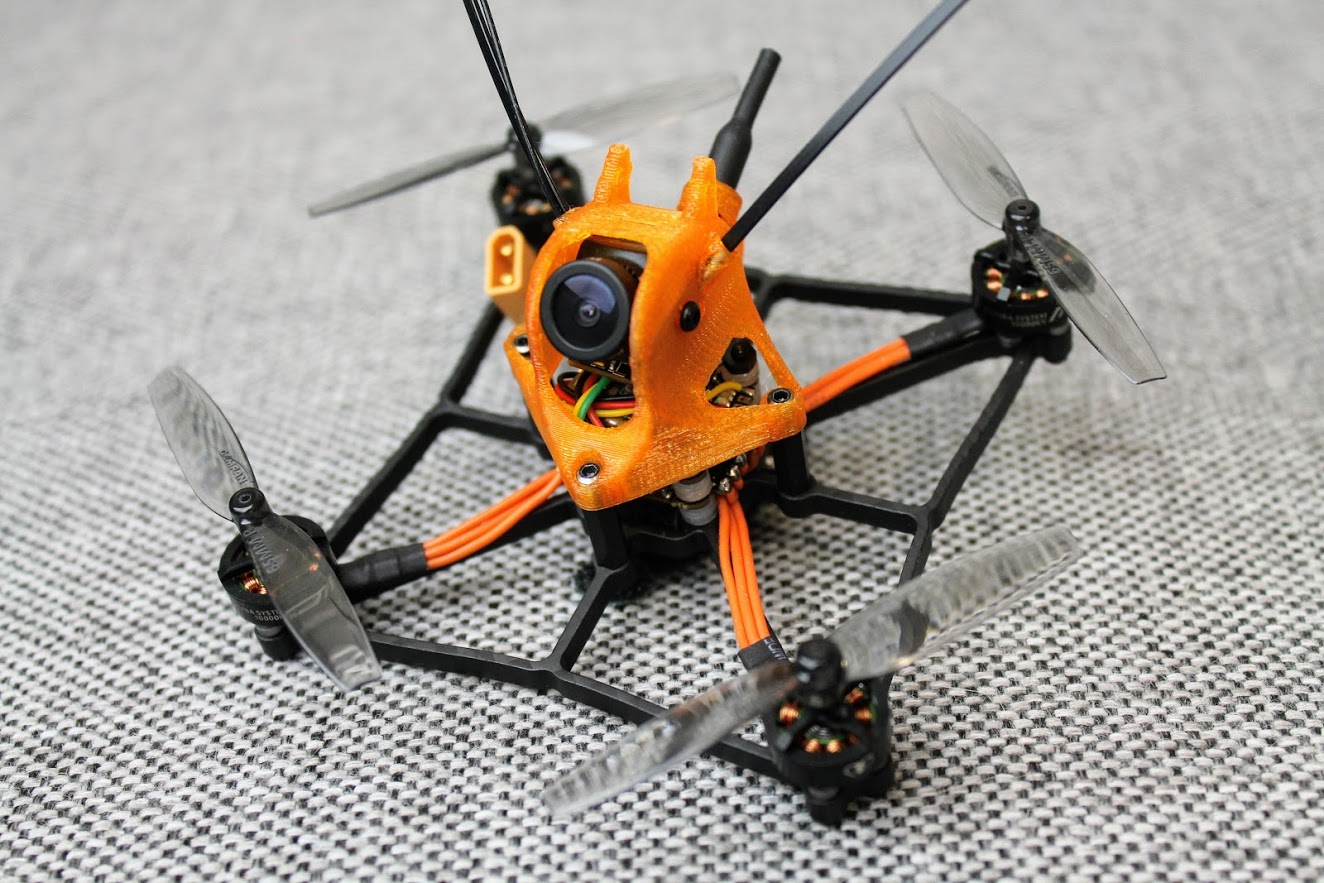
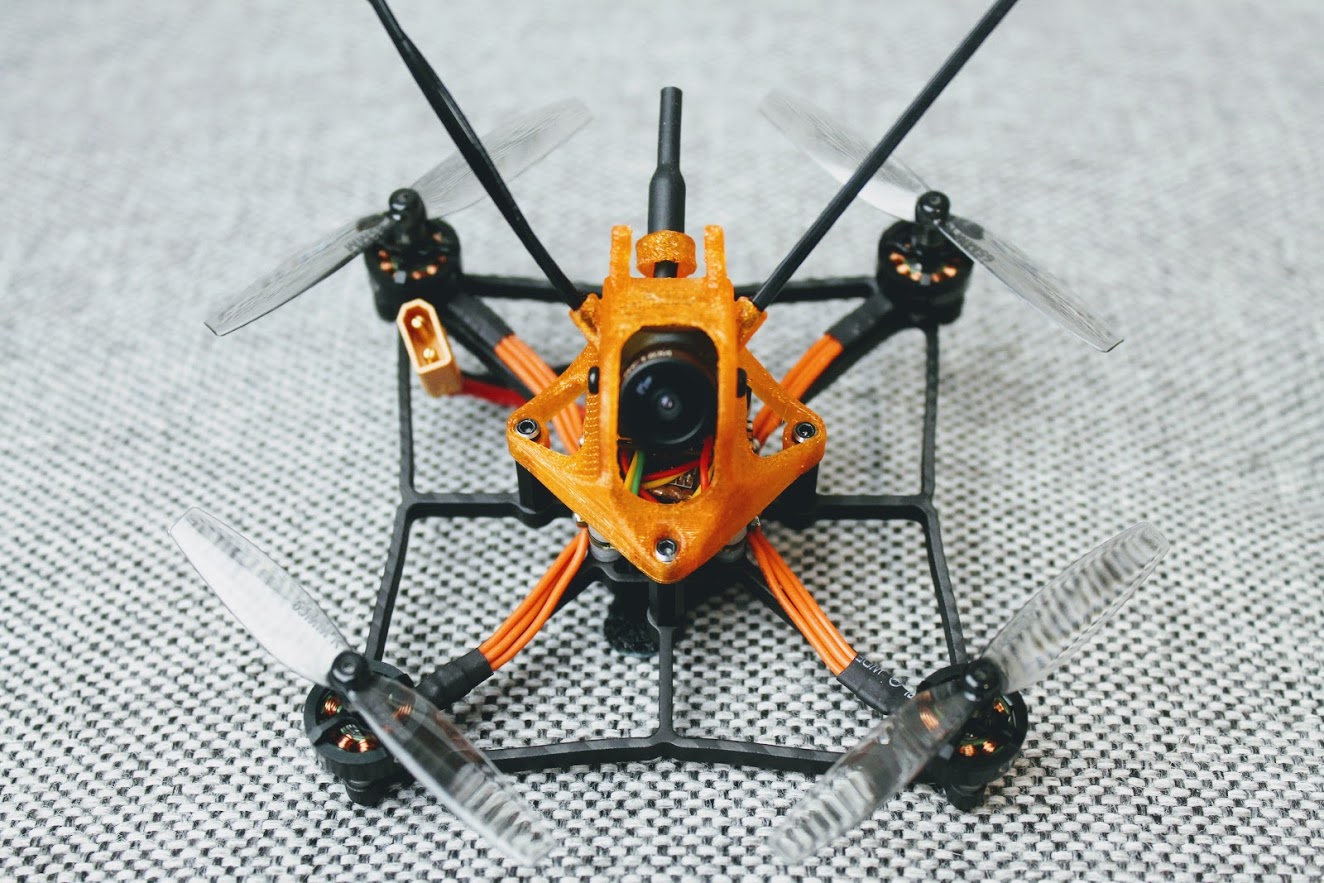
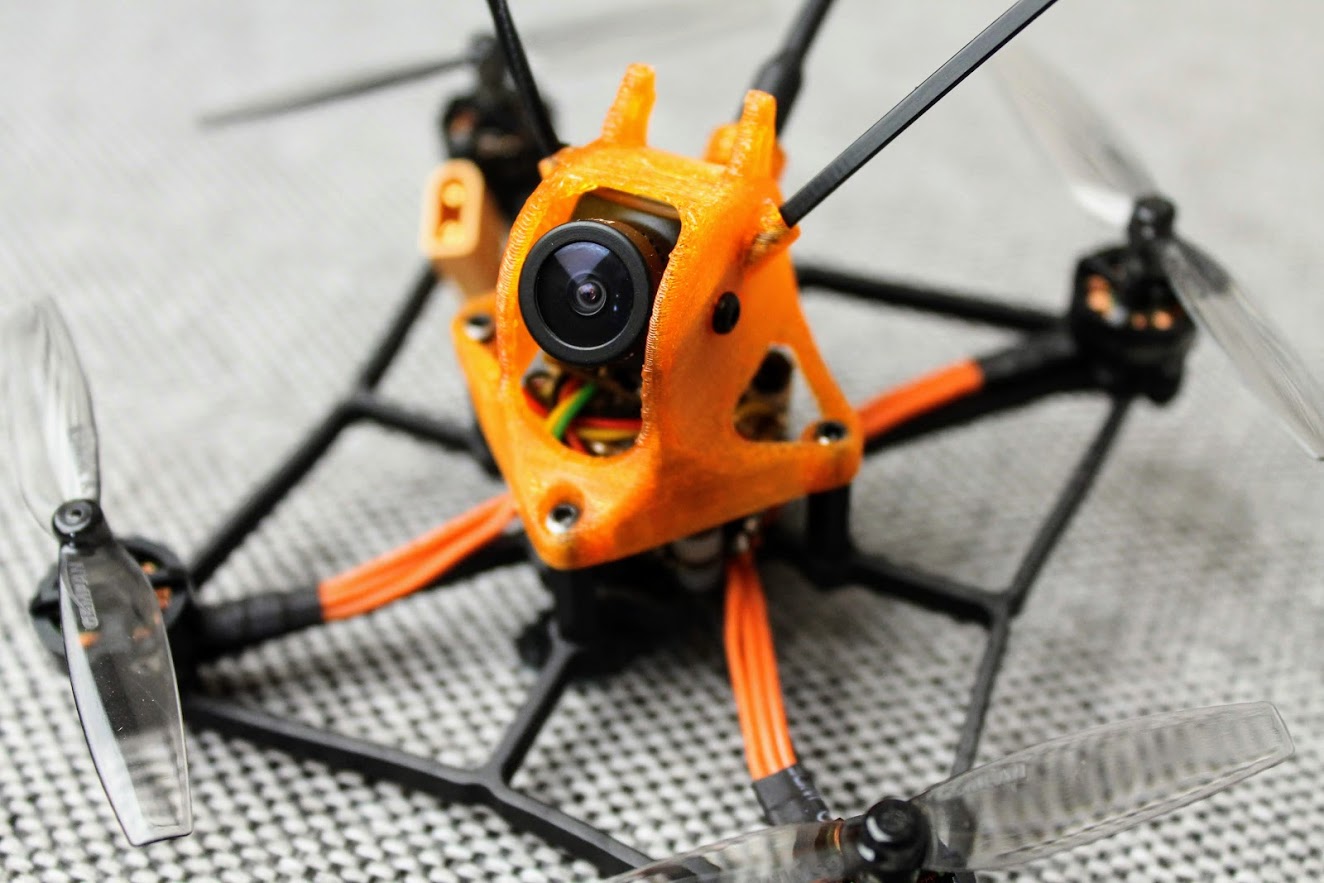
The view of the finished Diatone GTB229 quadcopter.
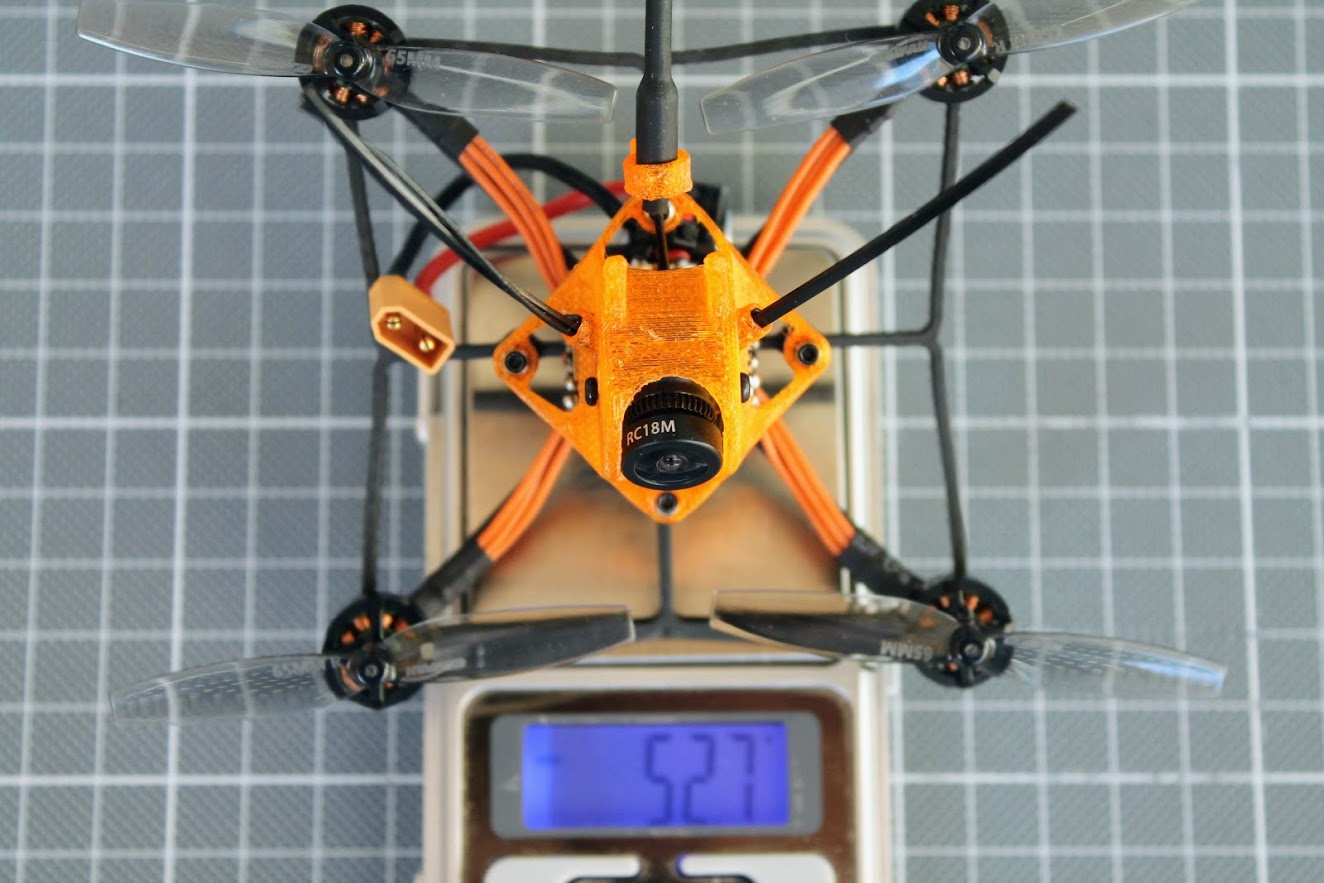
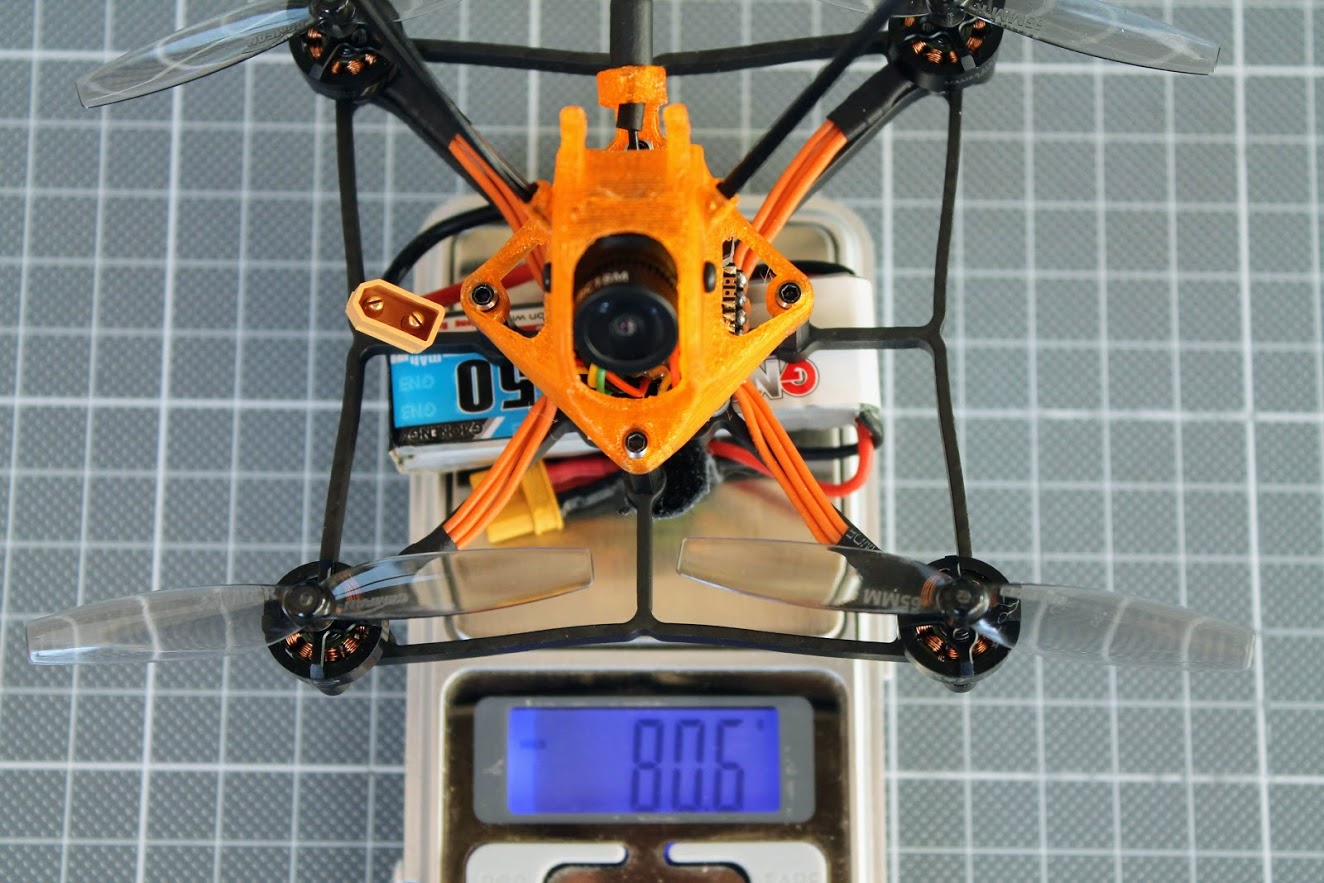
Total weight without the battery is 52.7 grams.
And the weight with the GNB 450mAh 2S battery is
Configuration
As soon as the motor wires and battery pigtail were soldered it is time to test the motors. I suggest powering the new build for the first time using the smoke stopping device. Plugging the battery for the first time is the most risky operation on any build.
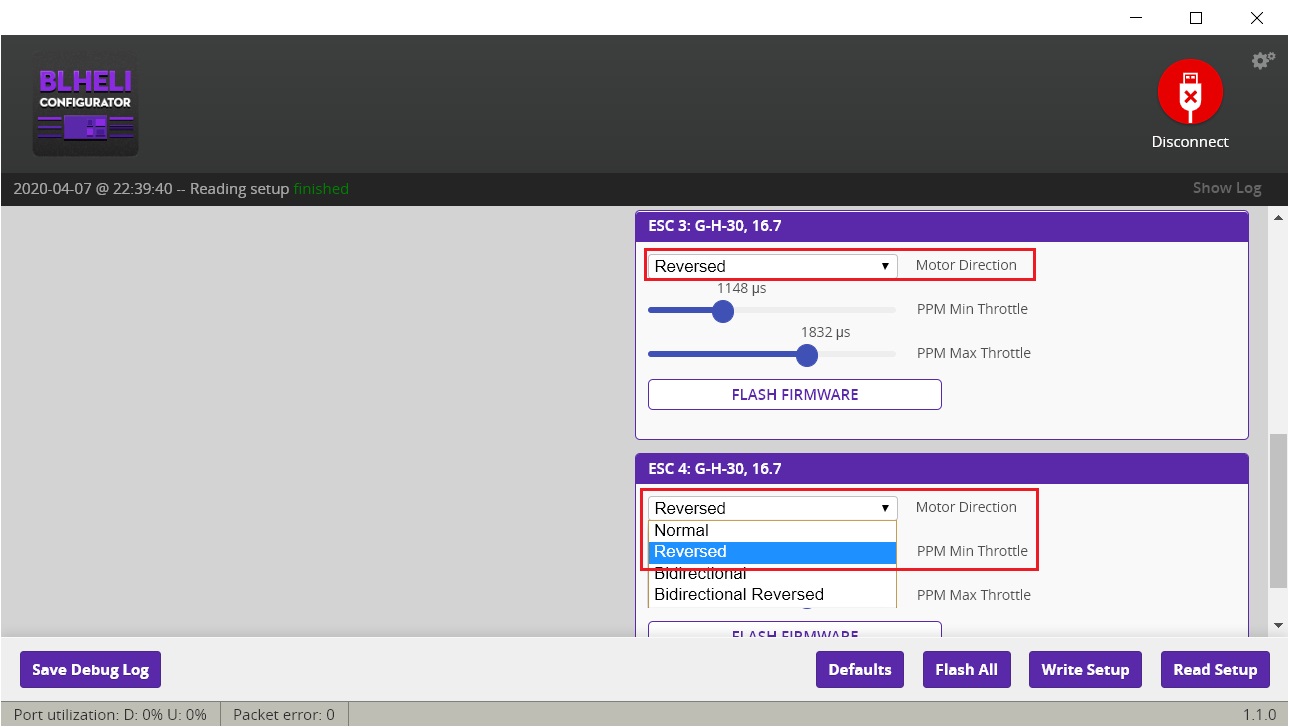
If everything was soldered correctly and the components are working as expected you should hear the ESC startup sound. Next thing is checking the motor rotation direction via Betaflight Configurator motor tab. I choose the reverse (or props-out) motor rotation configuration.
Individual motor check showed that I need to reverse the rotation of the motor in BLHeli Configurator. Set ESC 3 and 4 to be reversed.
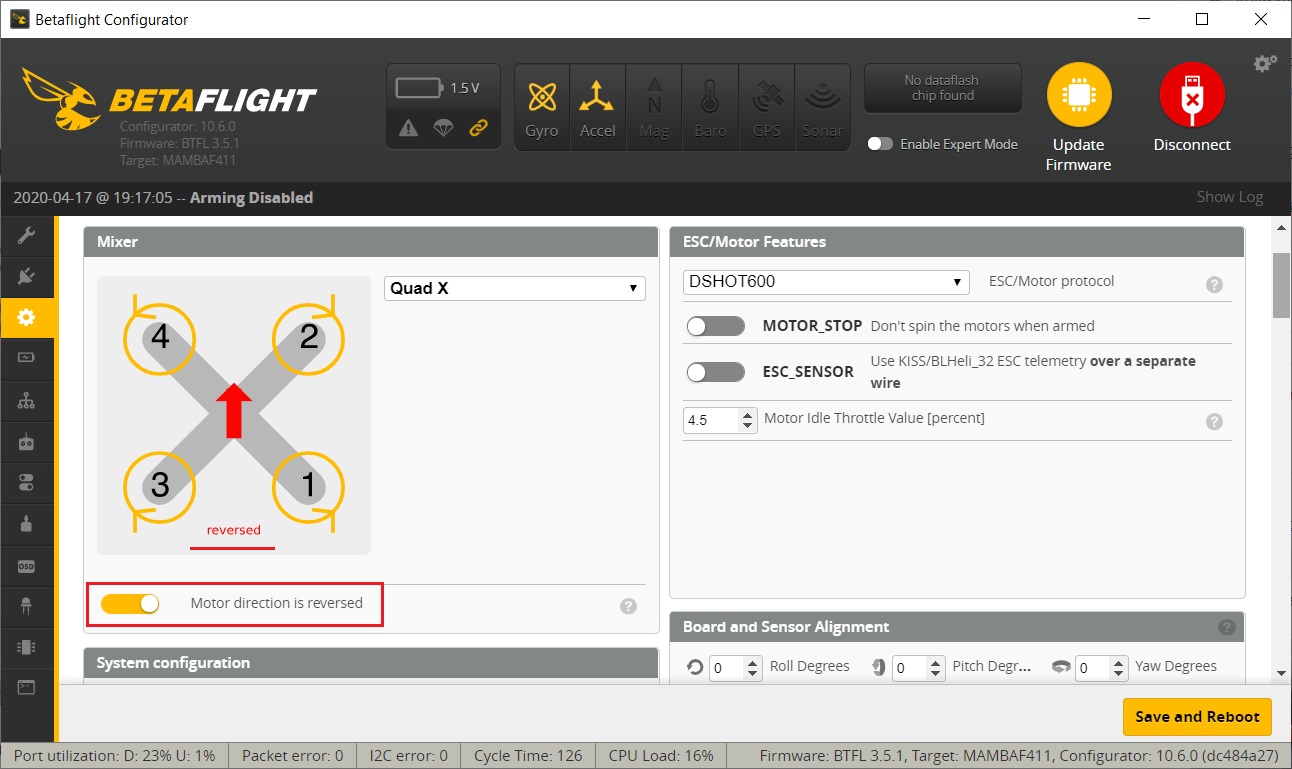
I’ve also set the reversed motor/propeller direction in the Betaflight Configurator (so called “Props out” configuration).
Other system configuration settings.
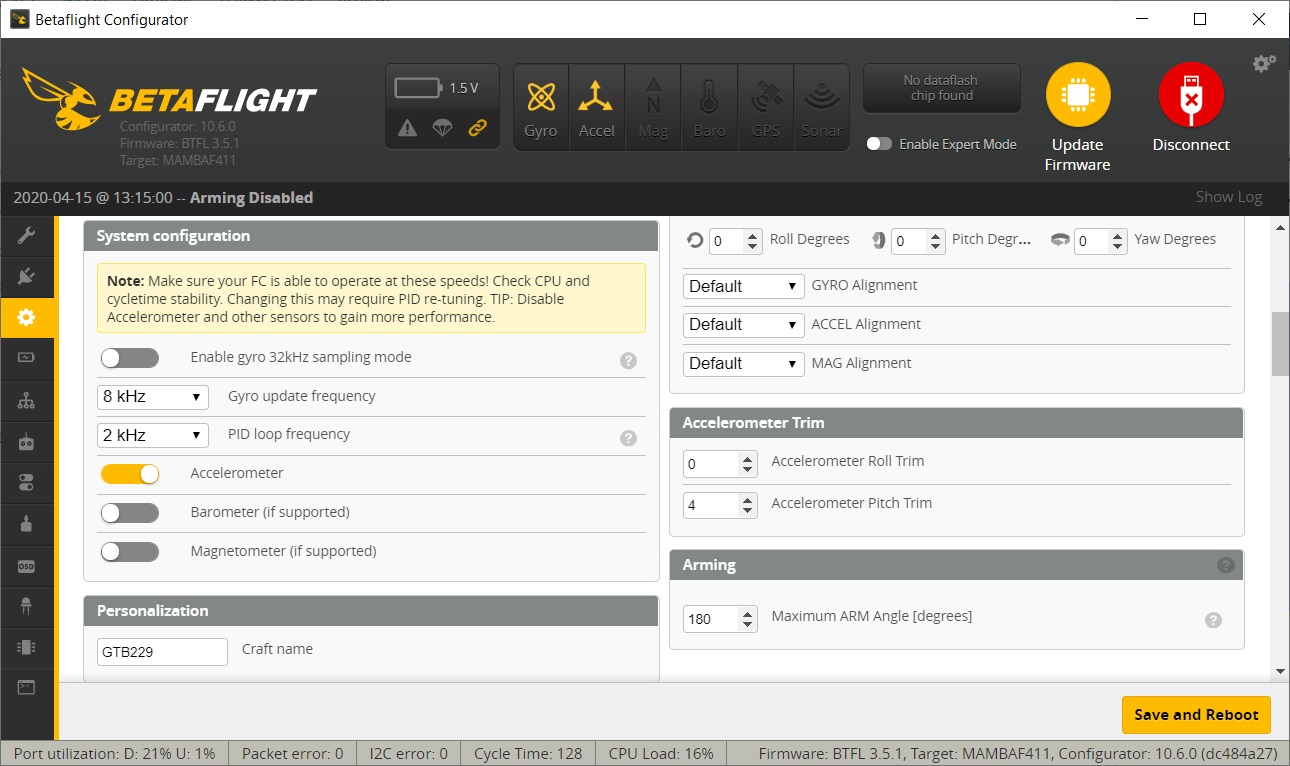
Receiver is connected to SBUS input on the UART1 and TBS Smartaudio VTX control on the UART2.

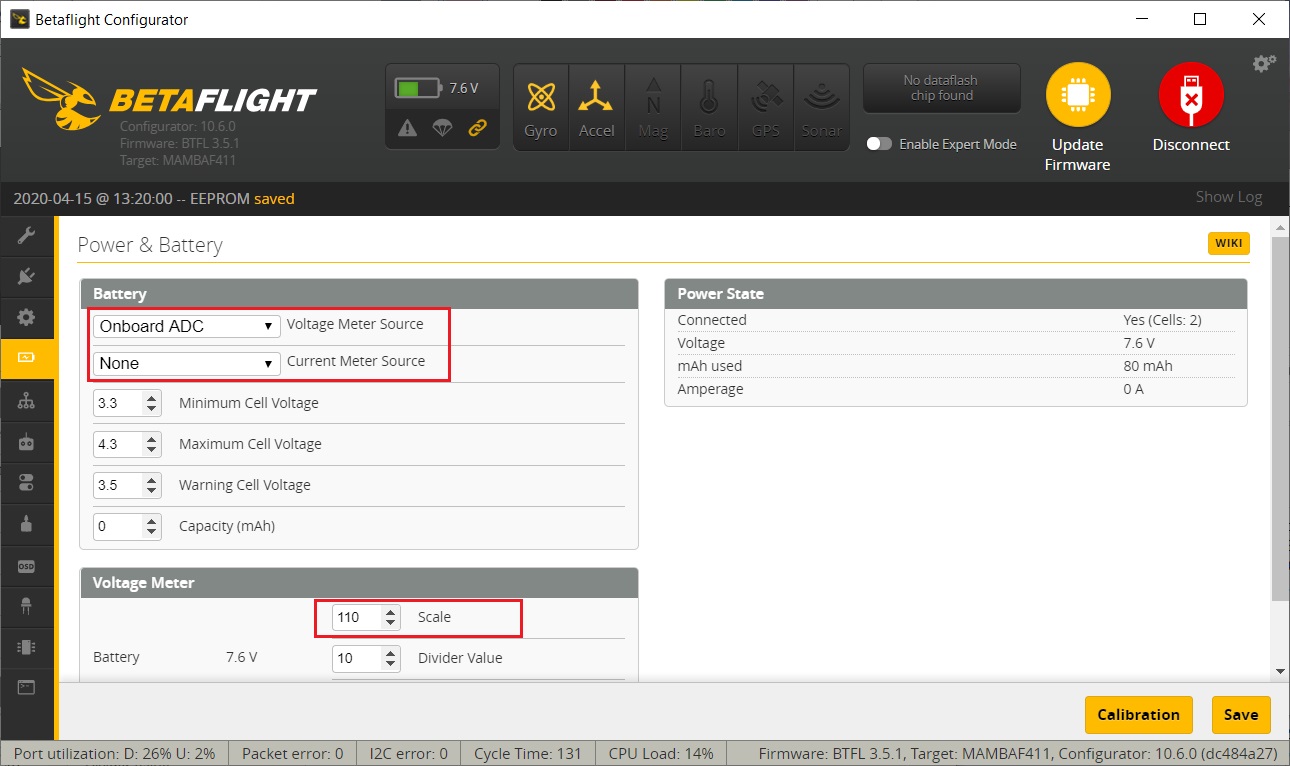
Diatone Mamba F411 Nano stack does not have the on board current sensor and the stack version V1.0 does not have any input for external current sensor (while version V1.2 has). So set the “Current Meter Source” to None. Voltage sensor scale is 110.
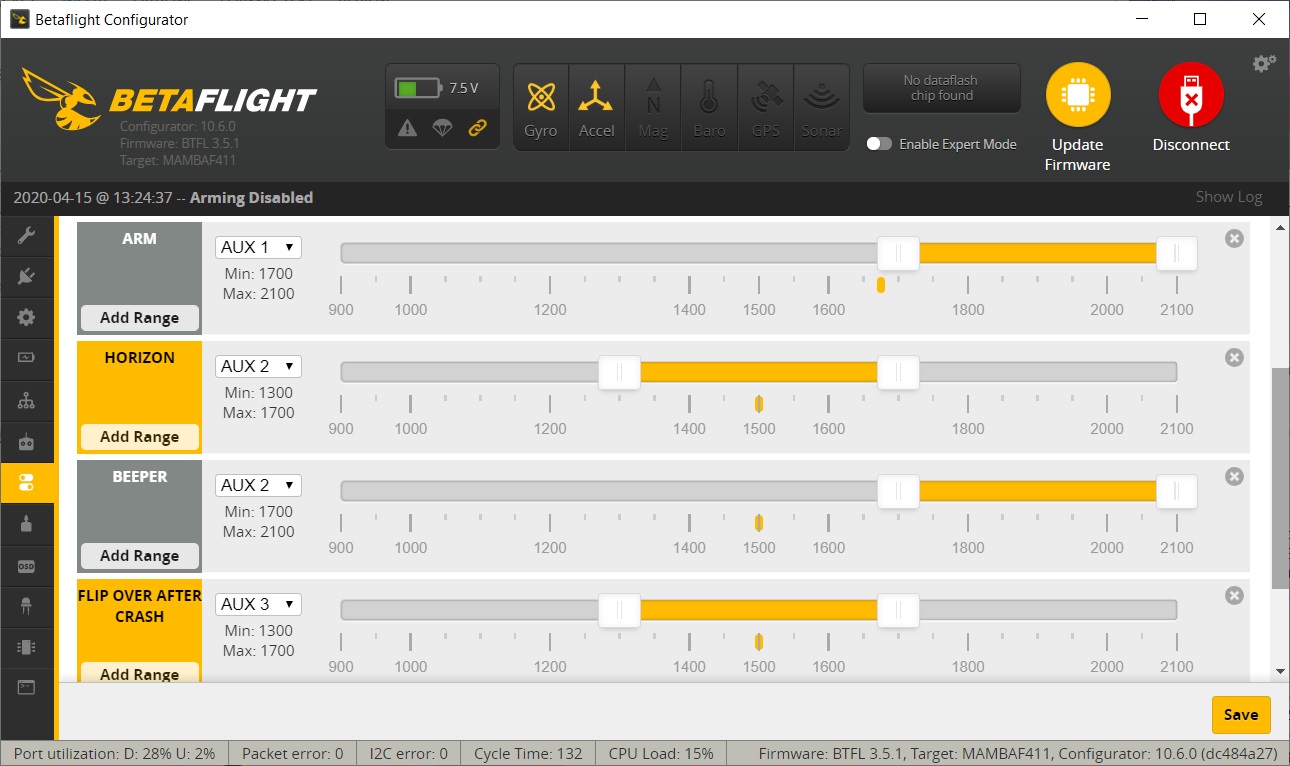
My preferred modes setup: ARM on AUX1 (rightmost switch), Horizon flight mode and Beeper on AUX2 (next to the AUX1 switch) and Turtle mode on AUX3
And some final shots of the finished quadcopter.

(The end)
-
 DIY ExpressLRS Transmitter and Receiver
ExpressLRS is gaining the popularity rapidly. There is a number of well known brands
DIY ExpressLRS Transmitter and Receiver
ExpressLRS is gaining the popularity rapidly. There is a number of well known brands -
 KingKong Tiny6 – build it yourself
KingKong Tiny6 is a nice Tiny Whoop style quadcopter. It is sold preassembled, all
KingKong Tiny6 – build it yourself
KingKong Tiny6 is a nice Tiny Whoop style quadcopter. It is sold preassembled, all
Very good job!
Thanks!
This is currently my favorite 65mm(2.5″) quad. It flies outstanding. Diatone frames are pure pleasure to build. Feels quality and has all the bits and nuts and extras included. Next build – Diatone Roma 4 LR from frame kit.