Guide: How to update OpenTX firmware
OpenTX is the most popular RC radio transmitter firmware in the world. It is constantly changing as the developers are fixing, improving and adding features into it. If you want to have the most current version of the OpenTX in your radio transmitter, you need to update the firmware.
This article is general guide how to upgrade/update OpenTX in almost any radio that runs it. Examples are based on Jumper T12 radio, but should be similar for Frsky Taranis X9D, X7, X9 Lite, X-Lite, Jumper T16 /T16 Pro and many more.
Do You really need to update OpenTX firmware?
First of all check if there is a newer version of the OpenTX in this page: http://www.open-tx.org/downloads. Then read what new features/changes/fixes the new versions have in this page: https://github.com/opentx/opentx/releases and decide yourself do you need these fixes or they are irrelevant for your needs. Some versions have minor changes and may be skipped without updating them.
First step – backup
I recommend to make the backup of the Radio settings and firmware first before starting to mess with the firmware upadates. If you have a backup you can always restore your Radio to the current state in case anything went wrong.
Backup using OpenTX Companion
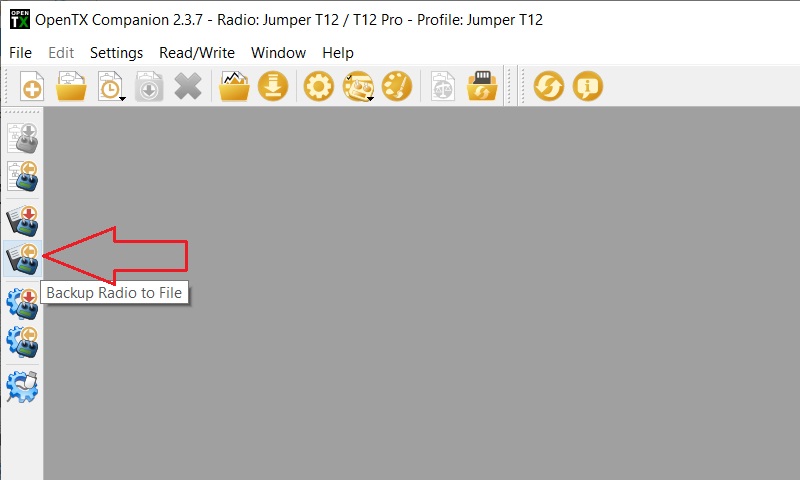
Power on your Radio transmitter. Connect it to PC. Select the “USB Storage (SD)” in the menu on the Radio screen. Start the OpenTX Companion (you can download the OpenTX Companion here: https://www.open-tx.org/downloads) and select [Backup Radio to File] to backup the EEPROM.
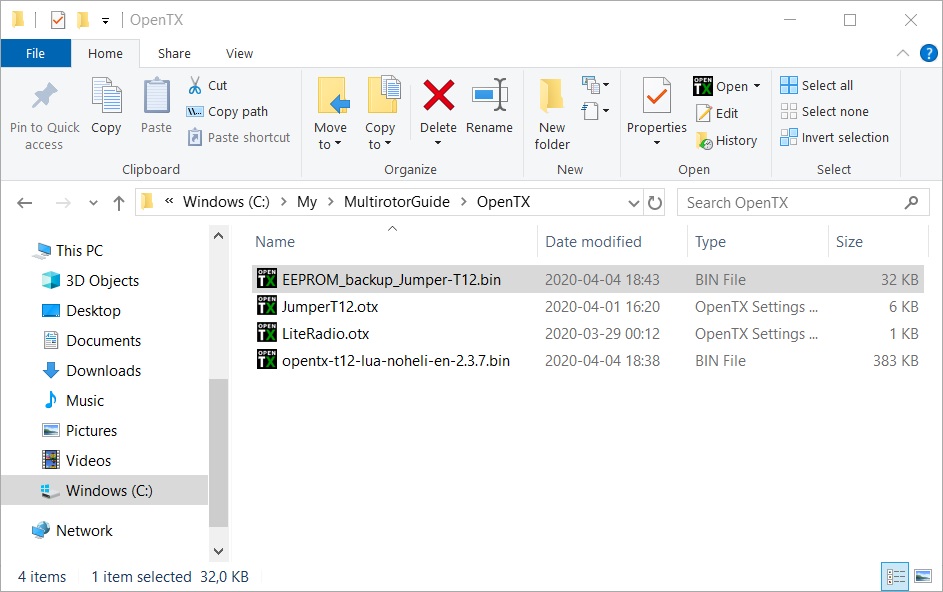
Save the EEPROM backup file to some location on your drive.
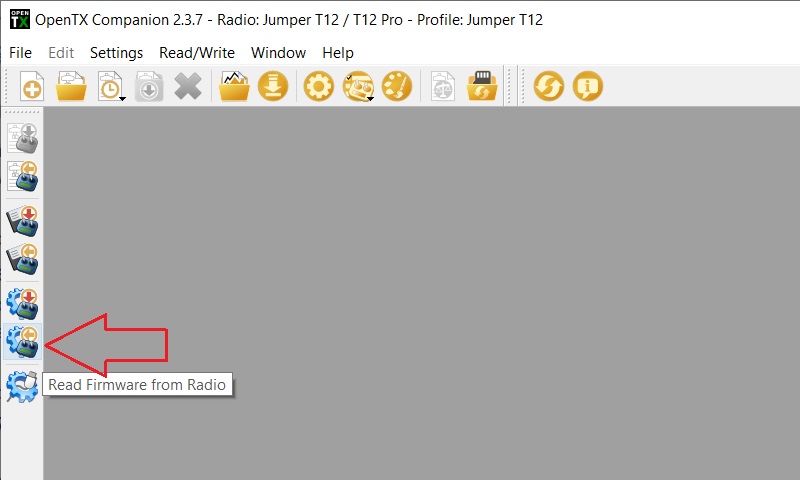
Select the [Read Firmware from Radio] to backup the FIRMWARE.
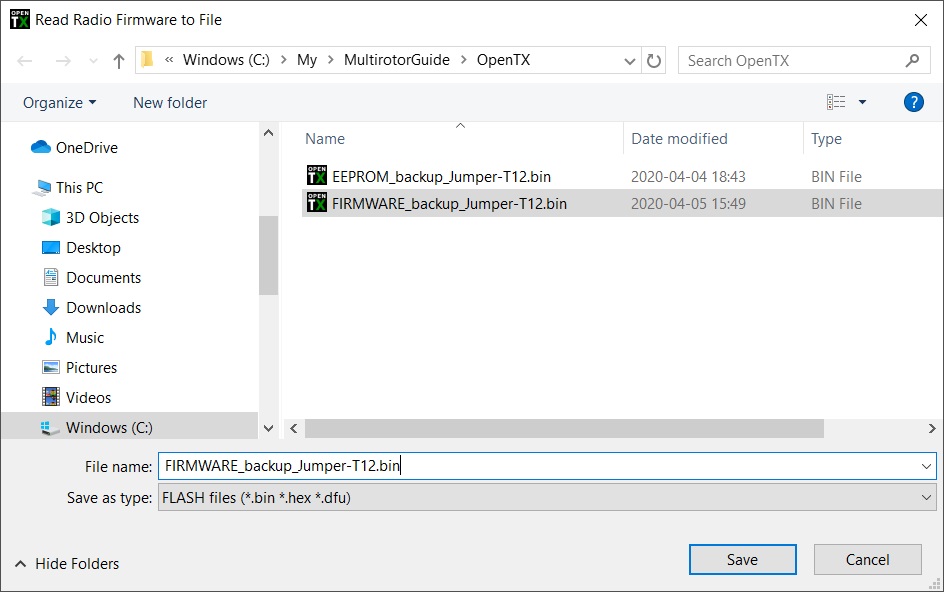
Save the FIRMWARE backup file to some location on your drive.
Backup using simple file copy
This is probably the simplest method of the backing up the firmware and eeprom data. Even though it is officially not recommended, but it works (tested). When you connect the OpenTX radio to the PC, it shows up as additional drive, called “Taranis”. There a two files in this drive: FIRMWARE.BIN and EEPROM.BIN. These are actually the firmware and eeprom data!
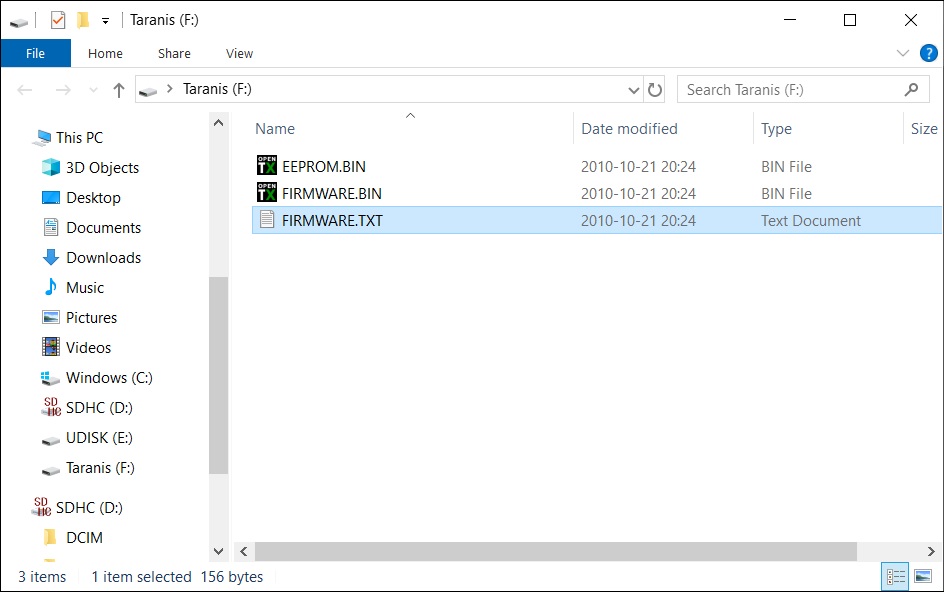
All you need is just to copy these files to your computer and you have your radio backed up!
Note: Have in mind that these are not actual “files” on the radio, but rather represent the current firmware and eeprom data and are read only. You cannot delete/modify/overwrite them so don’t try.
Backup EEPROM using Radio menu
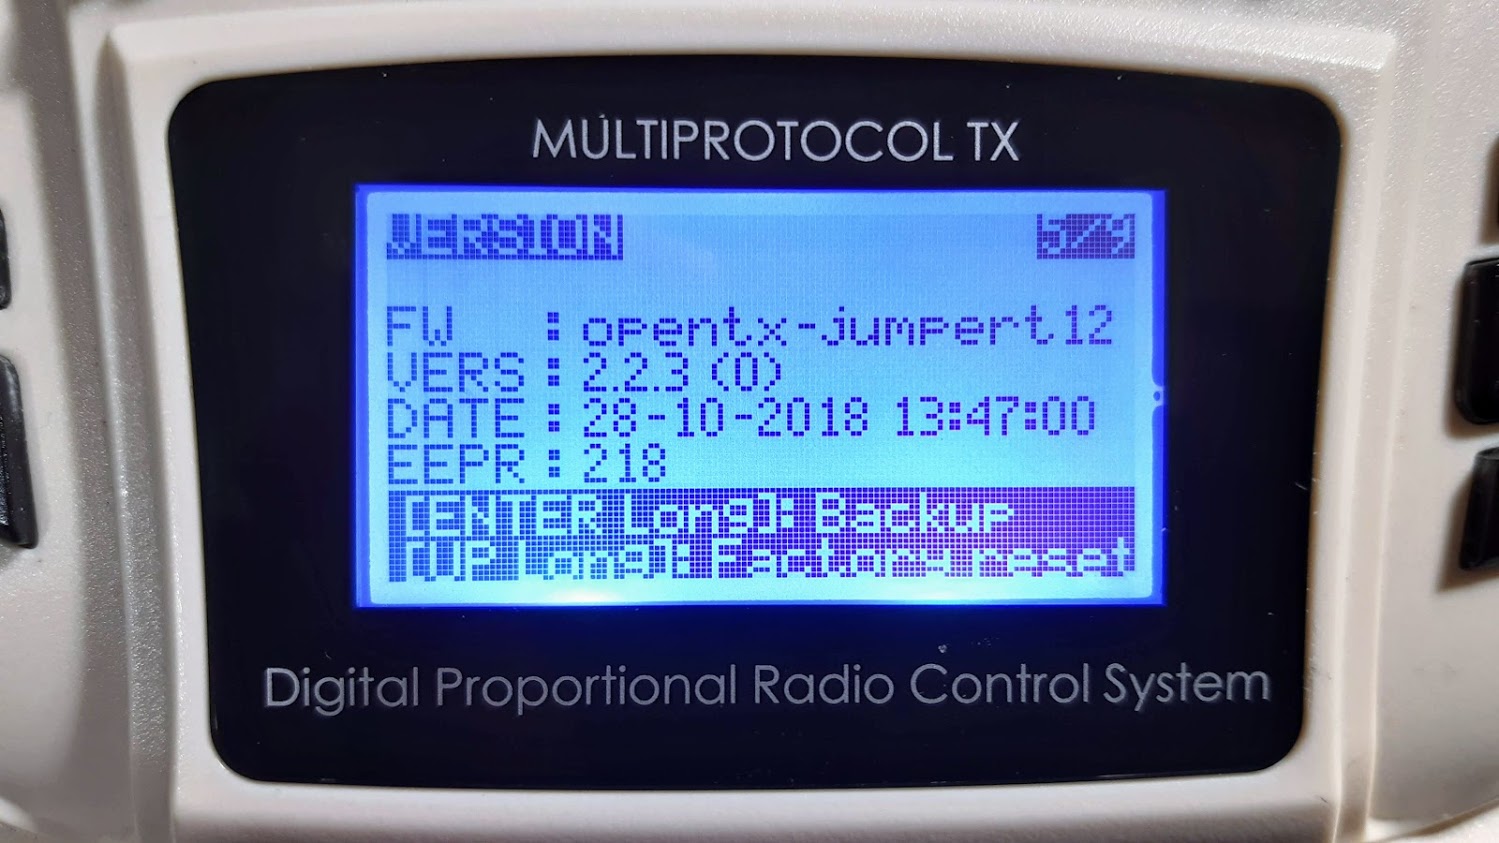
If you have OpenTX version v2.x or newer (most probably you are), then you can backup the EEPROM right on your radio transmitter SD Card.
For OpenTX versions 2.0-2.2 you should go to Radio Settings page 5 (Version) and long press on ENTER key will make the EEPROM backup in the EEPROM\ folder on SD Card.
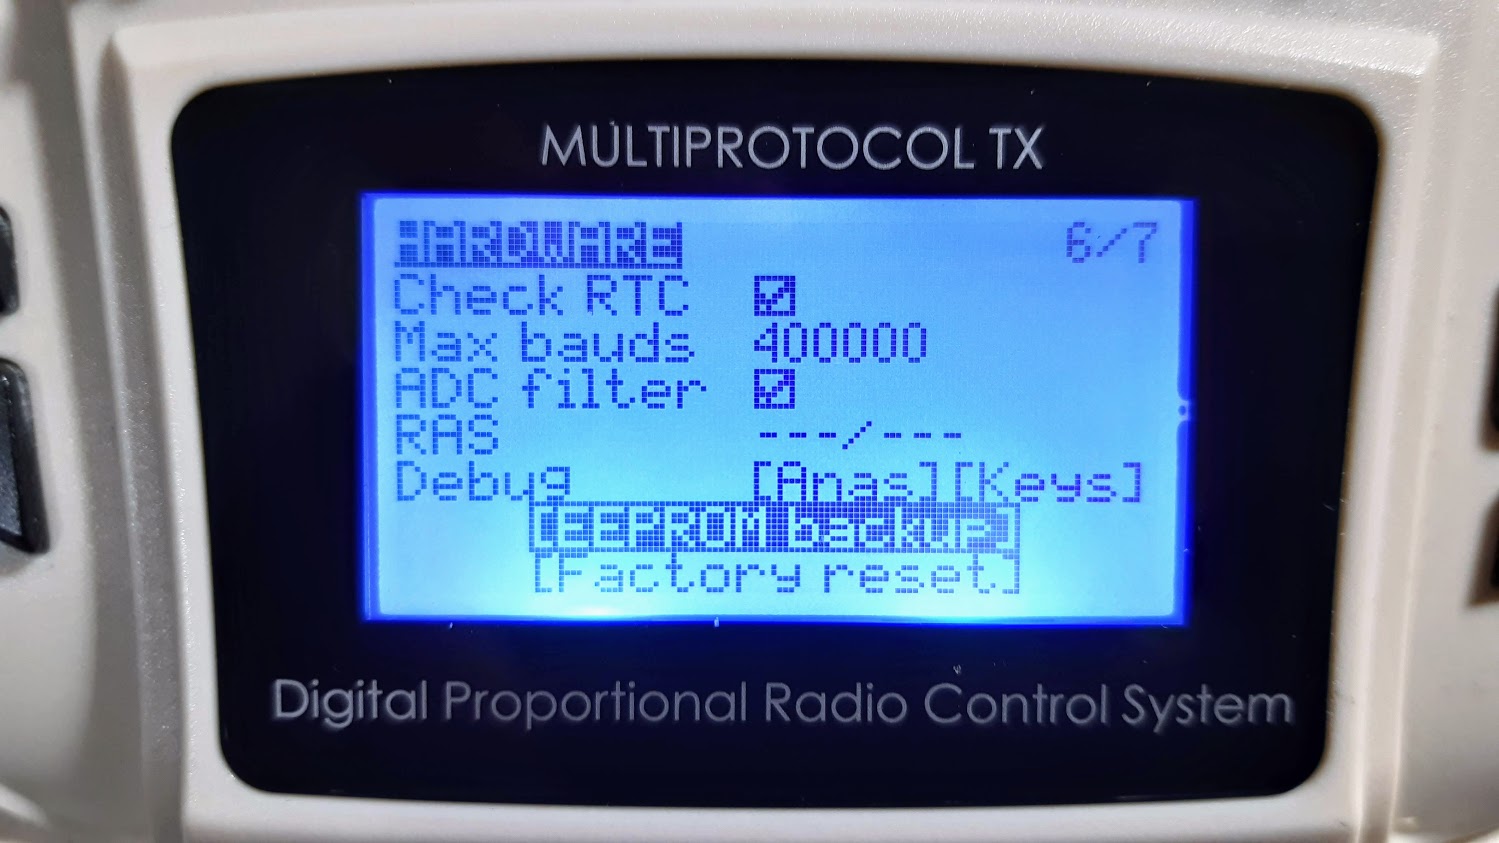
For OpenTX versions 2.3 or newer you should go to Radio Settings page 6 (Hardware), scroll down to the bottom of the hardware setting and selecting the [EEPROM backup] option will make the EEPROM backup in the EEPROM\ folder on SD Card.
Downloading the OpenTX firmware
First you need to download the right firmware. Start the OpenTX Companion. Press [Settings] button. In the Settings window select your Radio Type (in our case it is Jumper T12), mark the Build Options for your Radio (in our case noheli – no helicopter functions needed, lua – enabling Lua scripts, mark the internalmulti if you have internal mutiprotocol module, flexr9m – if you use R9M long range system in flex mode).

Also select the Default Stick Mode and Default Channel Order for your radio. In my case it is Mode 2 and A E T R channel order.

Select [Download] button, then in the following window select [Download firmware] button.
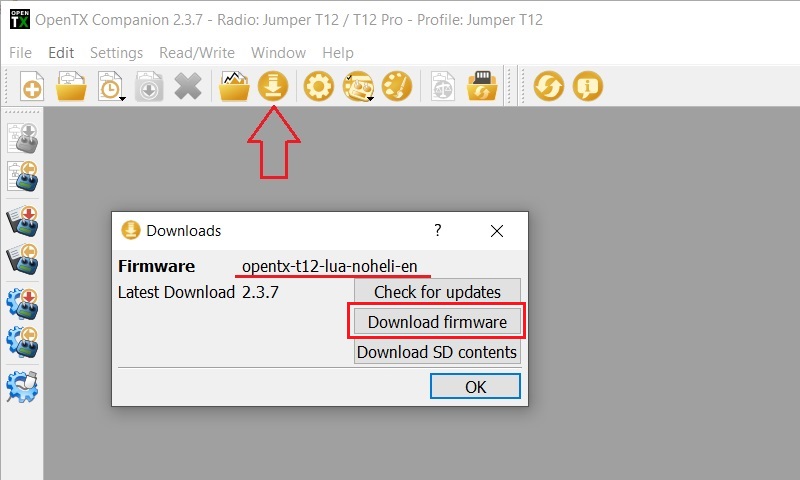
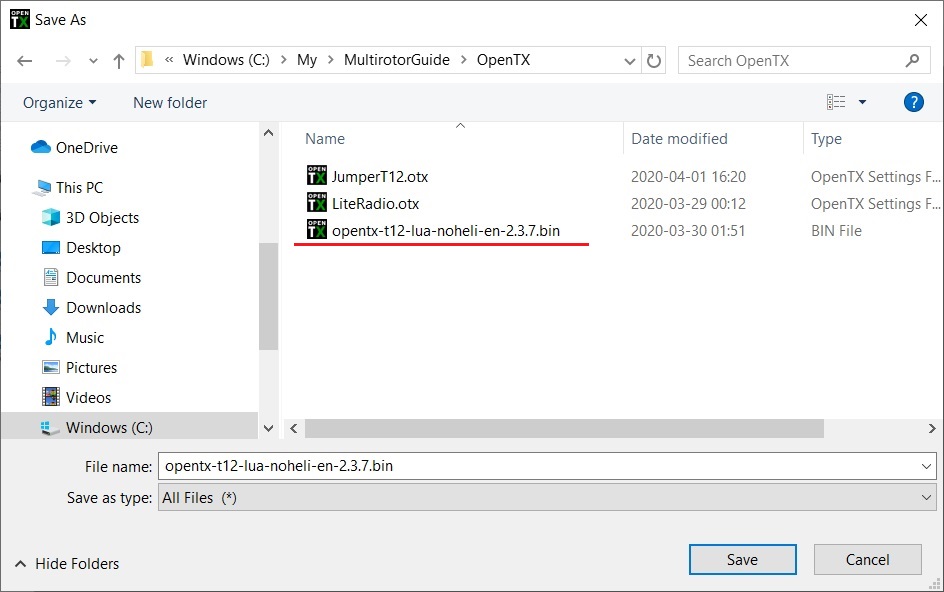
Save the OpenTX firmware file to some location on your drive.
Flashing the OpenTX firmware from OpenTX Companion
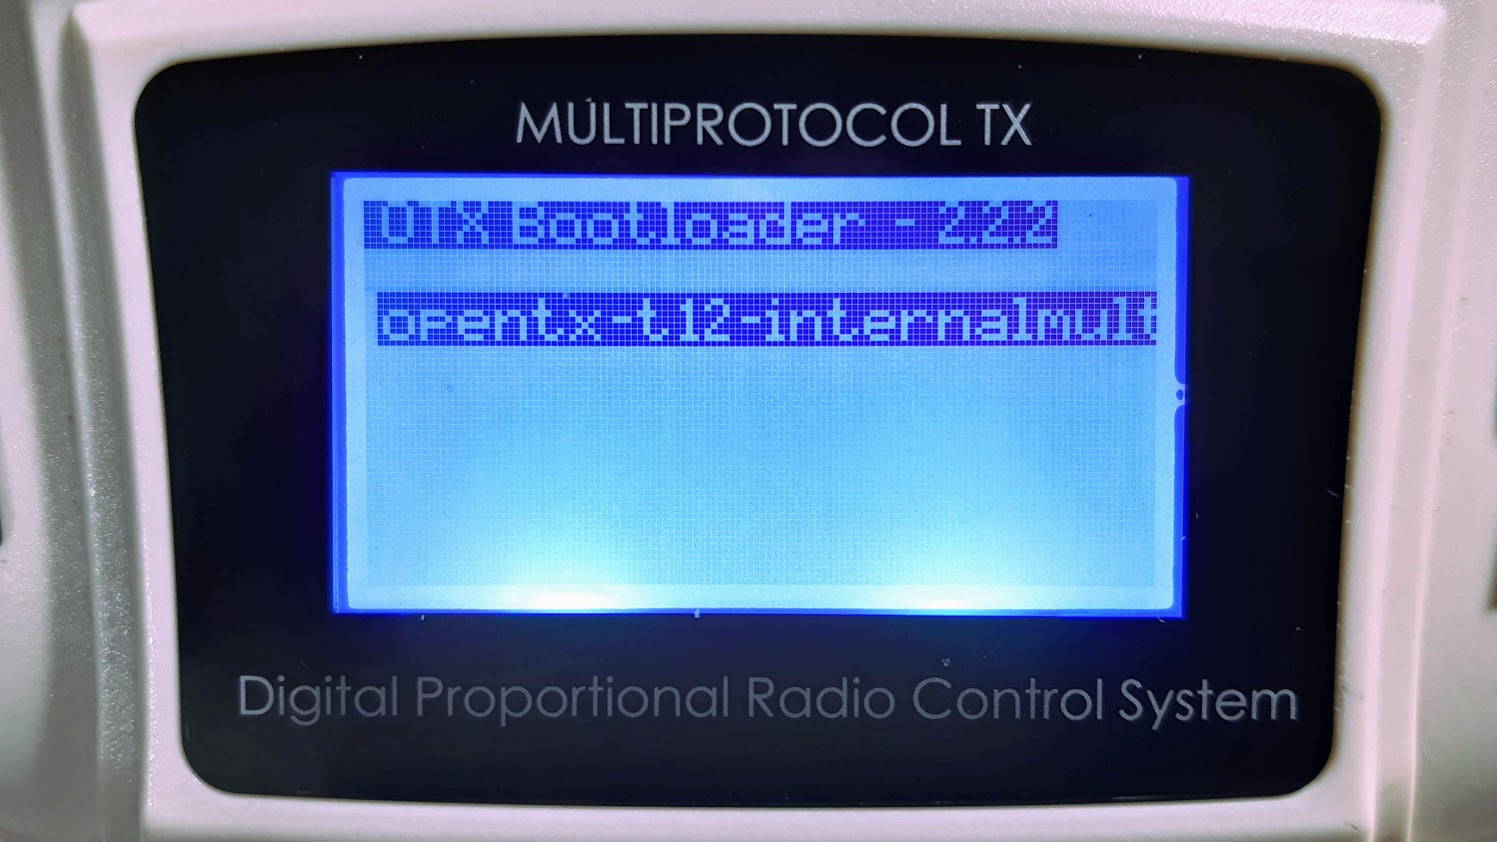
In order to flash the firmware to radio, you need to start the radio in bootloader mode and connect the radio transmitter to the OpenTX Companion.
In order to start the Radio in bootloader mode you need to hold the both horizontal trims towards the center and press power button.

You should see the menu, similar to the one shown in the picture below.

Connect the Radio transmitter to the PC. Radio screen should show “USB Connected” and Radio should be recognized as windows drive.
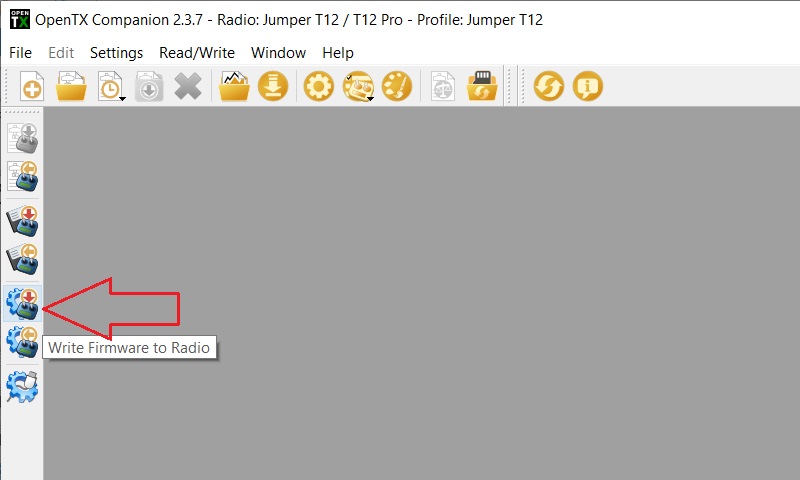
Select the [Write Firmware to Radio] button on the OpenTX Companion.
Select the firmware file that you have saved on your disk.
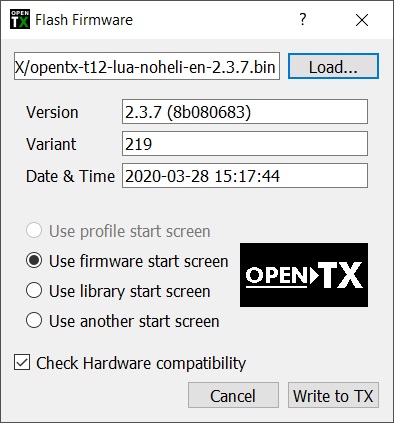
Press [Write to TX] button and wait for the flashing to be finish.
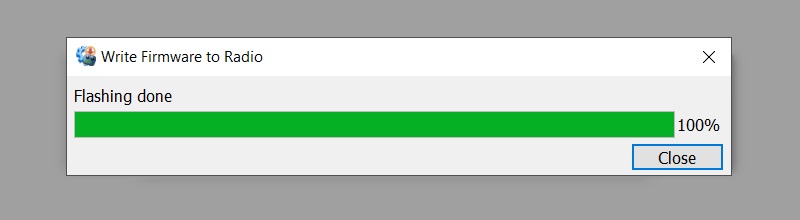
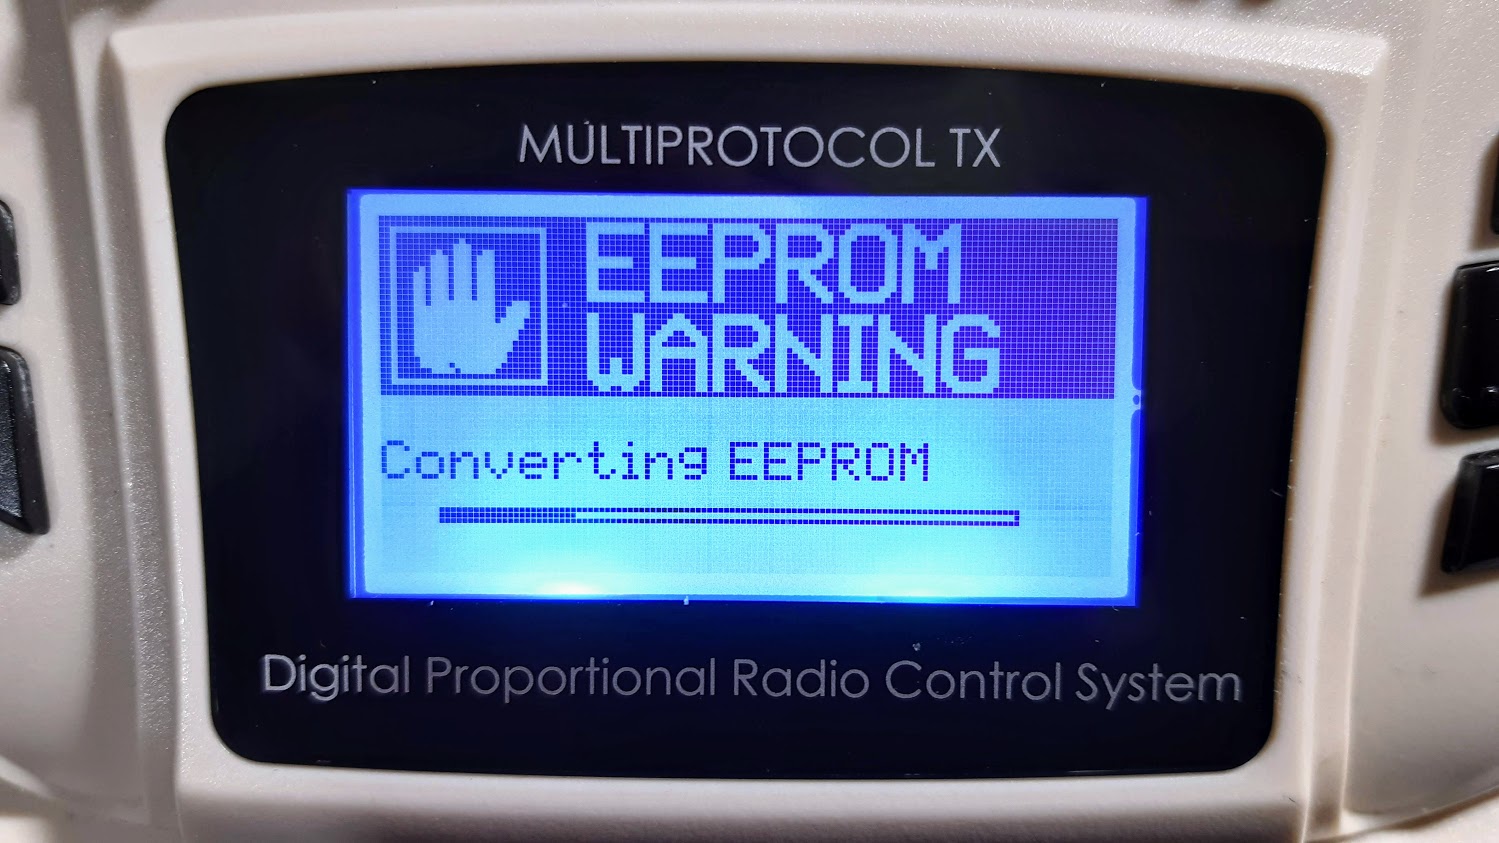
Turn off the transmitter and turn on again. If you are updating to the new major version you should see the warning screen saying that your settings and models data version is different than needed. Press any key.
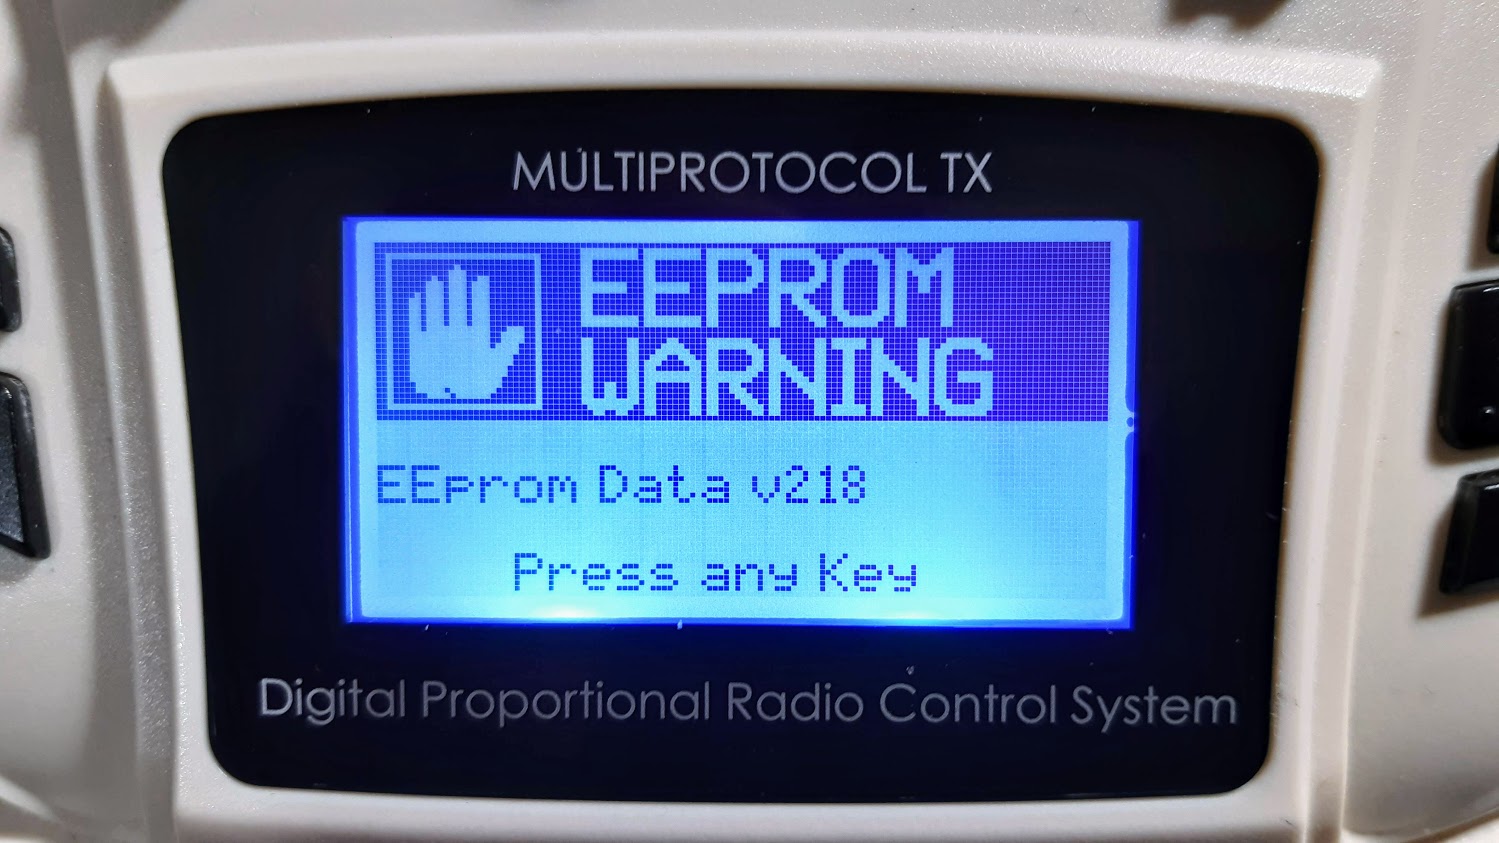
EEPROM data will be converted and all your settings and models should be preserved.
Flashing the OpenTX firmware from Radio menu
Alternatively you can flash the firmware right from your Radio transmitter menu. You still need to download the firmware corresponding to your hardware and setup with a help of OpenTX Companion. Save the downloaded firmware file into SD Card FIRMWARE\ folder.
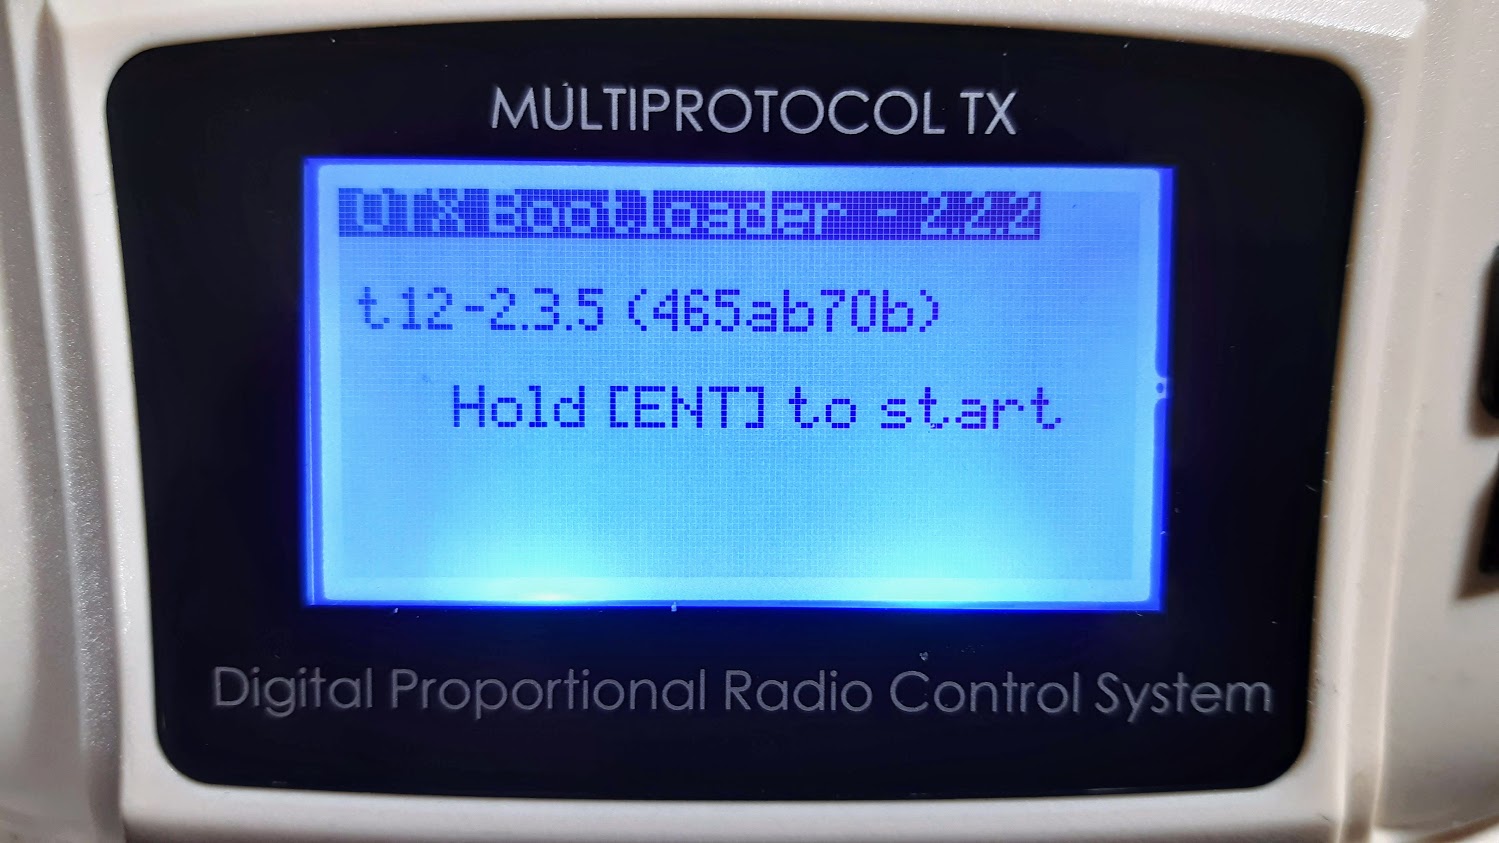
Now start the Radio in the bootloader mode (see instructions above). Select the Write Firmware option.
Then select the firmware file from the files that are saved in the FIRMWARE\ folder.
Hint: there is a firmware filename length restrictions. Make sure that the file name is no longer than 32 characters (including the dot and extension which take 4 characters)! Rename it if it is longer otherwise the file will not be visible on the radio.
Note: very old bootloaders expect the folder for firmware on the SD to be called FIRMWARES\ rather than FIRMWARE\. So if FIRMWARE doesn’t work, try copying the firmware file to FIRMWARES\ folder.
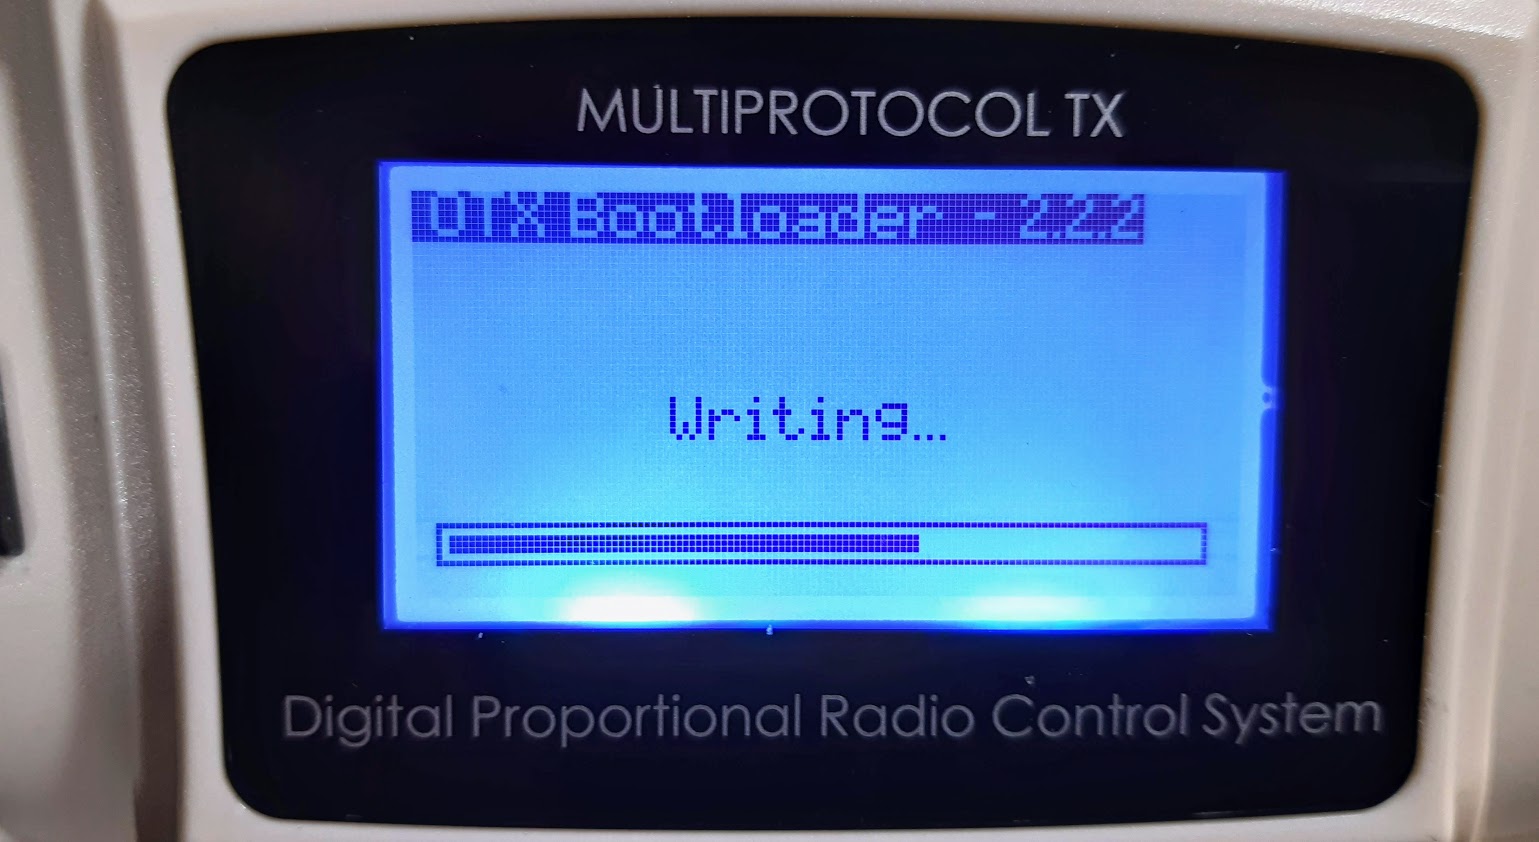
Hold the ENTER key to confirm the firmware flashing.
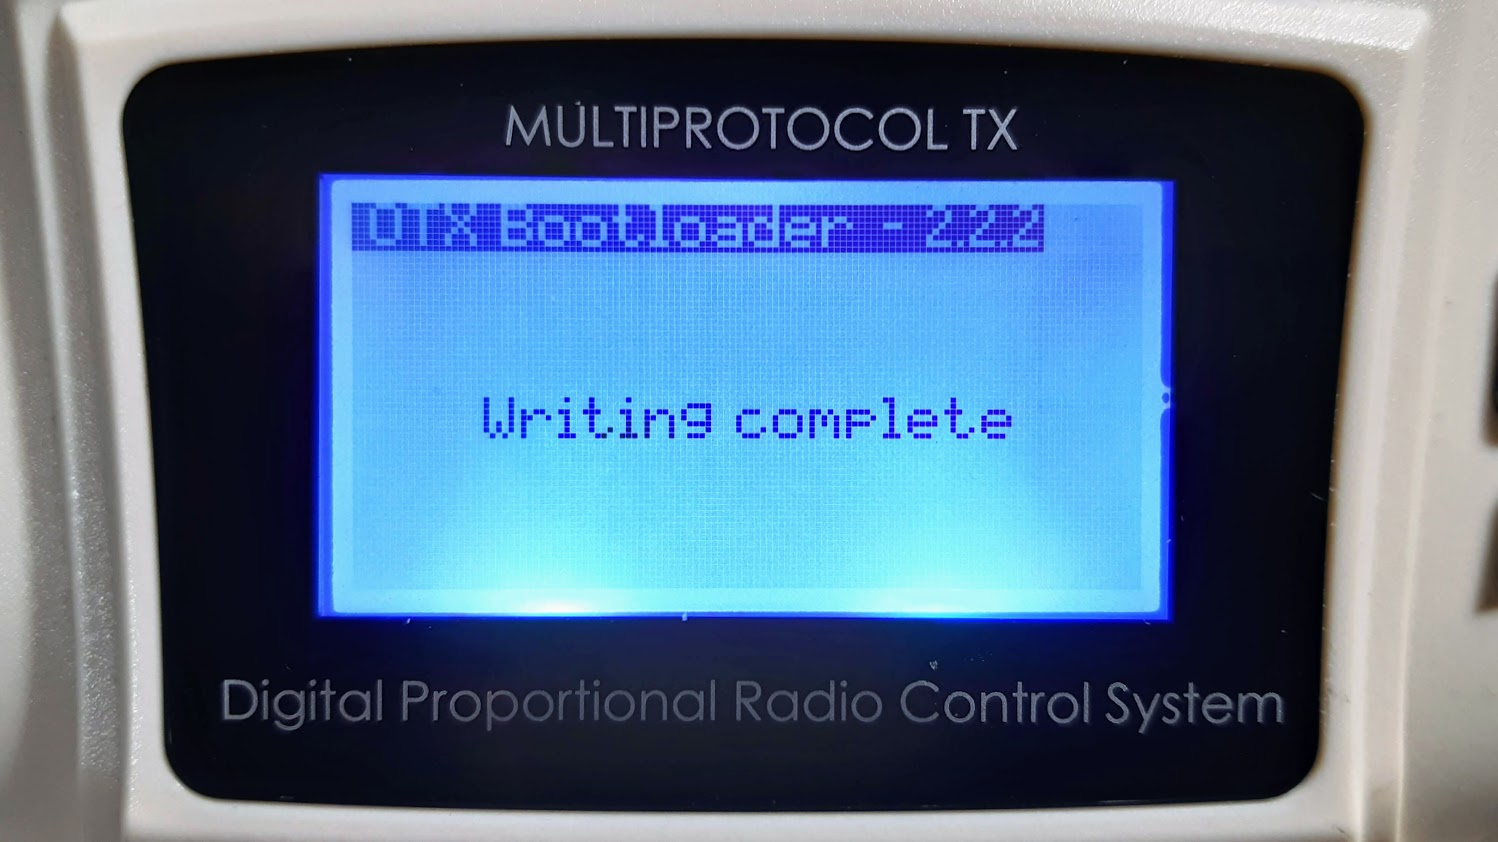
Wait for the flashing to finish.
Updating complete!
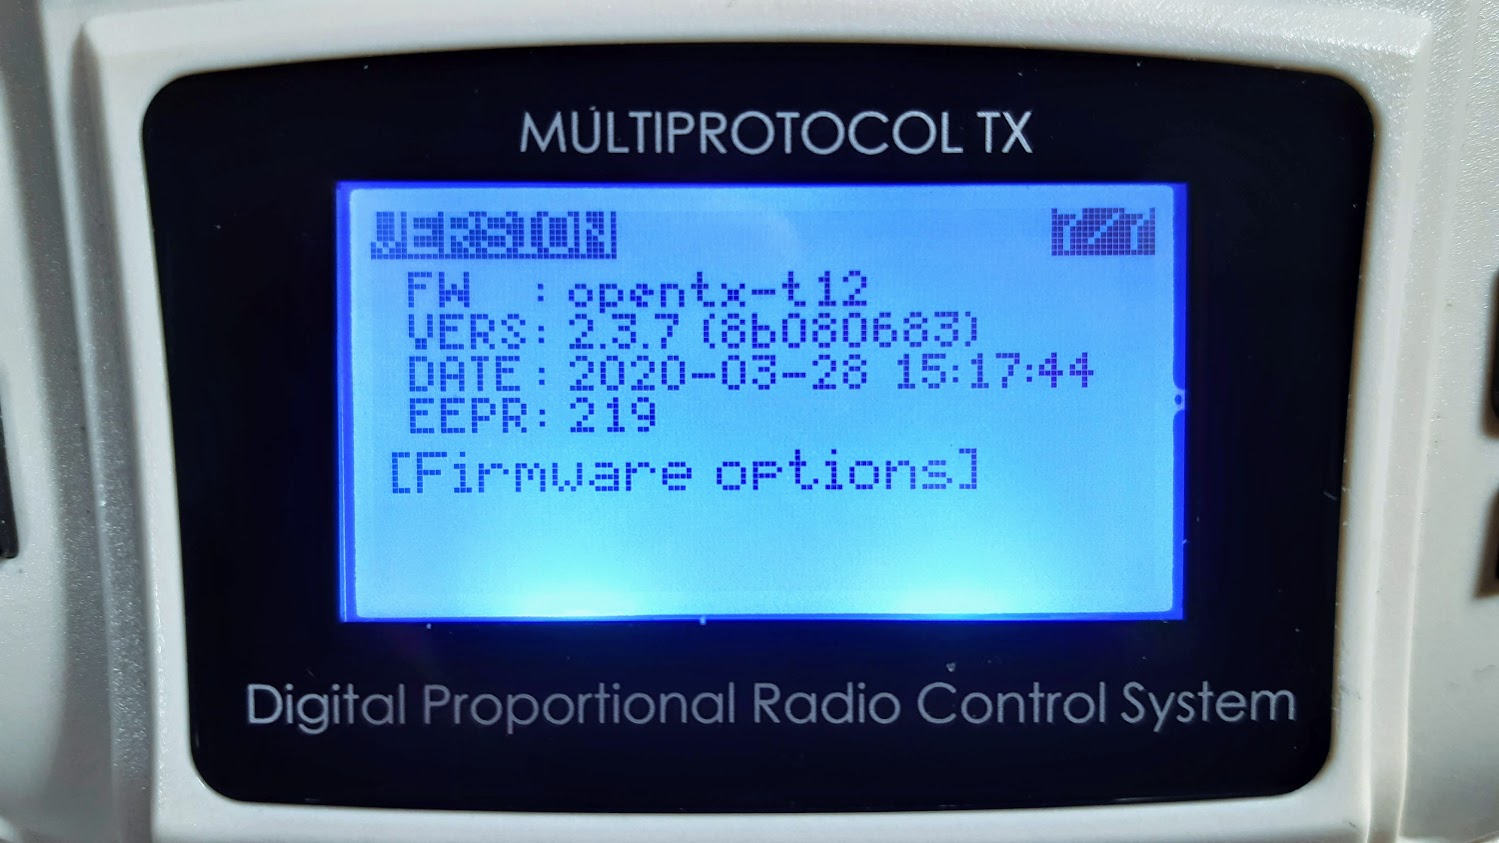
You can check the version of the current firmware in your radio by selecting Version page in the Radio settings menu.
Resources used for writing this article:
https://opentx.gitbooks.io/manual-for-opentx-2-2/content/
https://github.com/opentx/opentx/releases
-
 ESC Firmware Guide
In this concise overview, we’ll explore the evolution of ESC (Electronic Speed Controller) firmware,
ESC Firmware Guide
In this concise overview, we’ll explore the evolution of ESC (Electronic Speed Controller) firmware, -
 List of brushless whoop/toothpick flight controllers
This is the list of brushless tiny whoop/toothpick style flight controllers with brief description
List of brushless whoop/toothpick flight controllers
This is the list of brushless tiny whoop/toothpick style flight controllers with brief description